Have you ever felt unsure about how to get started with piping tips? Using them might seem tricky at first, but with a few simple steps, you’ll be able to create beautiful designs in no time.
From filling your piping bag to cleaning your tips, mastering the basics makes decorating much easier. Keep reading to learn how to make the most of your piping tools and boost your decorating confidence.
How to Fill a Piping Bag Without the Mess
To fill a piping bag without creating a mess, open a cuff at the top of the bag and place it in a tall glass. This stabilizes the bag, keeps it upright, and leaves both hands free. Add frosting gradually with a spatula, pushing each scoop down to avoid overfilling. Stop filling when the bag is about halfway full; overfilling increases the risk of blowouts and waste.
Next, pack the frosting firmly by tapping the bag on the counter to eliminate air pockets. Use your fingers or a spatula to press the frosting down toward the tip, ensuring a consistent and compact fill. This step helps achieve smooth, even piping and prevents uneven bursts during decorating. Once filled, twist the top securely to seal the bag and keep the frosting contained. For better control while piping, hold the twist under your thumb with one hand, so the bag stays sealed and manageable. After use, it is important to note that while glass measuring cups may seem similar, Pyrex measuring cups are generally safe for dishwasher cleaning but hand washing is recommended to preserve markings and prevent thermal shock. Loading the bag gradually in small, controlled steps helps maintain a clean workspace and gives you better grip and precision. Alternatively, for even more efficiency, you can wrap icing in plastic to create a tube that threads through the bag for mess-free filling. For thicker batters, a flat beater attachment can be used to prepare a stiffer icing that holds its shape better in the piping bag. If you need to prepare such a stiff icing in large batches, the KitchenAid mixer can handle the workload efficiently.

Complete Cake Decorating Set: Includes 1 piping bag holder stand for filling, 10 silicone bag ties (5 assorted colors) and 1 small piping tip adapter—covers daily cream/icing filling and cake decorating needs.

Stable & Organized: The piping bag stand provides a stable base for securely holding your pastry bags, while the 8 nozzle slots neatly organize your cake decorating supplies, making it easy to access your icing tips while working.
Less Mess & Easy Fill Support: This piping bag stand features a translucent cup that helps keep your pastry bag upright while filling, helping reduce frosting spills and keep your countertop cleaner. A practical easy fill piping bag holder for everyday baking prep
Start With These 4 Basic Piping Techniques
Begin with dots using a small round tip. Keep the piping bag nearly vertical, squeeze gently, and release pressure before lifting to create clean, uniform bumps. Next, practice drawing lines by holding the bag at a 45-degree angle with a round tip, lifting your hand slightly above the surface to prevent dragging. To prevent dragging, ensure your frosting consistency holds its shape when lifted but flows smoothly. Proper surface preparation, like greasing the pan or using a liner, prevents sticking just as parchment paper prep prevents baked goods from clinging to the loaf pan. Regularly cleaning your Silpat mat with mild soap and warm water prevents residue buildup that can affect non-stick performance. For stubborn residue on metal trays, a paste of baking soda and hydrogen peroxide lifts baked-on grime without scratching the surface.
For shell borders, switch to a star-shaped nozzle. Squeeze firmly to form the shell, then relax pressure while pulling toward the edge, overlapping each shell for a smooth border. To master swirls, use a large star tip. Hold it upright, squeeze steadily, and rotate your wrist as you lift. Choosing the correct tip for each technique is key, as it makes controlling your piping much easier.

【PACKING LIST】You will receive a set of 20 stainless steel piping tips in 5 different sizes, which can be used to pipe different sizes of buttercream

10-Piece plain pastry tip set

【Assorted Decorative Set】This set comprises 7 different sizes of icing tips made from stainless steel, allowing for the creation of a wide range of patterns on cakes and cookies. With various size options available, our piping tips set enables both large-scale pattern designs and intricate detailing.
Your Frosting Ruins Every Design? Fix It Here
If your frosting is too soft or too stiff, it won’t pipe correctly regardless of your tips. Achieving the right consistency is key because it influences the shape, edges, and petals of your decoration. Soft frosting won’t hold ridges and will collapse, while stiff frosting can break into rough peaks and be hard to pipe smoothly. Always check your buttercream’s texture before filling your piping bag. Warm butter, extra liquids, or overbeating can quickly ruin the stability needed for good piping. Using the correct measuring spoons ensures you don’t accidentally add too much liquid or sugar, upsetting the delicate balance of your recipe. Just as a loaf pan provides the necessary structure for sourdough to rise properly, a stable frosting consistency provides the structure your piping tips need to create clean designs. To keep your tools in top shape, regularly clean your equipment using gentle soap and water to prevent residue buildup that could affect future batches.
To adjust frosting that’s too soft, chill it for 10 to 30 minutes. Gradually stiffen it by adding small amounts of powdered sugar, mixing thoroughly after each addition. If you need a stiffer batch, let the frosting warm slightly at room temperature first, then add a tiny splash of milk to reach the desired firmness. Do a squeeze test: the frosting should form a firm peak that holds its shape without sagging.
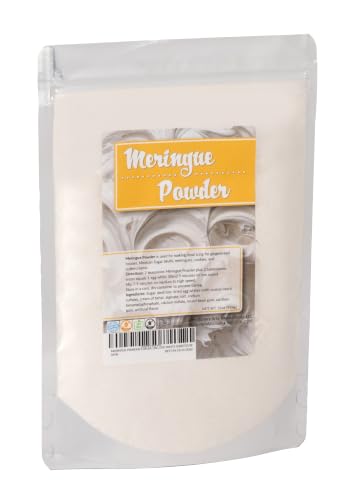
If you love decorating roll-out cookies or piping flowers, chances are you’ve used meringue powder to make your icing. Meringue powder is a must for making royal icing, meringue cookies and stabilizing marshmallow or whipped cream frosting.

Effortless Royal Icing: Experience the simplicity of crafting professional-grade icing with Judee's Royal Icing Mix, a staple in any sugar cookie icing kit. Just add water for a smooth, consistent texture, perfect for sugar cookies and cakes

ROYAL ICING & MORE: Perfect for royal icing, buttercream, and stabilizing frostings for professional-quality decorating.
Master Stars, Rosettes, and Shells in 3 Steps
To master stars, rosettes, and shells, focus on three core steps—tip angle, pressure control, and motion—since each design builds on the same foundation. Start with stars: hold the piping bag perpendicular to the surface, applying even pressure to form a small mound. Stop squeezing before lifting the tip to create a pointed peak. The frosting should be stiff enough to hold its shape and peaks without collapsing. For rosettes, switch to a closed star tip, pipe from the center outward in a tight circle, then release pressure and lift to form a tapered tail. The key is maintaining consistent pressure and motion to keep the shape even. For a comprehensive reference, consult a Wilton piping tips chart to match each tip shape to its specific design. Similar to how an angel food cake pan has a distinctive tube center to support light batter, your piping technique relies on the right tool structure for stable results. For shells, hold the bag at a 45-degree angle, squeeze until the icing forms a mound, then pull away cleanly to create a tail. Always cross over the previous tail when starting a new shell to ensure neat stacking. A closed star tip produces the clearest ridges for rosettes and shells. Tip size is important: larger tips make bigger, more prominent decorations, so choose according to your design needs. Practice each technique with focus on consistent pressure before increasing your speed. Keep the bag tight and twist the top if it begins to feel loose during piping.
Buying Your First Piping Tips: What Matters
Focus on versatility when buying your first piping tips. You don’t need a giant set; starting with a small core of 4 to 6 standard tips is enough. Aim for a large open star, a round tip, and a leaf tip. These shapes cover most basic decorating needs without overwhelming you. A comparison of baking utensils shows that metal tips outperform plastic in durability and leaving clean edges. Skipping plastic is a smart move for longevity. Larger tips make bold swirls, while smaller ones are better for writing or detailed work. Investing in a low-cost individual tip, like a Wilton 1M, often offers more value than a large mixed set. Prioritize classic shapes such as round, star, and leaf to maximize your creative options early on. In particular, a size 3 round tip is neater for handwriting and detailed writing. Buying a few quality tips will help you decorate confidently without overspending. For instance, a nonstick bundt pan requires minimal greasing, unlike standard metal pans that need careful preparation. Choosing a precise food scale ensures your ingredient measurements are accurate for consistent frosting consistency. Properly cooling your decorated baked goods on a cooling rack prevents condensation from ruining your piping work.

1. Versatile Design: Our stainless steel piping tips offers unparalleled versatility for your baking endeavors.Each frosting tips is carefully selected to provide a diverse range of decorating options.The piping tips set includes a round plain tip for classic borders and outlines,an open star tip for beautiful swirls and rosettes,a closed star tip for intricate designs and textures,a drop flower tip for delicate floral embellishments,and a french star tip for unique patterns and accents.With these large piping tips, you'll mees all your needs.

Essential Cake Decorating Tools: Getting ready to decorate but not sure what tools you need? RFAQK offers a complete set that includes everything you need to start decorating Cakes like a PRO! 48 Numbered Easy to Use icing tips, with E-Book in PDF, a booklet and a complete video course showing the outcome of each Icing Nozzle,2 icing couplers, 20 disposable icing bags (12-inch), 1 Reusable pastry bag (12-inch), Flower nail & lifter, Cleaning brush, Storage box that keeps everything organized

Tips come in protective plastic case
How to Clean and Store Piping Tips So They Last
For proper storage organization, keep your piping tips upright in a labeled case or container, with the narrow end pointing up. This helps protect their shape and makes it easy to sort through different sizes and styles. Always return the tips to their designated spot after each use to prevent losing or misplacing them. Store them in a cool, dry place away from humidity, which can cause rust or deterioration. Never toss wet or dirty tips directly into a drawer, as moisture and debris can damage the metal and clog the tips. With quick cleaning after each use and thoughtful storage, your piping tips will stay sharp, rust-free, and ready for your next decorating project. Before storage, ensure tips are fully dry by using a baby bottle dryer to efficiently remove all moisture. For longer-lasting tips, treat them with the same care as baking measuring cups by drying them completely before putting them away. To tackle baked-on residue, soak tips in a warm vinegar solution that effectively lifts stubborn buildup without damaging the metal. If a tip gets jammed or stuck, treat it with the same patience you would use for a stuck mixer bowl by gently loosening debris instead of forcing it.