

If you’re trying to figure out which Wilton piping tip to use for your decorating project, it can feel overwhelming with so many options. The right tip can make your designs smoother, faster, or more detailed, depending on what you want to achieve.
This guide will help you understand the different tip sizes and shapes, so you can pick the perfect tool for any icing or decorating task.
Keep reading to find out how to match tips with your project’s needs.
Wilton Piping Tips: Standard vs. Large Differences
The key difference between standard and large Wilton piping tips is their size, which determines their compatibility with couplers and the types of piping tasks they’re suited for. Standard tips are smaller, typically used for detailed work like writing or tiny flower petals, and they fit standard couplers. Large tips are bigger and handle larger designs such as bakery-style swirls or thick batter piping, and they require large couplers. Mixing sizes without the correct coupler can cause frustration and delays because standard couplers won’t accommodate large tips. For organization, keep standard tips in one caddy and large tips in another to save time searching for the right hardware. Extra-large tips produce plumper and more attractive cupcakes due to their increased size, which enhances visual appeal. For liquid ingredients, it is important to use a liquid measuring cup for accurate measurement. However, for bakeries that also use reusable baking mats, regularly cleaning them with step-by-step methods prevents baked-on residue from affecting future piping projects. Using a wire rack with your baking sheets ensures even cooling and prevents your piped creations from becoming soggy.
Standard tips usually cover round, star, and leaf shapes, ideal for precise, detailed decorating. Large tips are often used for oversized rounds, drop flowers, or bulk piping, where volume and speed are priorities. Choosing the right size depends on the volume you need to pipe and the detail level of your design.

Wilton-Large coupler

Ideal for decorating cakes, cookies and more

Which Wilton Piping Tip Should You Start With?
Starting with the Wilton 1M open star tip is your best choice. Its design makes piping easy by creating polished swirls, rosettes, and shell borders with buttercream on your very first try. Pair it with the Wilton 12 round tip next to practice dots, outlines, and simple fills. The 12 round tip doesn’t need a coupler; you can place it directly in your piping bag for a straightforward setup. Open-star tips like the 1M are ideal for beginners because they require less control over angles, making early success more likely. Practice low-risk designs—such as swirls on cupcake tops—and experiment with different color combinations and frosting textures to understand how each affects your piping results. Focusing on basic motions initially helps build confidence and avoids frustration. This tip is compatible with larger couplers or can be used directly in the bag for easy control. For bakers who enjoy making individual treats, using these piping skills to fill a mini loaf pan with batter or frosting can yield perfectly portioned results. A piping tips chart can help you compare tip outputs before committing to a design. The best hand mixer attachments, such as balloon whisks, also make whipping buttercream to the right consistency much easier for smooth piping.

【Packing List】 You will receive 3 pieces of 1M star tip cake decorating tips, the thickness is 0.4 mm and the specific length, width and height dimensions are 8 x 6 x 2.5 cm. This size is the first choice for cake lovers and beginners.
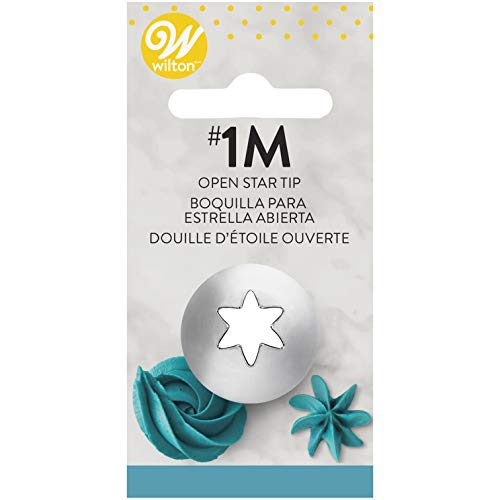
Ideal for perfect swirls, roses and drop flowers

Icing Bags and Tips Set: This set includes 3 large 1M stainless steel piping tips and 20 disposable 36*18cm icing bags, perfect for creating intricate designs on cakes, cupcakes, and pastries.
Round Piping Tips: From Fine Writing to Thick Fills
Round tips vary in size from #1 for delicate details to #1A for rapid frosting dams. The size of the tip determines the line width and the volume you can pipe at once. Smaller tips like #1 or #2 give you tight control for fine writing, outlining, or intricate borders. Medium-sized tips such as #5 or #8 are versatile, suitable for creating beads, dots, or lines with consistent thickness. Large tips like #10, #12, or #1A are ideal for quick coverage, thick fills, or piping large decorative elements. For bakers working with layered cakes, an 8 inch pan is a standard size that often requires these larger tips for efficient frosting application. Choosing a square cake pan that matches the volume of your recipe ensures your frosting quantities align with the baking surface. Using a high-quality stand mixer ensures consistent buttercream texture for these larger piping jobs.
Material choice matters because standard round tips fit a standard coupler, allowing easy switching between different sizes. Larger tips, especially #1A, require a large coupler to accommodate their size and volume. Selecting the right tip depends on the line width you want and how much volume you need to pipe at a time. These tips produce clean, precise shapes free of textures—perfect for smooth lines and professional-looking decorations.

【Assorted Decorative Set】This set comprises 7 different sizes of icing tips made from stainless steel, allowing for the creation of a wide range of patterns on cakes and cookies. With various size options available, our piping tips set enables both large-scale pattern designs and intricate detailing.

Large Tip Set 4pc-Round And Star

【PACKING LIST】You will receive a set of 20 stainless steel piping tips in 5 different sizes, which can be used to pipe different sizes of buttercream
Star Piping Tips for Shells, Rosettes, and Borders
A star piping tip is ideal for creating shells, rosettes, and borders because its finely cut teeth produce the ridges that define these designs. For shell borders, use medium-consistency icing with tip 21 and hold the piping bag at a 45-degree angle. Squeeze firmly to fan out the icing, then relax pressure and pull forward to form a tail. Overlap each new shell to hide the previous tail for a seamless look. For rosettes, pipe from outside in or center out using tips like 1M for large swirls or 16 for smaller, more delicate ones. Because star tips create textured ridges, they make decorating with color or multiple shades simple, allowing you to match borders to your theme effortlessly. Keep in mind that icing consistency and tip size directly influence your border’s appearance: smaller tips produce delicate stars, while larger tips generate bold, sweeping swags. For specific designs like DIY Bundt Pan methods, understanding piping tip selection ensures consistent results when adapting homemade pans. The Ateco 1M tip is a popular choice for large rosettes and swirls, offering a classic star shape with deep ridges.

Tips come in protective plastic case
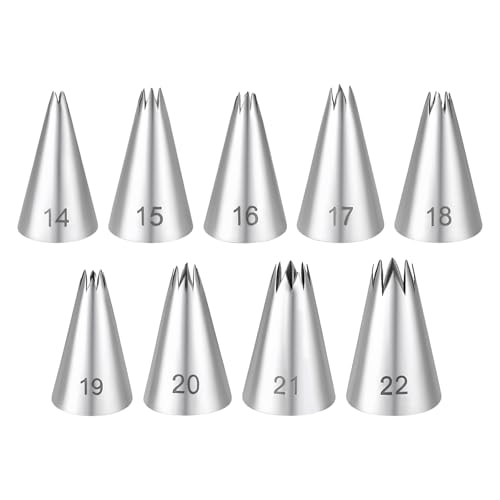
【Durable Material】Crafted from food-grade stainless steel, these pastry decorating tips resist corrosion and maintain hygiene. The dishwasher-safe design simplifies cleaning, while the rust-proof material ensures long-term use for professional bakers and beginners alike.

Riccle Piping Bags and Tips Set, 11.8 Inch 100 Anti Burst Piping Bags, 124 Pcs Cake Decorating Kit with 16 Piping Tips, 1 Reusable Pastry Bags, 3 Cake Scrapers
Petal and Leaf Piping Tips for Realistic Flowers and Foliage
Petal and leaf tips are essential for creating realistic floral details, and mastering Wilton’s two main families makes all the difference. Use tips #59 through #150 for petals and #65 through #352 for leaves. For roses and lilies, tips like #104 are ideal because their wide base and thin edge allow you to overlap petals evenly around a center nail. Angle the tip outward to curve the icing naturally, then taper it off cleanly to mimic real petal edges. This set, including the #104 petal tip, is manufactured in China and designed for use with standard bags and couplers. Choosing the right pound cake pan ensures even baking for cakes that will hold these piped decorations.
For foliage, leaf tips like #352 feature a V-shaped opening that produces veined, pointed leaves. Hold the tips vertically and gently pull away—applying steady pressure to achieve pointed, veined effects. To add more realism, blend colors by painting stripes inside a piping bag before piping for gradient petals and leaves.
Icing consistency is crucial: thin icing works best with leaf tips numbered #66 to #74, giving a delicate, veined appearance. Medium-stiff icing holds petal shapes well, helping to keep the form without drooping. Always practice on parchment paper first to get the feel for the pressure needed. Adjust your pressure as you pipe to sharpen edges or create delicate points before applying the tips to your cake.

Ideal for decorating cakes, cookies and more

The petal decorating tip no.352 Is a must-have for making realistic flower petals

Three-tip set includes #352 leaf tip, #104 petal tip, and #224 drop flower tip
Drop Flower, Basket Weave, and Ruffle: Quick Decoration Effects
In basket weaving, tip 47 is typically used with medium-consistency icing. You start by piping a vertical strip, then layer short horizontal lines over it, creating a woven pattern. To enhance the effect, switch colors between stripes to mimic the look of real basket weave. Maintaining proper cleaning habits ensures your piping tips and work surface stay in good order for consistent results. Similarly, if your equipment feels stuck, addressing a stuck mixing bowl right away prevents icing from drying and seizing components. Using baking soda paste effectively lifts baked-on residue from piping tips without damaging the metal.
Ruffle tips involve lifting the narrow end of the tip up and down while keeping the wide end on the surface. Speeding up the wrist movement tightens the ruffle, making it more compact, whereas slowing down loosens the ruffle for a softer, more flowing appearance. Each of these techniques delivers volume and texture quickly without requiring complex tools or detailed work.
Multi-Opening and Left-Handed Tips for Specialty Needs
Left-handed decorators should set up by piping borders from right to left. This approach keeps your hand from blocking your line of sight as you work. When creating multi-opening textures like those with tips 233 and 234, hold your piping bag at a 90-degree angle with the tip about 1/8 inch above the surface. Apply steady pressure, then stop before lifting the tip to produce thin strands that resemble grass, hair, or fur. The Wilton No.233 decorating tip, made of nickel-plated brass and weighing approximately 5.67 grams, is designed for these multi-opening textures. For a natural, more realistic look, pull the strands slightly right or left from the original line. Tip 134 allows you to pipe six dots at once, which speeds up repetitive pattern work. To master left-handed piping, always work from right to left when piping borders and lines. This keeps your hand out of your visual field, making your work clearer. Reversing photo references can help match your working direction, while adjusting the bag angle and tip orientation provides full control over textures and precision. A similar commitment to clear recommendations can help you achieve consistent, professional results in all your decorating projects. When choosing such tools, consider the material and weight of the tip to ensure comfort and durability during extended use. For more versatility, consider pairing your piping tips with a compatible mixer attachment to simplify the process of preparing multiple batches of frosting.
How to Read a Wilton Tip Chart for Any Project
A Wilton tip chart groups decorating tips by shape families such as round, star, petal, leaf, and more. This organization helps you quickly match a project’s style to the right tip number. Start by identifying your desired decoration type: choose round tips for lines, star tips for swirls, and so on. Then, look at the family images and size groupings on the chart to find the appropriate option. The comprehensive set, which includes 55 stainless steel tips, is organized in a sturdy, portable case that keeps each tip visible and accessible for easy reference. Standard tips are numbered #1 through #12 and work well for fine details or small decorations. Larger tips like #1A or #2D produce wider textures suitable for bold borders or large designs. Always verify whether your tips are compatible with your piping coupler—standard versus large couplers—to ensure a secure fit. Use the visual references on the chart to preview the shape and output, which can be helpful when planning flavor combinations like buttercream or fondant textures, or when blending colors. The durability of your results also depends on using a properly sized baking tray that distributes heat evenly for consistent foundation layers. Treat the tip chart as a quick reference guide: start by selecting the family based on your decoration style, narrow down by the tip number, and then confirm your choice by inspecting the shape images. This method streamlines your selection process and helps you choose the right decorating tip without guesswork.
Picking the Right Tip for Your Project: A Practical Guide
Once you know how to read a Wilton tip chart, choosing the right tip for your project becomes straightforward. Match the tip to your goal. Use small round tips for writing, monograms, and creating sharp, precise strokes. Large star tips like 1M or closed stars work best for cupcakes, producing ruffled swirls and decorative tops. For borders and shells, medium star or round tips give you consistent control and a smooth finish.
Floral cakes call for petal tips, drop flower tips, and leaf tips to build layered roses and fill gaps. The size of your piping tip influences your technique: smaller tips offer precision for detailed work, while larger tips speed up coverage. When filling pastries or piping batter, opt for bigger round tips to achieve a smooth, even flow. Don’t overthink it—base your choice on the texture and scale you want. Always test your selected tip on parchment paper before proceeding to your actual project to avoid surprises.