

Getting stubborn burnt spots off your baking tray can feel like a chore, but with a few simple steps, you can restore it to nearly new.
Whether the stains are light or tough, there’s an easy method to tackle it without damaging the surface.
Keep reading to learn how to clean your tray quickly and effectively.
Why Your Baking Tray Looks So Burnt (And Why That Matters)
Burnt buildup on your baking tray forms gradually over time, not overnight. It happens when fats, sugars, and proteins from food start to carbonize under high heat. Baking temperatures between 180 and 250°C speed up this process, turning spills into stubborn black layers. You might think these dark stains are rust, but they’re usually polymerized oils or charred food residues. For comparison, Silpat mats resist this kind of buildup because their non-stick silicone surface doesn’t allow food to bond during high-heat baking. Many kitchen tasks, like mixing batters for baked goods, benefit from using top-rated attachments that ensure even ingredient distribution. Investing in a durable roasting pan with rack can also minimize burnt buildup by promoting even heat distribution and drainage.
Cleaning myths can be misleading. Soaking the tray alone usually won’t remove this baked-on gunk because it bonds tightly to the surface. When buildup accumulates, it traps old grease, causing lingering oven fumes and unpleasant odors every time you open the door. Over time, this buildup disrupts even heat contact, making food stick more and transferring off-flavors to your next batch. Acting early by cleaning regularly is crucial because each bake reinforces the stain, making it harder to remove later. Quick cleanup helps preserve your tray’s finish and keeps your oven smelling fresh, preventing stubborn residue from building up over time.
The 3 Supplies You Need to Clean a Baking Tray
To clean a burnt baking tray effectively, you only need three supplies: dish soap, baking soda, and white vinegar. Dish soap serves as your primary cleaning agent, breaking down grease and loosening stubborn residue. Baking soda acts as an abrasive booster, helping lift stuck-on grime without scratching delicate surfaces. White vinegar, when combined with baking soda, creates a fizzing reaction that breaks down tough buildup and stains. To complete the cleaning process, use a non-abrasive scrub brush to protect coated surfaces, complemented by a sponge or scourer to wipe away softened grime. For stubborn spots, soaking the tray first makes scrubbing easier. Make sure you have hot water and a sink large enough to fully submerge the tray for best results. Alternatively, if your baking tray is heavily coated, avoid using harsh metal pans like a Bundt pan for this cleaning method, as the shape can trap residue and make scrubbing difficult.


LONG-LASTING - Say goodbye to your old dish scrubber and hello to Skoy Scrub. Made from remnant cotton fibers and a non-toxic hardener, this scrub is designed to outlast old green scouring pads or scrub sponges, saving you money and reducing waste.

Multifunctional Brush: High-quality soft household cleaning brush bristles, easy to clean dirty parts of clothes, Remove dirt comfortable and do not hurt surface of shoes and clothes; Easily scrub away stains and dirt from most surfaces
How to Quickly Wipe Off Loose Grease and Crumbs
To quickly wipe off loose grease and crumbs, start by letting the tray cool completely. This helps prevent burns and stops heat from spreading grease, making the cleaning safer and more effective. Tap the tray over a trash bin to dislodge dry crumbs, paying special attention to corners and edges where crumbs tend to gather. Use a paper towel to gather these solids; doing a dry pass first speeds up the entire cleaning process. Next, grab a fresh towel or a soft sponge to lift loose grease from the surface. Work from the edges inward, folding the towel to reach tight spots. If grease remains stubborn, a second quick pass ensures it gets removed. You should always check the tray is dry before reinsertion into the oven to prevent damage. Finish by wiping the tray with a dry cloth to eliminate any remaining moisture, which helps prevent water spots and keeps the tray ready for its next use. Understanding the stainless steel construction of many trays helps explain why this gentle cleaning method preserves their surface. For tougher baked-on residue, consider using a paddle attachment on a stand mixer to mix a paste of baking soda and water, which you can apply with a soft cloth for gentle abrasion.

Sponge Cloth 20 cm x 18 cm x 5 mm ( 7.9 in x 7.1 in x 0.2 in)

【Prominent Design】 Our kitchen sink organizer tray thickened the edges by 40% and the bottom by 30%, making the tray more thick and durable.Our silicone sponge holder has 21 rounded raised designs for easy cleaning and quick drying of soap or sponge.Raised edges prevent water or other spills, keeping the counter dry and tidy.The non-slip bottom design keeps the silicone tray stable on the sink or countertop and won't slide around.

NO MORE MUSHY SOAP — Your soap stays firm and lasts up to 2x longer than in a flat dish — no more scraping off that gooey bottom layer every morning. The angled drain spout channels water directly into your sink while raised ridges lift your bar soap above the surface for complete air circulation. Over 9,000 reviewers agree: this thing actually works.
The Right Ratio of Baking Soda to Vinegar for Best Results
A paste mixture of about 3 parts baking soda to 1 part water is most effective for baked-on tray grime. This thick, spreadable paste adheres well to the surface, allowing it to work directly on stubborn residue. To activate the cleaning power, spray vinegar over the paste. The fizzing reaction helps lift grease and baked-on debris without making the mixture runny. Using standard baking soda ensures consistent scrubbing strength, while precise ratios like 1:1 or 1:2 are unnecessary and can waste vinegar or weaken the paste. Simply sprinkle a light layer of the paste onto the tray, spray with vinegar, then let the reaction do the heavy lifting. After a few minutes, you can rinse away the loosened grime for a clean surface. Baking soda acts as a mild alkali on the pH scale, which helps break down acidic grease and baked-on food residues. For a similar approach, soaking the bowl in hot water first can soften stubborn residue before scrubbing. Understanding the tare function on a scale can help you accurately measure the baking soda and water for consistent cleaning results.

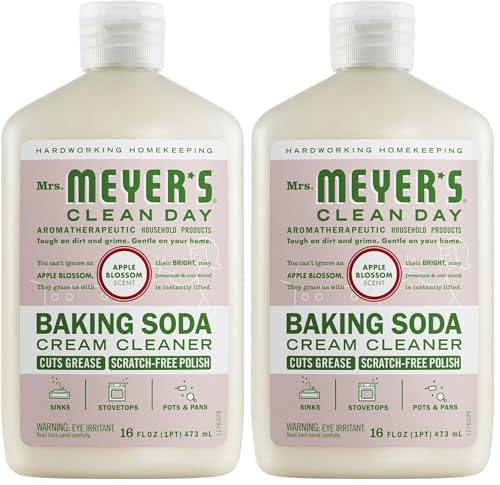
Mrs. Meyer's Baking Soda Cream Cleaner removes soap scum and grease build-up to make your kitchen sparkle

POWERFUL MULTI PURPOSE CLEANER: Tackle grease, grime, stains, and buildup with The Pink Stuff Cleaning Paste. Designed for high performance cleaning across kitchens, bathrooms, and household surfaces
How Long to Let the Paste Sit on a Burnt Baking Tray?
The length of time you should let the paste sit depends on how burnt your tray is. Light burns typically require 15 to 30 minutes, which is enough time for the paste to loosen superficial residue. For more typical burns, 30 to 60 minutes usually suffices to soften the buildup and allow easier removal. Heavy burns may need several hours of sitting time—this longer duration helps the chemical reaction penetrate deeper layers of char and grease. In extreme cases, leaving the paste overnight is recommended for the most stubborn buildup.
The paste works by targeting surface oxidation and breaking down carbonized grease. Thinner layers dissolve quickly, so they need less sitting time. Heavier burns call for extended periods because the paste needs to act more thoroughly to loosen the hardened carbon. Rushing the process by scraping too soon can push residues back into the tray or make cleaning more difficult. A thicker paste stays active longer and is especially effective for severe burns if left overnight. Choosing the right material for your baking tray, such as heavy-duty steel or aluminum with a nonstick coating, can prevent future heavy burns from forming in the first place. For those who prefer to grind their own ingredients for homemade cleaning pastes, a grain mill attachment for a stand mixer can efficiently process materials like rice or oats into a fine powder.
Check the tray after the minimum recommended time. If residue still remains, give the paste more time to work—patience is key to tackling tough buildup. Choosing a food scale for accurate measurement of paste ingredients ensures the paste’s chemical reaction is consistent and effective. Allowing the paste to sit long enough ensures the chemical reaction fully breaks down burnt-on residue, making cleaning smoother and more effective.
Which Scrubbing Tool Won’t Scratch Your Tray’s Finish?
A non-scratch sponge pad or a soft nylon scrubber won’t damage your tray’s finish. These gentle tools lift grime effectively without harming nonstick or ceramic coatings. A microfiber cloth is also a good choice for light buildup, reducing the need for heavy scrubbing and helping your tray last longer. Eco-friendly nylon brushes handle stubborn spots with less risk of scratching than metal pads. Avoid steel wool or coarse abrasives altogether, as they can ruin the surface. Match your cleaning tool to the tray’s material: soft sponges work well on nonstick trays, while nylon brushes can tackle tougher surfaces. Always start with the gentlest option to keep your tray looking its best. For a durable alternative, consider stainless steel bowls which resist scratching and maintain their finish.

THREE SCOURING PADS: This pack of Scotch-Brite Zero Scratch Scour Pads includes three scrub pads for dishes

SIX SCRUBBING SPONGES: This pack of Scotch-Brite Odor Resist Non-Scratch Scrub Sponges includes 1 pack of six sponges.

NINE SCRUBBING SPONGES: This pack of Scotch-Brite Zero Scratch Scrub Sponges includes 9 sponges
The Best Way to Rinse Away Residue and Avoid Smells
A thorough final rinse after using pastes or degreasers is essential to remove any leftover cleaner that could leave a taste or odor. If stubborn smells persist, create a paste with baking soda or soak the tray in vinegar to neutralize odors. Be sure to wash these residues away with soap and water afterward. Completely drying the tray is crucial; use a microfiber cloth or leave it to air-dry in sunlight. Pay special attention to corners and edges, where grease and residue tend to hide. For a tube pan, using a reliable release method can prevent cake from sticking fast and reduce the need for aggressive scrubbing later. Prompt drying helps prevent rust and prevents stale odors from coming back. For best results, consider using silicone baking mats as a reusable liner to reduce the need for heavy cleaning and odors in the first place.
Which Cleaning Method Works Best for Your Tray Type?
The best cleaning method depends on your tray’s material. Aluminum trays respond well to warm water and mild soap for regular cleaning. Just be careful to avoid sudden temperature changes, which can cause warping. Nonstick trays require gentle hand-washing with a nylon sponge to protect the coating; avoid dishwashers because the harsh environment can damage the surface. Stainless steel trays handle baking soda paste well for stubborn stains, but cleaning frequently helps prevent buildup. Silicone trays are best cleaned with hot water and grease-cutting soap shortly after use; abrasive tools can scratch and damage the surface. For ceramic-coated trays, stick to mild dish soap and soft cloths because harsh cleaners can dull the finish. Matching your cleaning method to the tray’s material and cleaning frequency ensures your trays stay in good shape and last longer.
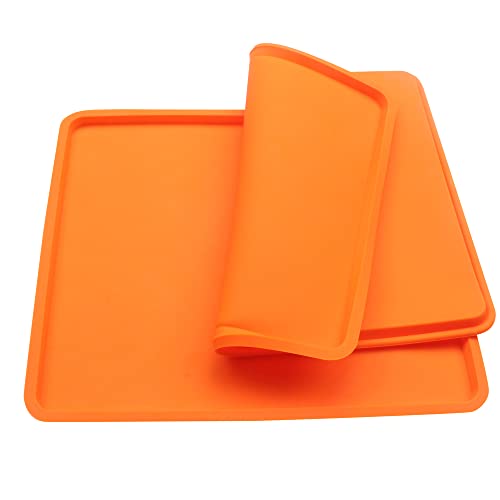
Mould size: 10 5/8 x 11 13/16 x 3/8inch (27*30*1cm)

Sturdy Design: The metal reinforced frame on our 8 inch silicone square cake pans ensures a secure grip when moving between counter and oven. These durable cake pans retain their shape perfectly during baking and offer convenient, space-saving nesting storage.

HEALTHIER COOKING DESIGN: Innovative perforated insert allows fat to drain away during baking; Elevated design keeps food above grease for healthier results; Perfect for 2 lb meatloaf recipes