

Getting your pizza dough perfectly rolled out without a rolling pin might seem tricky, but it’s totally doable. You can stretch and shape your dough by hand to achieve a light, bubbly crust, even if you don’t have the usual tools.
With a few simple techniques, you’ll be able to prepare your dough smoothly and efficiently. The following steps will guide you through the process.
Never Use a Rolling Pin on Pizza Dough
Never use a rolling pin on pizza dough. It compresses the fermentation gas, tightens the gluten network, and pushes out the bubbles that help achieve oven spring. This results in a denser, cracker-like crust instead of a light, airy one. Instead, use your hands to shape the dough gently. Press from the center outward, allowing gravity and your fingertips to do the work. This preserves the gas pockets, ensuring a bubbly, blistered crust. For those who prefer a more structured bake, using a quality loaf pan can also help maintain the dough’s shape during proofing. Make sure the dough is at room temperature and not too cold or rigid before shaping. Let it rest for about 30 minutes to relax the gluten. A relaxed, bubbly dough stretches more easily without compression, giving you that chewy, puffy texture you want. For a neat result, you can apply a similar gentle pressure technique used in pour-over coffee to evenly stretch the dough without collapsing its internal structure. For consistent results, a stainless steel roasting pan with a rack provides even heat distribution and sturdy support during baking.
Prep Your Pizza Dough for Easy Stretching
To prepare your pizza dough for easy stretching, start by warming it to the right temperature. Cold dough tends to snap back and resist your hands, making stretching difficult. Remove refrigerated dough 30 to 60 minutes before you plan to work with it; if you’ve done a cold fermentation, give it 2 to 4 hours to come to room temperature. Maintaining the proper dough temperature ensures even stretching with less tearing. Focus next on gluten relaxation. Rest the dough after shaping it into balls; a bench rest of 15 to 30 minutes allows the gluten to relax, increasing extensibility. This makes the dough easier to stretch without resistance or shrink-back. If you notice the dough tightening up during handling, give it a brief rest to loosen it again. Longer resting periods can significantly ease handling and help achieve a smooth, even crust. While warming the dough, keep it covered to prevent drying out. It’s also crucial to use fully proofed dough. Underproofed dough resists stretching and may spring back or tear. Prepare your toppings beforehand so you can stretch and bake your pizza immediately, avoiding repeated handling that can cause the dough to lose its elasticity. For consistent results, consider using a stainless steel bowl mixer to ensure the dough is evenly mixed and properly developed before shaping. Choosing the correct pan size helps guarantee even heat distribution and consistent crust thickness when you bake your stretched dough. A high-quality stand mixer bowl can also improve dough consistency and cleanup.
Press Pizza Dough Into a Disc Without Crushing Air
Pressing the dough into a disc without crushing the air inside involves gentle, systematic pressure to redistribute gas toward the edges without deflating the bubbles. Start from the center using your flattened fingertips and press outward, moving the trapped gas toward the rim. Keep the outer 1 to 2 centimeters thicker, which will form the future crust, while the center remains thinner but not so thin that it risks tearing. Use light pressure to avoid collapsing the internal bubbles, ensuring the dough retains its extensibility for shaping later. This technique is similar to using a dough press that ensures even pressure distribution for lightness and air retention. For achieving this even pressure at home, a KitchenAid mixer with a dedicated roller attachment can help automate this delicate process. For best results, always clean your work surface thoroughly before starting, just as with baking sheet care to prevent any residue from affecting the dough. Using a food scale ensures each dough disc weighs the same, improving consistency during shaping and baking.
Rotate the dough a quarter-turn after each pressing to promote even thickness and prevent lopsidedness. Lightly dust your work surface to prevent sticking and tearing, but avoid using excess flour which can make handling more difficult. Stop pressing before the rim is flattened; aim to leave it puffier to enhance oven spring. Your goal is a well-formulated disc that is evenly thick, slightly thicker at the edges, and capable of expanding nicely during baking.

Professional-Grade Stainless Steel: Food-safe stainless steel construction ensures durability and corrosion resistance, maintaining hygienic standards for both home kitchens and commercial use

Stainless Steel biscuits maker Schablone/Bar - has 4 patterns. For making elongated biscuits also known as "Moroccan Biscuits" or Churros.

EXCEPTIONAL METAL CONSTRUCTION: Our pasta press is built from high-grade alloy metal material, providing you with a longer-lasting, more durable, and more reliable pasta press than other similar plastic alternatives that may crack with time.
Stretch Pizza Dough With Hands, Fists, and Gravity
Once you’ve pressed the dough into a disc, you’ll start stretching it with your hands, fists, and gravity. This method relies on the dough’s own weight to help create an even, wide circle. Begin by draping the dough over your knuckles or the backs of your fists, keeping your fingertips away from the center to avoid poking holes. Use slow, steady rotation; as you turn the dough, gravity evenly pulls it outward, making it easier to stretch without creating thin spots. Proper hand positioning is crucial: your fists serve as a firm platform, allowing the dough to hang and stretch downward at chest level.
If you encounter resistance, don’t force it—giving the dough a brief rest allows it to regain elasticity. Gently move your fists apart, gradually increasing the tension to help the dough expand. Support the edges with your hands while the center elongates indirectly, maintaining control and preventing tears. Keep a light dusting of flour on the surface to prevent sticking and to facilitate smooth handling. Aim for a uniform circle, focusing on even stretching rather than trying to reach the desired size all at once. For consistent results, a high-quality baking pan ensures even heat distribution after the dough is shaped.

Authentic Italian Texture: Incredibly fine milling creates the perfect 00 flour for achieving quintessential leopard spots on your Neapolitan-style pizza crust, replicating authentic Italian pizzeria results in your home oven

【Sprinkle Evenly, Not Waste】Mcyye flour duster for bread baking works perfectly for dusting flour, powdered sugar, or cocoa powder on cookies, brownies, and other baked goods, giving a nice, even dusting without clumps.

Effortless Precision: Our flour sifter enables a hand processing, ensuring a hassle-free and precise dusting experience for both novice and professional bakers
Three Hand-Stretching Techniques That Replace a Pin
You can replace a rolling pin with these three effective hand-stretching techniques for shaping pizza dough. First, employ the fingertip press-and-rotate method: press outward from the center with your fingertips, leaving a thicker edge for the crust. This technique maintains the dough’s elasticity while defining the crust early. Next, try the flat-hand opposite pull: place your hands flat on the dough and pull them apart slowly while rotating the dough. This movement smooths out lumps and helps develop gluten without collapsing the edges. Lastly, use the knuckle-drape stretch: drape the dough over your knuckles, allowing gravity to stretch it naturally. Rotate the dough continuously to form a round shape until reaching 10 to 12 inches in diameter. Always let the dough rest at room temperature for at least 30 minutes before stretching. Resting relaxes the gluten, making the dough easier to stretch without snapping back or tearing during these hand techniques. Use the whole length of your fingers to press and squash the dough rather than just the fingertips for better control and shape retention. For the most consistent results, you should always level off dry ingredients when using a measuring cup, as the knowledge emphasizes. To prevent sticking during hand stretching, generously dust the work surface and dough with a fine layer of flour or cornmeal, mimicking the non-stick principles of proper loaf pan prep. A digital kitchen scale ensures precise flour measurements, which is crucial for consistent dough hydration and easier hand stretching.

Perfect Crust: Achieve crispy, airy Neapolitan-style pizza crusts with King Arthur gluten free flour blend. Specially formulated for authentic texture and flavor, ideal for celiac or gluten-sensitive individuals seeking the perfect GF pizza.

Premium Silicone Bakig Mat: Our kitchen baking mat is crafted with 100% food grade silicone. With 0.7mm thickness reinforced design (2x thicker than standard 0.3mm mats) can withstand daily kneading sourdough, rolling pizza dough, and shaping sticky fondant without warping or degradation

Premium Silicone Bakig Mat: Our kitchen baking mat is crafted with 100% food grade silicone. With 0.7mm thickness reinforced design (2x thicker than standard 0.3mm mats) can withstand daily kneading sourdough, rolling pizza dough, and shaping sticky fondant without warping or degradation
Common Pizza Dough Stretching Mistakes to Avoid
Avoid stretching cold dough straight from the fridge. It will snap and resist, making shaping difficult. Allow the dough to rest at least 30 minutes before stretching to let the gluten relax. When stretching, pull gently and gradually, rather than rushing or applying aggressive force, which can tear the gluten network. Use minimal flour when working with the dough, as heavy dusting creates dry patches that weaken its flexibility. For example, excess flour causes a pasty appearance after applying sauce, harming the final look. Focus your pressure outward rather than in the center; pressing too hard in the middle can thin out the crust excessively and create a fragile, paper-thin center. Work evenly from the center outward for a balanced crust. Proper resting and gentle handling are essential to prevent the dough from shrinking back or tearing. Remember, an even base facilitates better topping placement and helps achieve a consistent crust thickness, so handle the dough with patience and care throughout the process. If you need a flat surface for shaping, a baking sheet placed on the stove can offer a stable alternative, though never use direct burner heat on the sheet. Using a food scale to portion your dough balls ensures uniform size for even stretching and consistent crust thickness. For even baking, a half sheet pan provides the ideal surface to hold your stretched pizza dough steady.
How to Fix Stubborn or Tearing Pizza Dough?
If your pizza dough keeps snapping back or tearing, the solution often starts with temperature control and resting time. Cold dough from the fridge causes the gluten to tighten, making it harder to stretch. Resting the dough covered at room temperature for 15 to 30 minutes allows the gluten to relax, making it easier to work with. If the dough still resists, simply repeat the resting process rather than forcing the stretch, which can cause tearing. For achieving a smooth, even consistency, a hand mixer with dough hooks can also help develop the gluten more gently than overworking by hand. Understanding the piping tips chart is useful for selecting pastry bag nozzles that produce specific shapes, but for pizza dough the focus remains on texture and elasticity. Investing in a high-performance stand mixer can provide the consistent kneading power needed for optimal dough development.
For tears, the root cause is usually insufficient gluten development. To strengthen the dough, perform a few folds or a brief kneading session, then let it rest again. Accurate ingredient ratios are crucial, as excess flour on the surface can dry out the dough and limit its elasticity. Before stretching, brush off any excess flour. For small tears, gently pinch them shut. Larger tears require a patch of spare dough pressed over the hole. When all else fails, gather the dough back into a ball, let it rest, and then try stretching again.

Designed for Everyday Home Baking: This K45DH dough hook replacement is designed for KitchenAid 4.5-5QT tilt-head stand mixers. Compatible with K45, K45SS, KSM75, KSM90, KSM100, KSM110, KSM150, and KSM180 models. Replaces part numbers WPW10674618, W10674618, 3183589, and 4162152. A dependable replacement for KitchenAid stand mixer accessories and attachments. Not compatible with bowl-lift or commercial stand mixers.

🍐【Compatible】K45, K45SS, KN15E1X, KSM75, KSM85PS, KSM88PSQ, KSM90, KSM95, KSM96, KSM97, KSM100, KSM103, KSM105, KSM110, KSM120, KSM150, KSM150A, KSM151PS, KSM152, KSM153, KSM154, KSM155, KSM156HB, KSM158, KSM160A, KSM175,KSM180, KSM180LEBK, KSM180RPMB
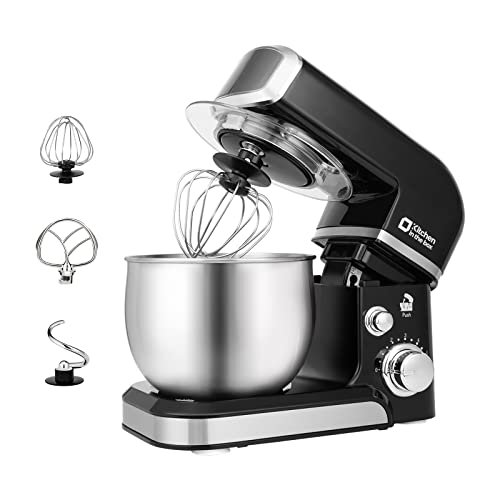
Compact Designed And More Color Options - The stand mixer is less than 7lbs with dimension 12.9*7*10.2 In, small and easy to storage,which could help space-saving. Perfectly suitable for small kitchen,apartment,or limited storage space. And multiple colors to choose,meet a variety of aesthetic needs for your kitchen.
Final Shape Checks for a Puffy Rim and Thin Center
Ensure your dough is ready with these final shape checks before sliding it onto the peel. Confirm the shape is symmetrical: it should be a balanced circle, not an oval, with a clearly defined crust ring. The rim should stay visibly thicker, about half an inch, and feel airy—avoid pressing it, as trapped gas is what gives it that puffed-up look. Check the center’s thickness, aiming for roughly an eighth of an inch with an even, patch-free surface. Slight translucence is acceptable, but tears are a sign to redo. Lift the dough gently: if it stretches easily from gravity rather than force, your dough’s elasticity is ideal. Lastly, make sure there are no flat, overworked bands interrupting the rim, and that the middle lies flat without any doming. Use gentle, firm presses to push the dough outward, rotating gradually to maintain even pressure over all sections. If all these checks pass, your dough is prepped for baking with an even center and a fully puffed rim. For consistent results, using a pullman loaf pan ensures uniform heat distribution and controlled crust development.