

Got stubborn grease on your baking sheet and no idea how to get it clean? The good news is that with a few simple steps, you can restore your pan’s shine and performance.
Whether you’re dealing with light residue or tough spots, there’s a straightforward method that works for most messes.
Keep reading to learn how to deep-clean your baking sheet effectively.
Why Your Baking Sheet Needs More Than a Quick Wash
A deep clean is essential to remove built-up grease and baked-on residue from your baking sheet. While a quick wash with hot water and dish soap can handle light messes, it won’t tackle the hardened deposits that accumulate over time. These stubborn layers cling to corners, rims, and crevices, requiring more intensive effort. Applying a cleaning paste or soaking the sheet for an extended period helps loosen the grime. Using brushes to scrub into tight spots and abrasive pads to break down crusted-on grime ensures a thorough clean. After cleaning, drying completely prevents rust spots from forming due to trapped moisture. Removing this residual film not only restores the pan’s appearance but also improves its performance by promoting even browning during future baking sessions. For Silpat mats, non-abrasive cleaning methods are recommended to preserve their non-stick surface and prevent damage. For particularly stubborn residue, using a baking soda paste can effectively lift the grime without scratching the surface.
Essential Tools for Deep-Cleaning a Baking Sheet
To deep-clean your baking sheet effectively, the right tools are essential to prevent damage and ensure thorough cleaning. Use non-abrasive scrubbers and plastic scrapers to protect your pan’s finish while removing stubborn residue. A nylon brush or an old toothbrush is ideal for reaching corners and seams, making detailed work easier. For applying a baking soda paste, choose a simple sponge or cloth that can hold and spread the paste evenly over scorch marks. Rinse thoroughly using a sink sprayer for a complete cleanup and dry your pan with a clean towel afterward to prevent water spots. Proper tool maintenance is also crucial; rinse scrubbers and brushes after each use and dry them completely to keep your tools effective and your pans scratch-free over time. For silicone baking mats, a dedicated baking soda paste helps lift baked-on residue without scratching the surface. If you prefer a more versatile option, use the best frosting consistency instead for piping intricate designs on baked goods. Standard kitchen tools like a wooden bowl can also be used as a mixing vessel for cleaning solutions, keeping your metal pans safe from scratches.
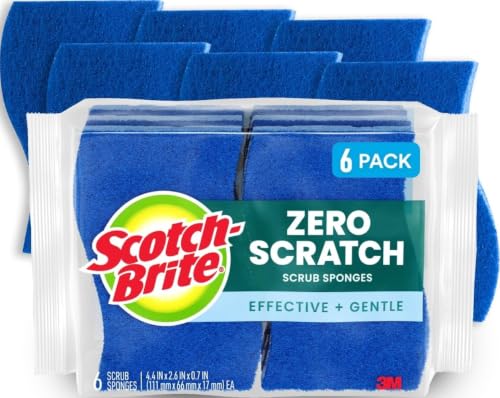
SIX SCRUBBING SPONGE: This pack of Scotch-Brite Zero Scratch Scrub Sponges includes 6 sponges

Mr. Scrub sponge’s quality resembles that of market-leading brands.

SIX SCRUBBING SPONGES: This pack of Scotch-Brite Odor Resist Non-Scratch Scrub Sponges includes 1 pack of six sponges.
Soak Your Baking Sheet in Hot Water and Dish Soap First
Soak your baking sheet in hot water and dish soap for 15 to 30 minutes. This duration helps loosen light grease and food residue, making scrubbing easier or even unnecessary. Fill your sink with very hot water—not just warm—and add a squirt of dish soap. Fully submerge the cooled baking sheet in the soapy water. For lighter spots, 15 minutes usually does the trick, while more stubborn grime may require a full half-hour soak. During the soak, avoid using harsh abrasive tools, as the warm water softens dried oils and food particles, allowing them to lift with minimal effort. Using a springform pan for ice cream cakes follows a similar principle, as the gentle release of the pan reduces buildup and simplifies cleanup. This method works well for both aluminum and nonstick pans, as long as you do not leave the pan soaking overnight. Similar to cleaning, maintaining accurate calibration of your tools ensures consistent results. For similar care of your stand mixer tools, you can explore top attachment comparisons to find which accessories require this gentle cleaning approach.
Scrub Off Baked-On Grease Without Scratches
To scrub off remaining baked-on grease without scratching the pan, use non-abrasive scrubbers like nylon brushes, soft sponges, or silicone pads. These tools effectively lift grime while protecting delicate surfaces such as non-stick coatings or aluminum sheets. Avoid steel wool or other harsh abrasives on these materials, as they can cause scratches or gouging. For those who value precision in their kitchen tools, reviewing top rated food scales can help ensure accurate measurements alongside proper pan care. Additionally, top silicone oven gloves provide a secure grip and heat protection when handling hot pans during cleaning. Keeping your mixer clean is also important, and using a food-grade lubricant on moving parts can prevent wear and maintain performance.
Apply controlled scrubbing with short, circular motions and even, gentle pressure. Focus primarily on stained areas to minimize wear across the surface. Light pressure combined with gentler tools helps prevent scratches and maintains the pan’s integrity. If necessary, supplement your scrubbing with gentle cleaning agents like Bar Keepers Friend mixed with plenty of water or a paste made from cream of tartar—use these agents sparingly.
After scrubbing, rinse the pan thoroughly with water to remove any loosened grease and residue. Make sure to dry the surface completely to prevent water spots and rust from forming. Proper drying ensures your pan stays in good condition and ready for its next use.
Baking Soda and Vinegar for Stubborn Spots
For stubborn, baked-on spots that resist gentle scrubbing, a paste of baking soda and vinegar works effectively. Start by sprinkling about 1/4 cup of baking soda directly onto the affected area. Then, add a small splash of vinegar to the baking soda to activate the chemical reaction. The fizzing action helps lift and loosen grime without harsh scrubbing, much like how a quality butcher block can be cleaned with gentle methods to preserve its surface. Let the paste sit for 30 to 60 minutes, especially if the residue is tough. After soaking, use a non-abrasive sponge to gently scrub away the loosened grime. This method is ideal for targeted stains and greasy patches on baking sheets while minimizing surface damage. Be cautious with aluminum sheets, as prolonged vinegar exposure can cause etching. Use the vinegar briefly to produce foam, then rinse immediately with warm water to prevent damage. Rinse thoroughly and dry the surface afterward to halt ongoing chemical reactions and reveal a cleaner, fresh surface. This technique is similar to how you might clean a loaf pan without harming its nonstick coating. For tube pans, a similar gentle paste approach can prevent scratches and stuck-on residue.

Mrs. Meyer's Baking Soda Cream Cleaner removes soap scum and grease build-up to make your kitchen sparkle

Baking Soda Powered All Purpose Cleaner – Plant based multi surface spray puts the natural cleaning power of bicarbonate of soda into an easy trigger, no scrubbing paste required

When Stains Won’t Budge: Use a Washing Soda Paste
If baking soda and vinegar don’t remove the toughest stains, a washing soda paste can help. To make the paste, sprinkle a generous amount of washing soda directly onto the stained areas. Then add hot water gradually, stirring until you form a thick, spreadable paste. Keep it thick—avoid making it watery—so it stays put on sloped surfaces without sliding off. Let the paste sit for 15 to 30 minutes to soften baked-on grease and carbonized residue. Afterward, use a non-abrasive sponge to scrub the area gently; heavy scouring isn’t necessary. Rinse thoroughly with warm water and dish soap to remove any remaining residue. Be cautious when using washing soda on aluminum sheets, as it is a strong alkali that can cause damage. Always test a small, inconspicuous area first to ensure compatibility.
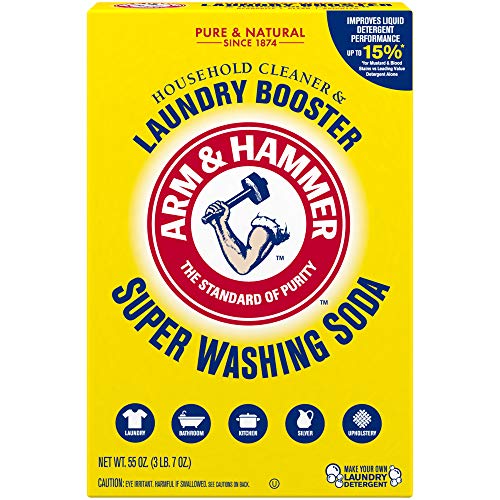
One 55 oz box of ARM & HAMMER Super Washing Soda Household Cleaner and Laundry Booster

For Baking, Cleaning, and Deodorizing

A HOUSEHOLD CLASSIC: This bulk 7 lb resealable bag of ARM & HAMMER Baking Soda unlocks 100+ uses across your home—from kitchens and laundry rooms to crafting tables and beyond
Got Rust? How to Fix It on a Baking Sheet
Rust on a baking sheet can be removed with an acid soak. Submerge the affected area in white vinegar for 1 to 3 hours to lift light oxidation. For more stubborn rust, mix equal parts vinegar and lemon juice to soften corrosion. This combined acid treatment helps to break down oxidation before you scrub. Avoid letting strong acids sit too long, as they can damage the metal surface. Using a non-stick baking sheet could help prevent rust from forming in the future.
After soaking, use a stiff brush or fine steel wool to scrub away loosened rust. For spot-treating remaining patches, apply fresh lemon juice mixed with salt directly to the rusted areas. Repeating short soaking sessions tends to work better than trying to remove all rust in a single aggressive attempt. If you notice deep pitting after several attempts, it’s usually best to replace the sheet, since severe corrosion often isn’t worth repairing.


MULTI-SIZE SET FOR EVERY TASK: This stainless steel baking set includes 3 practical sizes (9”, 12”, and 16”) to cover all your cooking needs. Ideal as a baking sheet stainless steel or a versatile stainless steel tray.

Versatile Three Size Combo:Your complete baking set includes three sizes at 17.5x13, 15.7x12, and 12.6x9.5 inches to cover every kitchen task from full sheet roasting to small batch cookies. The large pan fits standard ovens, the medium works with toaster ovens, and the compact size handles snacks and ingredient preparation
Rinse and Dry Your Baking Sheet to Prevent Damage
After cleaning your baking sheet, rinse it thoroughly with warm water to remove all soap, baking soda, vinegar, and any loosened residue. This step helps prevent stains and residue buildup—leftover cleaner can cause a film or discoloration. Pay special attention to corners, rims, and textured areas where gunk tends to hide.
Immediately dry the sheet with a clean kitchen towel to prevent rust and corrosion. Focus on reaching every edge and rolled rim, removing all hidden moisture that can cause water spots and damage. Air-drying alone isn’t enough if you soon plan to store it. Ensure the sheet is completely dry before putting it away by checking seams and the underside for dampness. Proper drying preserves the finish, extends its lifespan, and keeps it ready for your next use.
Daily Habits That Keep Your Baking Sheet Clean Longer
Dry your baking sheet thoroughly after every wash to prevent rust and corrosion. In addition to that, adopt a few consistent practices to keep it cleaner longer. Line your pans with parchment paper or silicone mats for every bake, and trim liners to match the pan size to avoid spills accumulating on exposed areas. For pan safety, hand-wash with mild soap and a soft sponge instead of using the dishwasher, which can cause warping over time. Clean your baking sheet promptly after it cools, paying close attention to corners where grease and crumbs tend to hide. When trying out ingredient substitutions, especially sugary or sticky ones, be mindful of spills that can bake onto the surface and become stubborn. Using fitted liners helps contain drips and prevents buildup, while avoiding letting debris dry on the surface makes cleaning easier later. Quickly remove foil after use, avoid harsh scrubbing, and rinse thoroughly to prevent soap films that attract grime. These simple daily habits help protect your pans and make cleanup faster and less intense. Since baking sheets and plastic measuring cups both need careful handling, note that most plastic measuring cups are not microwave safe due to heat and material limits. A standard jelly roll pan is typically 10×15 inches, making it ideal for even baking and roll cakes. For similar kitchen maintenance, regularly check that your mixer bowl locks into place to prevent loosening during use.
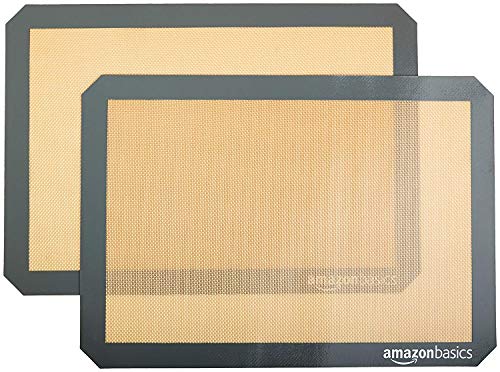
SHIPMENT CONTAINS: 2-pack of food-safe silicone baking mats for easy and convenient baking, roasting, or food prep

Perfect Fit for Half Sheet Pans: Sized at 16.54" x 11.62", these reusable silicone baking mats fit all standard half sheet trays. Ideal for baking cookies, bread, pastries, or roasting vegetables — no parchment paper or foil needed.

Easy Cleanup: The surface helps reduce baked-on residue, and the mats can go in the dishwasher once cool for convenient cleanup between batches