

Wondering how to measure a cup without a standard measuring cup? You’re in the right place. There are simple kitchen tricks—like using tablespoons, a mug, or your scale—that can give you accurate results.
With a few common tools, you can measure liquids and dry ingredients just as precisely. Keep reading to learn easy methods that make measuring feel effortless.
Why You Might Need to Measure a Cup Without Measuring Cups
You might need to measure a cup without measuring cups when you’re in a situation where standard tools aren’t available. For example, if you’re in a dorm kitchen, camping, or traveling lightly, you may not have access to precise measuring instruments. In these cases, using everyday objects or familiar vessels can help you approximate the right amount. Historically, people baked and brewed using simple, common containers or even their hands, demonstrating that precise measuring tools are not always necessary. Understanding the four standard sizes—such as 1 cup, ½ cup, ⅓ cup, and ¼ cup—can help you match familiar objects to these common volumes more accurately. Similar to how caring for Silpat mats requires specific methods to remove baked-on residue, getting accurate measurements without tools relies on consistent, repeatable techniques.
Different cultures also offer their own ways of estimating quantities. A Japanese *gō*, for example, is a traditional cup measurement that differs from the American standard but relies on everyday objects for consistency. When you’re out of the official measuring cups or need to finish a recipe quickly, improvising with what’s around ensures you maintain good ratios and don’t compromise the texture or flavor of your dish. This practical approach keeps your cooking on track without special tools—just your judgment and familiar household objects. For even greater accuracy, consider using a top rated food scale to weigh ingredients directly, bypassing the need for volume measurements altogether.
Use Tablespoons or Teaspoons for the Most Accurate Cup
Use tablespoons or teaspoons for the most accurate cup measurement. To measure dry ingredients precisely, count 16 level tablespoons for 1 cup or use 48 level teaspoons for the same volume. Be sure to level each spoon to avoid heaping, which can lead to inaccuracies. When using tablespoons, keep each scoop level by running the back of a knife or a straight edge across the top. For smaller amounts, employ a finger pinch to transfer a tiny, leveled amount onto the spoon. Always use the same size spoon for consistency to prevent mismatched measurements. Grouping smaller spoonfuls into larger units like tablespoons reduces errors and speeds up the process, ensuring you measure with precision every time. Knowing that standard measuring spoons come in four sizes—typically 1/4 teaspoon, 1/2 teaspoon, 1 teaspoon, and 1 tablespoon—helps you quickly identify which spoon to use for each grouping. For safety during kitchen tasks, consider using hot pads to protect your hands from heat. For instance, be aware that not all kitchen tools are safe for high heat, as KitchenAid mixing bowls are generally not recommended for microwave use due to their material limits.
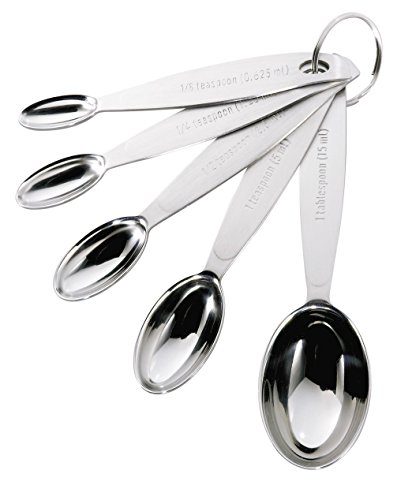
Set includes: 1/8, 1/4, 1/2, 1tsp and 1tbsp

GUARANTEE SAFE FOR COOKING: Are you worried about silicone and plastic tools not safe for cooking? Protect your health using our stainless steel measuring spoons which are made of food grade stainless steel

Treat Yourself To A Set Worth Having - With single metal construction and heavy duty premium Stainless Steel, these measuring spoons were built with endurance in mind. No more worrying about rusting or bending. Get this set that looks beautiful, performs incredibly and will seemingly last forever.
Grab a Mug or Glass for a Quick Cup Estimate
To quickly estimate a cup using household items, look for a mug or glass around 8 fluid ounces. Many standard coffee mugs hold 10 to 12 ounces, so filling one completely often exceeds a single cup by about 4 ounces. Check the bottom or side for any ounce markings first. If you find an 8-ounce mug, fill it to the brim for an accurate estimate. For a 10-ounce mug, filling it about three-quarters full gives a close approximation. With a 12-ounce mug, fill about two-thirds of it. Using smaller drinkware over oversized options yields better accuracy because size variations are common. If you understand the shape and tip impact on how much material fits, you can better gauge volumes in non-standard containers. If there are no printed capacity marks, treat any glass as only a rough guide, since glassware sizes can vary significantly. For precise measurement needs, consider investing in dedicated liquid measuring cups specifically designed for accuracy. For home bakers, achieving consistent results in recipes often relies on the same precision with piping techniques used for decorating cupcakes.

Clear plastic for durability and ease of measuring

Decorated measuring cup that is perfect for your mix and prep kitchen needs

Multi-Unit Liquid Measuring: Printed cup, ounce and milliliter graduations keep common recipe units on one vessel for cooking, baking and drink preparation
Use Your Hands for Rough Cup Portions
You can estimate a cup using your hands as a rough guide. Cupping your hand makes approximately half a cup, especially for soft, scoopable foods like rice, cooked vegetables, or pasta. Two cupped hands together roughly equal one cup. For bulkier items like chopped fruit or salad, forming a tight fist gives a visual estimate close to one cup.
For smaller servings, your palm without fingers represents a 3 to 4-ounce protein portion. This method is good for quick portion control but isn’t precise enough for baking. Your accuracy depends on your hand size and the density of the food. Loose packing or particularly dense foods can throw off your estimate. Use these hand shapes mainly for cooked grains, produce, and proteins, and they can help you get a reasonable approximation without measuring cups. For precise baking, remember that similar principles apply to cooling, as cooling time before removal varies significantly based on pan material and cake density. For more reliable accuracy, consider using a Kitchenaid mixer attachment to ensure consistent results. For the most consistent results, however, a dry measuring cup is designed to be filled level with the rim, unlike liquid measuring cups.
Use a Kitchen Scale as a No-Cup Measuring Tool
A kitchen scale allows you to measure a cup precisely by weight rather than volume. To do this, first calibrate the scale to grams and place your bowl on it. Use the tare function to zero out the weight after adding the bowl, so only your ingredient’s weight counts. For water, 1 US cup weighs about 237 grams, which helps verify the scale’s accuracy. However, for other ingredients, you’ll need to target specific gram amounts: 120–125 grams for flour, about 200 grams for granulated sugar, around 227 grams for butter, and approximately 340 grams for honey. By measuring ingredients this way, you can easily adapt recipes, make accurate substitutions, and scale recipes without fuss. Simply add your ingredient until you reach the precise gram target for that particular food, ensuring consistent results every time. This approach is especially useful for angel food cake pans where precise weight prevents common mistakes like sticking or collapsing. Tea loaf pans also benefit from weight-based measurements to avoid overfilling and ensure even baking. For everyday baking, a baking sheet often provides more reliable results when using weight-based measures for even heat distribution.

𝗘𝗳𝗳𝗼𝗿𝘁𝗹𝗲𝘀𝘀 𝗪𝗲𝗶𝗴𝗵𝗶𝗻𝗴: Supports 5 units (oz/lb:oz/fl'oz/g/mL), tare function, and includes 2 AAA batteries for hassle-free operation

Digital kitchen scale with food-safe, BPA-free plastic components

[ Durable Stainless Steel & Tempered Glass Surface ]: This digital food scale features premium composite construction, delivering long-lasting durability, stable weighing performance, and a splash-resistant, easy-to-clean surface for everyday kitchen use
Choose the Right Method for Liquids vs. Dry Ingredients
You need to match the measuring method to the ingredient type for accuracy. For liquids, use a clear measuring cup with volume markings. Place the cup on a flat surface and read the measurement at eye level, lining up with the bottom of the meniscus—the curve that the liquid forms. Do not hold the cup in the air, as this can cause parallax error, leading to an incorrect reading.
For dry ingredients, use the spoon-and-sweep method. Lightly spoon the ingredient into your measuring cup, then level it off with a flat edge like a knife. Pressing or scooping directly from the container compresses the material and results in measuring too much. Dry measuring cups or spoons should be filled until they are flush with the rim, ensuring an accurate level. Conversely, liquid measuring cups leave some room above the desired level, typically about a half-inch, to prevent spilling during pouring. Using the wrong method for each type of ingredient can lead to inaccurate measurements.
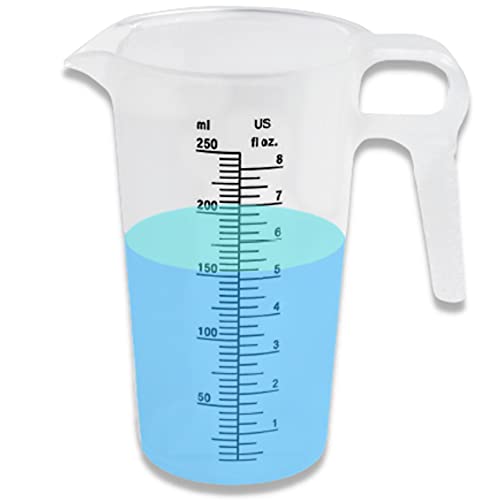
ULTRA-TOUGH & DURABLE – PRACTICALLY INDESTRUCTIBLE: This gallon measuring pitcher is made from food-grade polypropylene with extreme chemical resistance. This plastic container won’t wear down, chip, cloud, or discolor and has a melting point of 246°F. Great for using as an oil measuring container, chemical measuring pitcher, and pool measuring cup for chemicals.


Black measurement markings on both sides
Make a Reusable Measuring Cup From Any Container
To create a reusable measuring cup from almost any container, start by selecting a clean, food-safe container with straight or gently tapered sides. Suitable options include plastic bottles, yogurt tubs, or jars, since straight sides make it easier to draw and read level lines accurately. First, determine the container’s true capacity by filling it with water, then pouring that water into a standard measuring cup. Repeat this process several times to ensure accurate calibration. Next, pour the desired volume of liquid back into the container, mark the level with a permanent marker, and label each line clearly with measurements like 1 cup or ½ cup. For durability, use waterproof ink or carve the marks into the plastic to prevent smudging or wearing off over time. It’s important to periodically check your calibration and re-mark if the labels shift or fade. This cost-effective alternative also uses waste materials to craft functional kitchen tools. For very small measurements, you can reference everyday household items such as bottle caps to verify approximate teaspoon volumes. Unlike a tilt head mixer that relies on a locking mechanism for stability, a narrow, consistent shape makes reading easier and store your custom measuring cup where the labels are visible and protected. Choose a narrow, consistent shape to make reading easier and store your custom measuring cup where the labels are visible and protected. This approach provides reliable, repeatable measurements every time you cook or bake.
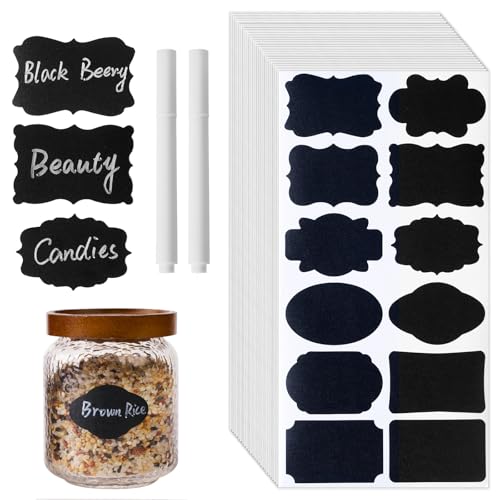
Great Value Set: Includes 360 chalkboard labels (30 sheets) in 12 shapes and 2 white erasable liquid chalk markers. Each label measures 2.1″ × 1.4″ — great for small to medium food containers
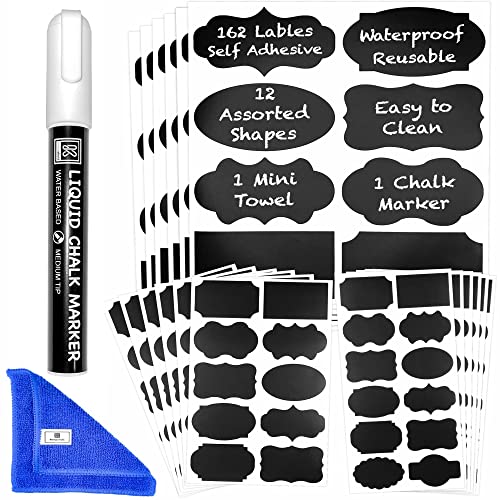
162 LABELS, 12 SHAPES & THREE SIZES - Organize mason jars, pantry containers, glass bottles, spice jars, craft supplies and more with an assorted set sized for small lids through larger storage bins

Package Contains: 12 pack 8 OZ round clear plastic jars with black lids, extra a spatula, a pen &Labels as gift.