

If you’ve ever wondered how to bake sourdough bread in a simple loaf pan without complicated techniques, you’re in the right place.
You’ll learn how to shape, proof, and bake your dough for a crusty, delicious bread with just a few ingredients and straightforward steps.
Keep reading to turn your sourdough into a perfect loaf using this easy method.
How to Shape Sourdough for a Loaf Pan
To shape your sourdough for a loaf pan, start by placing your dough on a lightly floured surface and patting it into a rough rectangle—avoid stretching it too thin. Gently degas the dough to release large bubbles formed during fermentation, then square the edges. Stretch the sides outward, aligning them with your pan’s length without tearing the gluten structure you’ve developed. Using a top rated food scale ensures your ingredients are precisely measured for consistent dough hydration and fermentation. To prevent sticking during the shaping process, ensure your work surface is clean, as baked-on residue on tools can affect dough handling. Choosing a pan with proper heat distribution helps the sourdough brown evenly during baking.
Next, fold the top third down and the bottom third up, like folding a letter. If extra support is needed, fold the sides inward before rolling. Shape the dough into an oblong log, pressing the seams firmly to seal. Pull the dough toward you against the surface to build tension, which tightens the outer skin and encourages the loaf to rise upward rather than spreading out.
Finally, ensure that the length of your log matches the length of your loaf pan. Place it seam-side down to create a smooth top surface. This method helps achieve a uniform, well-shaped loaf ready for final proofing.
The Best Way to Prepare Your Loaf Pan
Properly preparing your loaf pan ensures your baked bread releases easily and maintains its shape. Use a standard 9×5-inch metal pan, which provides enough space for the dough to rise comfortably. Start by selecting your greasing method. Applying a thin layer of neutral oil or melted butter and coating every corner and sidewall prevents sticking. Avocado oil is an excellent choice for its consistent release. You can also line the pan with a parchment sling — a piece of parchment paper long enough to lift the loaf out — and add a light grease layer underneath for extra security. Make sure to pay special attention to the corners, as they are the most likely spots for baked bread to stick. A well-prepped pan allows your loaf to slide out smoothly, avoiding tears or damage to the crust. For best results, use a stand mixer to ensure your dough is thoroughly and evenly mixed before baking. This preparation is especially important for sticky or high-hydration doughs that require better rise and structure from the pan. Using a parchment sling with a light grease layer underneath is a reliable method to prevent sticking, as mastered in professional pan preparation techniques. For accurate ingredient portions, consider using a set of measuring cups to ensure your flour and water ratios are precise.

STANDARD 9 x 5-INCH LOAF PAN: This standard loaf pan is perfect for baking meatloaf, sweet or savory breads, thick cakes or brownies, smaller portions of lasagnas or casseroles, and more. Enjoy the perfect bake every time with this versatile bread pan

Set of 2 rectangular-shaped loaf pans; ideal for baking bread, pound cake, meatloaf, and more

Made in the USA from globally sourced materials; aluminized steel 1 1/4 lb Loaf Pan, commercial grade and heavy gauge- measures 9 x 5 x 2. 75 inches
How Long to Proof Sourdough in a Loaf Pan
Proofing sourdough in a loaf pan typically takes about 2 to 4 hours at room temperature. The exact timing depends on your dough’s appearance and feel rather than the clock. You’ll know it’s ready when it’s puffed up, has risen near the pan’s rim, and shows a gentle, slow rebound when pressed with a finger. Higher fermentation temperatures will speed up proofing, while cooler environments slow it down. Substituting ingredients, like using a different flour, can also shift the timeline, so keep an eye on your dough rather than relying solely on the time elapsed. For a cold proof, you can refrigerate the dough overnight for 8 to 12 hours, with some extending it up to 24 or even 48 hours for richer flavor development. You can bake directly from the fridge after this extended cold proof. Remember, the strength of your starter and the dough’s temperature are the main factors influencing proofing time—trust your senses over the clock to determine readiness. Using a KitchenAid mixer attachment can help you mix and knead the dough more consistently before it goes into the pan. For consistent results, a mixer with higher torque ensures thorough gluten development even with stiff doughs.
Best Oven Temperature and Bake Time for Pan Loaves
Baking sourdough in a loaf pan requires an oven temperature around 392 to 425°F for optimal crust and browning. A common approach is to set the oven at 392°F and bake for about 45 minutes, which results in even browning and a gentle crust. For more oven spring and deeper color, increasing the temperature to 400–425°F and baking for 40 to 45 minutes enhances browning and loft. Your fermentation stage plays a crucial role; under- or over-fermented dough will react differently to heat. To achieve the best texture, letting cake cool in the pan for the right amount of time prevents a soggy bottom and ensures the crumb sets properly.
To ensure your loaf is fully baked, check the internal temperature—aim for 205°F, which indicates the crumb is set. A two-stage bake is effective: start with 25 to 30 minutes covered to trap moisture, then remove the cover and bake uncovered for an additional 10 to 20 minutes to develop a crust. This method pairs well with flavor profiles like dark rye or toasted seeds, as the softer crust won’t overpower their taste. Keep in mind that smaller loaves bake faster, so adjust your bake time accordingly to prevent overbaking. Unlike a loaf pan, an angel food cake pan has uncoated, high sides and a hollow center tube to support the delicate batter as it rises and cools. For best results, use a silicone baking mat under your loaf pan to catch drips and simplify cleanup.

【Enhanced Stability with 4 Handles】The silicone baking mat is designed with four handles for excellent stability during dough transfer, ensuring perfect baking results. The silicone bread baking sling maintains your dough's shape throughout the process without spills or mess.

Reusable & Eco-Friendly: Made with a durable triple-layer silicone + fiber + silicone construction, this baking liner is built for repeated use—cut down on waste and save money.
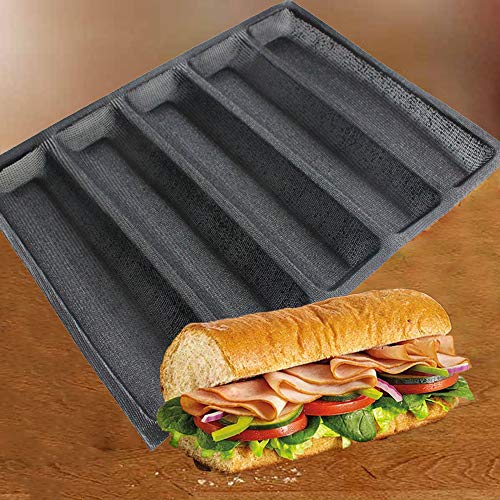
Durable Silicone Material: Made from food-grade silicone and fiberglass for durability and easy cleaning.
How to Create Steam for a Crispy Crust
Steam plays a crucial role in achieving a crispy crust because it keeps the dough surface moist and flexible during the initial phase of baking. This moisture delays crust formation, allowing for better oven spring and full expansion of the loaf before the crust hardens. As a result, the crust becomes thinner and crunchier, rather than thick and hard. For precise handling of water needed for steam generation, dry measuring cups provide accurate volume measurements for pouring into your preheated pan. For example, knowing the exact capacity of an 8 inch pan helps you determine the right water volume to use for steam without overflowing. For hands-free safety when handling hot pans, top oven gloves offer reliable heat protection and dexterity.
There are several methods to generate steam in your home oven. Preheating a metal pan on a lower rack and pouring hot water into it creates an environment rich in moisture; quickly closing the door traps the steam inside. Alternatively, adding ice cubes to the pan releases steam more gradually, prolonging the moist environment. Using a spray bottle to mist the oven walls two or three times during the first 15 minutes of baking also effectively creates steam.
After the loaf has expanded sufficiently, it’s important to remove the steam to allow the crust to dry out. This step is key for fostering deep browning and achieving that characteristic crunch. Keep in mind that while alternative proofing methods may influence the dough’s structure, they do not affect your steam technique.
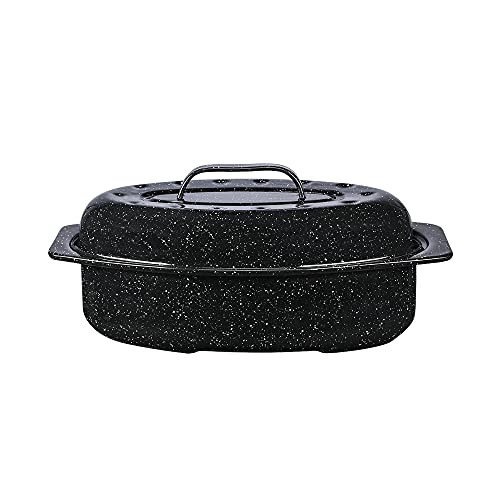
MULTI-USE SIZE FOR ROASTING & BREAD BAKING: 13-inch oval roaster fits up to 7 lb poultry or roast and doubles as an ideal vessel for baking sourdough bread. The enclosed design traps steam for crispy crusts and artisan-style results at home.
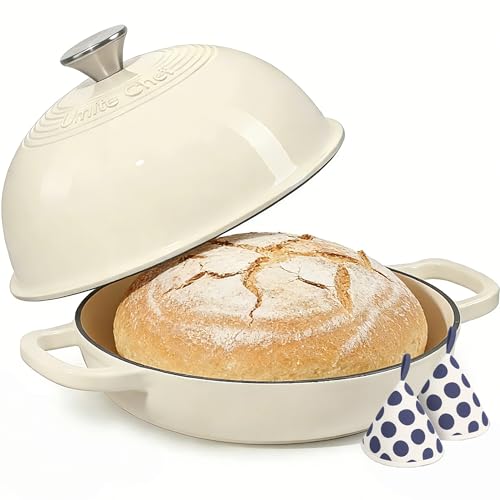
Achieve Professional Artisan Bread at Home - Expertly designed for bread baking, this 6 qt cast iron bread oven creates the ideal steam baking environment. Crafted from high-quality cast iron, it ensures superior heat retention for a crispy, golden crust and impressive oven spring—just like a bakery. The domed cloche lid traps moisture perfectly, guaranteeing delectable results every time

EXTRA-LARGE 11x5 INCH LOAF PAN Bake bigger, better, and more beautiful loaves with the Vanderlume 11x5 inch extra-large cast iron loaf pan. This oversized bread loaf pan boosts baking efficiency and ensures every creation comes out full, golden, and picture-perfect — perfect for families and passionate home bakers
How to Score Your Loaf Pan Sourdough
To score your loaf pan sourdough, make a single, decisive slash down the center just before baking. This single cut ensures the dough bursts open along the score line, leveraging proper fermentation to achieve optimal oven spring. This simple cut is enough since the pan already shapes the loaf. Use a bread lame or razor blade to ensure a clean, swift cut that prevents tearing. Keep the blade angle shallow, around 20 to 45 degrees, to create a clean ear without deflating the dough. The depth should be about half an inch. Cold dough straight from the fridge is easier to score because it’s firm and less likely to drag or deform. A confident, quick slash now helps control oven spring and results in a predictable, attractive crust split. For a decorative finish, you could also use piping tips to add a simple pattern of flour paste along the score line before baking. Choosing the correct type of fat to grease the pan ensures the loaf releases cleanly after baking.
How to Tell When Your Sourdough Is Fully Baked
The easiest way to tell if your sourdough is fully baked is to use a combination of checks rather than relying on just one. First, insert a food thermometer into the center of the loaf; your target temperature should be between 205°F and 210°F. This range indicates that the internal moisture has evaporated enough and the structure is set.
Next, examine the crust. It should be deep golden-brown—neither pale nor shiny, which can suggest underbaking or overbaking. After removing the loaf from the pan, tap gently on the bottom. A hollow sound signifies it’s baked through. Additionally, a fully baked loaf will feel light for its size but also firm and have a crisp crust when you handle it.
Ingredients sourcing influences how evenly your bread bakes; high-quality, fresh ingredients lead to more consistent results. Proper storage starts with ensuring the loaf is fully baked, as an underbaked center can cause stored bread to develop unwanted moisture or mold. If the internal temperature is below 205°F or the bottom sound is dull, place the loaf back in the oven for short, 5-minute increments to finish baking. Do not rely solely on crust color since loaf pans can brown the outside prematurely before the interior is set.
Why Cooling Completely Matters for Texture
Cooling completely on a wire rack for at least 2 to 4 hours is essential for the best sourdough texture. Larger or denser loaves may require up to 6 hours or overnight to cool fully. During this time, heat and moisture escape, allowing the crumb to set and starches to firm up. This prevents the loaf from becoming gummy or sticky when sliced. Using a quality circle pan can further support even heat distribution and consistent crust development during baking. Proper cooling promotes cleaner cuts and better air-pocket retention. It also ensures the crust remains crisp without trapping excess moisture inside. Cutting into a warm loaf compresses the interior, resulting in a squashed, doughy texture. Patience during the cooling process is what transforms a fresh, tender loaf into one that is sliceable and stable. For those seeking a v-bottom rack, this design helps elevate the loaf for optimal airflow and even roasting dynamics. For the best results, always place the loaf on a wire rack to allow air to circulate freely underneath, which prevents a soggy bottom.
How to Remove Sourdough From the Pan
To remove sourdough from the pan, start by gently running a thin silicone spatula or a blunt knife around the edges of the loaf. Focus on working carefully into the corners where sticking is most common. After loosening the edges, place a cooling rack over the pan, then invert it and give one gentle shake to release the bread. Properly greasing the pan beforehand makes the release smoother and reduces the risk of the loaf sticking. If the bread doesn’t drop out right away, return the pan upright, loosen the edges once more, and try inverting again. Avoid waiting too long before removing the loaf, as condensation can form and cause the crust to become soggy. Once the loaf is free, transfer it to a rack to cool completely, maintaining a crisp crust and preventing moisture buildup underneath. Allow the loaf to cool until still warm but touchable to help loosen it from the pan. A KitchenAid stand mixer can efficiently knead the dough for this sourdough, ensuring a consistent texture that releases cleanly from the pan.

Two Cream XLarge pans support planned baking: paired loaves, freezer meals, pound cakes, or meatloaf portions in one session.

SPACE-SAVING COLLAPSIBLE DESIGN - Maximize your kitchen storage! Our innovative silicone bread pans easily fold down flat to a fraction of their original size. It is the ultimate storage solution for small kitchens, apartments, dorms, campers, and RVs where cabinet space is limited.

Complete Baking Essentials Kit: includes 4 silicone baking molds (mini loaf pan, standard muffin pan, mini muffin pan, round cake pan), 1 silicone spatula, 1 dual-head pastry brush, and 1 pair of heat-resistant oven mitts; Everything you need to bake cupcakes, muffins, bread, cakes, and more, good for home bakers and professionals alike
Fixing Common Pan Loaf Problems
Even with a clean release, you might still encounter issues like a dense crumb or a pale crust. Underproofing is a common cause; extend your bulk fermentation by 1 to 2 hours until the dough passes the poke test. Ensure your starter is bubbly and doubles in size within 4 to 6 hours, and increase hydration to 68–70% to improve the dough’s structure. Overproofing can lead to collapse; reduce proofing time by 30 to 45 minutes, and refrigerate the dough to slow fermentation and prevent it from becoming fragile.
A gummy center indicates you haven’t cooled the loaf enough. Wait at least 1 hour before slicing, and check that the internal temperature is above 200°F. If the structure feels weak, incorporate additional folds during the bulk fermentation phase. Pale crust may result from a not fully preheated oven or the absence of steam. Make sure your oven is fully heated to at least 425°F, bake in a dark metal pan, and introduce steam to promote a golden, crispy crust. Proper storage of sourdough helps maintain its texture, and longer fermentation times deepen the flavor.

IDEAL FOR FAMILY MEALS - Perfectly sized for families of 3–5 people, this 5.5QT Dutch oven handles everything from hearty soups and stews to one-pot dinners, pasta dishes, and Sunday pot roasts. Spacious enough for a whole chicken yet practical for everyday cooking, it delivers the ideal balance between daily family meals and weekend entertaining. Also well-sized for artisan bread bakers who want one pot for both family dinners and sourdough baking.

2-in-1 Dutch Oven Loaf Pan:Bake two loaves at once or use it as a dutch oven. This cast iron loaf pan with lid creates steam for a golden crust, making it ideal as a sourdough loaf pan and bread loaf pan for homemade bread

BAKE TWO ARTISAN LOAVES AT ONCE: The unique dual-compartment design allows you to bake two individual sourdough loaves simultaneously, saving oven space while producing bakery-style crusts and soft, airy interiors. Perfect for sharing homemade bread with family and friends.