

Ever wonder how to line parchment paper on a cake pan without it sticking or bunching up? The secret is in preparing the pan just right so your baked goods come out clean and perfectly shaped.
With a few simple steps, you can create a non-stick surface that makes cleanup effortless. Keep reading for a straightforward method that guarantees a flawless release.
Why Parchment Paper Ensures a Perfect Cake Release
Parchment paper guarantees a perfect cake release because it acts as a non-stick barrier between the batter and the pan. This prevents delicate, tender crumb structures from sticking or tearing when you remove the cake. Unlike greasing alone, parchment provides a reliable solution for smooth, clean edges and intact shape.
Additionally, parchment protects your cake’s flavor by blocking metallic tastes from the pan, maintaining a fresh, pure taste. It also preserves the appearance of your cake by preventing curling or uneven edges, resulting in a neat presentation. Since it withstands high baking temperatures, you can use it confidently for any recipe without worry. Using an accurate food scale to measure your ingredients ensures consistent batter density for the best results.
Sticky batters release effortlessly without tearing or damaging the cake’s structure, reducing the risk of broken corners or missing crumbs. Cleanup becomes much easier because parchment leaves behind minimal residue, saving time and effort. For consistent, reliable results each time you bake, lining your pans with parchment is an essential step. For even more effortless cleanup, a Silpat mat offers similar non-stick benefits for baking sheets. For those who frequently bake multiple layers, using the right KitchenAid mixer attachments can streamline batter preparation.
Measure and Cut Parchment for Round Pans
To measure and cut parchment for round pans, start by measuring the inside diameter of your pan—measure straight across from one inner edge to the other, not from the outside rim. Cut a square piece of parchment slightly larger than the diameter; for a 9-inch pan, a 10-inch square works well. Fold the square into a narrow wedge, keeping the tip centered. From the center point of the wedge, measure the radius, which is half the diameter. Mark this point on the wedge, then cut across at the mark. Unfold to reveal a perfect circle that fits flat at the bottom of the pan without gaps. This method works with textured parchment as well, even if it has embossed patterns. Properly measuring and trimming ensures the parchment covers the entire bottom edge-to-edge, which is key to preventing sticking and easy release. Folding the paper again into quarters ensures a small, layered square that simplifies accurate cutting.

PREMIUM QUALITY: Our parchment paper circles are designed with food grade paper, non toxic, 100% safe. Heat resistance up to 446 degree F (230 ℃) , perfect for toaster oven, tortilla press, round cake pan, cheesecake pan, air fryer and so on.
SUPERIOR QUALITY: Our parchment paper circles are designed with premium food grade silicone paper with quality in mind, Not Bleached, Non Toxic, Non-Wax, 100% Safe for daily use. HEAT RESISTANT up to 446 degree F (230 ℃) , perfect for dutch oven, toaster oven, tortilla press, cheesecake pan, springform pans, air fryer and so on

Size information: 6 inch cake pan liners with 7.5 cm lift tabs, 8 inch cake pan liners with 8 cm lift tabs, 9 inch cake pan liners with 8 cm lift tabs
Cut Parchment for Square and Rectangular Pans
Corner trimming is essential for a clean fit. Snip diagonally from each corner toward the pan’s marks to remove excess parchment. This step prevents bulk, allowing the paper to lie flat instead of folding. After trimming, press the liner into the pan, creasing the sides sharply to fit its shape perfectly. Any excess bulk from untrimmed corners can cause smooshed edges when stacking cakes, resulting in more work during frosting or decorating. Use the overhang as a handle for lifting out brownies or bars easily. The result is a snug, gap-free fit that’s ready for batter, making cleanup quicker and presentation more polished.

UNBLEACHED NATURAL PARCHMENT: Made from natural wood pulp, these unbleached parchment paper sheets are food-grade and designed for everyday baking and food preparation.

[Perfect Compatibility]:Compatible with 12-Cavity Mini Brownie Pan.These square baking liners are custom-designed to fit standard 12 mini brownie pans, with a precise size of 2.2x2.2x1.06 In for stable, mess-free baking.

SAFE & HEALTHY MATERIALS: Our unbleached parchment paper is made of 100% natural wood pulp, no fluorescents, completely non-toxic and meets food safety standards. Brown 8x8 parchment paper squares are heat-resistant up to 450°F, perfect for any baking or cooking need
Grease the Pan So the Parchment Paper Stays Put
To keep parchment paper from curling up or shifting, lightly grease your baking pan before placing the paper. Use butter, shortening, oil, or cooking spray to apply a thin, even coat. A pastry brush or a paper towel works well to spread the grease into the corners and edges. This creates a tacky surface that holds the parchment in place when you pour in batter, ensuring a cleaner release later. Alternatively, you can build your own dough hook at home to save money on specialty baking tools. Wearing top oven gloves ensures your hands stay safe when handling hot pans during this process. Using a kitchen scale with high precision helps measure ingredients accurately for consistent results.
For alternative greasing options, softened butter offers a richer flavor, while cooking spray provides a quick, easy tack. Be careful not to use too much grease—just enough to secure the paper without creating a slippery mess. After greasing, press the parchment firmly into the pan, smoothing from the center outward to achieve a tight fit. Properly secured parchment stays put, making cleanup easier and helping your baked goods come out smoothly.
When storing unused sheets, keep them flat in a cool, dry drawer. Crumpled parchment is more likely to shift during greasing and baking. A light layer of grease is all you need to keep the parchment steady—no need for excessive amounts that could cause sticking or mess.

For Fat Free Cooking, so there’s more on your plate, and less in your pan

Made with 100% Canola oil 100% Natura

One 5 oz can of PAM Non Stick Olive Oil Cooking Spray
Fit the Parchment Snugly Without Wrinkles
To ensure a snug fit of parchment without wrinkles, start by tracing the pan base and cutting just inside the outline. This slight inside cut guarantees the paper lies flat against the bottom without buckling. For round pans, drop the circle into the pan and press it flush, pushing from the center outward to smooth out any air pockets. For square or rectangular pans, firmly crease the parchment into each corner so it fits exactly and doesn’t overlap or shift. Making sure the liner matches the pan’s shape precisely is key to avoiding slack that could cause shifting during baking. If you notice any wrinkles, flatten and re-crease before adding the batter. Wrinkle-free parchment promotes even browning and promotes easy release when your cake is done. Precise sizing and sharp folds help keep the paper in place through spreading and baking, supporting a clean, professional-looking finish. A well-fitted liner will sit flush against all sides and the base, leaving no gaps or buckles that could interfere with your cake’s release.

EXTRA STRONG - 200pcs 9 inch parchment paper rounds made of extra thicker 45gsm paper, compared with commonly used 35gsm or 40gsm paper, it's about 12% thicker than others'. We define it as heavy duty parchment paper rounds. Katbite 9" round patty paper won’t curl or burn.

Materials - The baking sheet is made of natural parchment paper, which is safe and reliable, making it a worry-free choice for your baking process. The natural material ensures that your baked goods are healthier.
Kraft Paper Material - The baking paper is made of high-quality, natural wood pulp, ensuring the safety and quality of your baking process. It is a reliable choice to meet all your baking needs.
Add Parchment Strips for Tall or Deep Pans
To add parchment strips for tall or deep pans, cut strips that rise 2 to 3 inches above the pan’s rim. This extra height prevents batter overflow and helps it climb upward during baking. Measure the inside circumference of the pan and cut a strip slightly longer so the ends can overlap for a snug fit. Use a sturdy parchment paper brand to avoid tearing, as thickness matters for stability.
Trim the strip’s height after placing it inside the pan to ensure it stands upright against the wall. Secure the seam with a small dab of butter or oil to prevent slipping. This custom parchment collar creates a taller, stable baking wall, making it easier to release baked goods cleanly from deep or tall pans and reducing mess during removal.
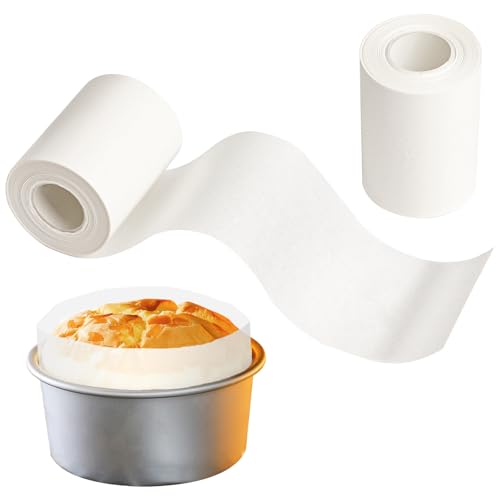
Size: our parchment paper roll measure about 2.95 inches wide by 131.23 feet long; Heat resistant up to 446 ℉/230 ℃;this parchment paper roll is good for baking cakes, cookies, pancakes, and more; PLEASE NOTE it may catch fire or curl over 250 ℃ degrees high temperature
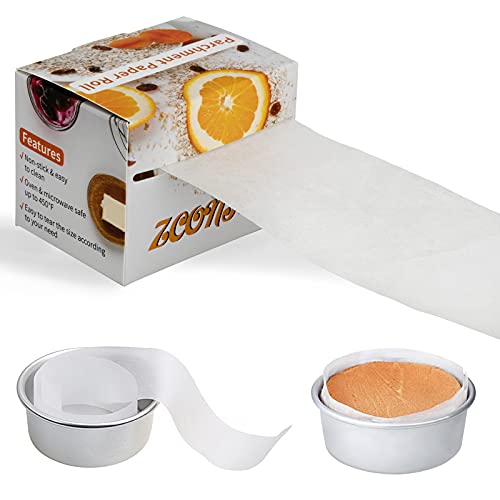
THOUGHTFUL DESIGN- ZCONIEY Cake pan side liner design for prevent your cheese cake sticking to baking pan side & ensures more even baking. With this non-stick cake strips allow you the cake come out in one piece, and keep baking tray clean. The ROLL-SHAPE ideal user-friendly to pull out baking paper and cut the length as you need. Say goodbye to cut size and waste a bunch of parchment paper

Perfect Fit & Extra Long: Customizable Size for Any Pan. Never struggle with mismatched liners again. Our 2.75" x 164ft parchment paper roll offers maximum flexibility, allowing you to cut the exact length needed for round, square, or springform pans. One roll provides enough cake pan side liners for hundreds of baking sessions, ensuring a professional edge for every cake.
5 Common Parchment Mistakes That Cause Sticking
Mismatched parchment sizing is a common mistake that can lead to sticking. Choosing a sheet that is too small leaves exposed pan metal, increasing the risk of batter seeping through and causing sticking. On the other hand, oversized sheets tend to buckle and bunch up, making it difficult to remove baked goods cleanly. To avoid this, measure your pan carefully and cut parchment to fit exactly, ensuring a snug, smooth surface. Proper sizing helps create an even, non-stick layer, making baking and cleanup much easier.
The Easiest Cleanup Method for Any Cake Pan
Lining your cake pan with parchment paper is the easiest cleanup method. Start by lightly greasing the pan to keep the paper in place. For round pans, trace the bottom on parchment and cut just inside the line. For square or rectangular pans, fold parchment to match the width, then make small corner slits for a snug fit. This creates a barrier that keeps batter from sticking to the pan, reducing baked-on residue. After baking, the cake releases easily in one piece, and your pan only needs a quick wipe. It also ensures your cake lifts out cleanly without tearing, making decorating much simpler. Keep pre-cut parchment rounds stored flat to have them ready for future bakes and to make cleanup even faster next time.