

Want to make bread without a loaf pan? You can achieve a beautifully crusty, thick boule or batard using just a few simple steps.
By shaping your dough and baking it directly on a hot surface like a cast-iron skillet, you’ll get a professional-looking loaf with minimal equipment.
In this guide, I’ll walk you through the best techniques for shaping, transferring, and baking your bread to get perfect results every time.
Why Bake Without a Loaf Pan? Better Crust, Less Gear
Baking bread without a loaf pan yields a better crust because the freeform shape exposes more surface area directly to the high oven temperature. This results in a thick, crisp exterior that many bakers aim for. Starting with a hot oven accelerates crust formation, and scoring the dough helps control how the bread expands while adding visual appeal. Additionally, the crust browns more evenly on all sides, enhancing the overall flavor and texture of the bread. To keep your baking sheet in top condition after use, you can clean it by following step-by-step methods that lift baked-on residue without damaging the surface. For best results, using a hand mixer with dough hooks simplifies the initial mixing process. A stand mixer attachment can also knead the dough efficiently for consistent results.
This method also reduces the need for specialized baking equipment. Instead of relying on a loaf pan, you simply shape your dough and place it directly on a baking sheet. This approach makes storage easier and lowers the entry barrier for baking at home. With fewer tools to worry about, you can focus more on technique and enjoy a bakery-quality loaf without the clutter.

SET OF 3 BAKING SHEETS: GoodCook’s Nonstick Cookie Sheet Set comes with a small 13” x 9”, medium 15” x 10” and large 17” x 11” baking sheet to provide the perfect options for any of your baking needs.
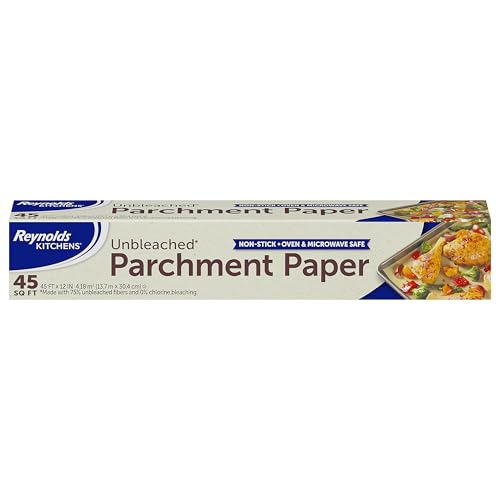
Package Includes: One (1) Reynolds Kitchens Unbleached Parchment Paper Roll measuring 45 feet long by 12 inches wide (45 square feet total)
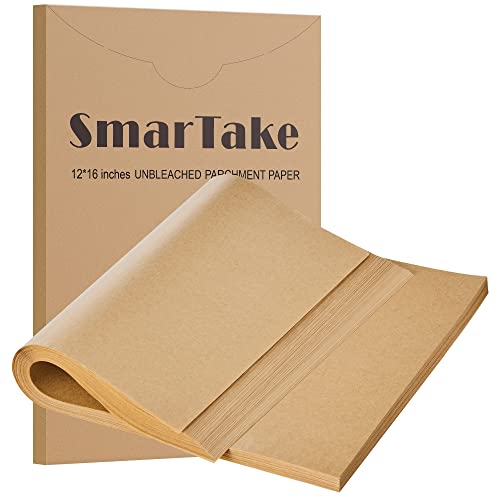
Pre-cut Baking Parchment Paper Sheets: Are you tired of cutting curly parchment paper? Our pre-cut parchment sheets can let you get rid of cutting parchment anymore. The sheets lay flat on the baking tray and will not curl
What to Use Instead: Parchment, Skillets, and Dutch Ovens
If you bake bread without a loaf pan, you can use parchment paper, a cast-iron skillet, or a Dutch oven to shape and support your loaf. Parchment acts as a sling, making it easy to transfer your dough and preventing sticking—especially with high hydration doughs—when dusted with rice flour. A pre-cut piece of parchment that extends beyond the loaf can help lift it out without trouble. You can apply this same concept by cutting the parchment into a triangle and rolling it into a homemade piping cone for filling pastries with ease.
A preheated cast-iron skillet can substitute for a loaf pan for free-form loaves. Heating the skillet before baking improves oven spring and crust development because the hot surface promotes even expansion. You can cover the skillet with foil to trap steam, replicating the baking environment of a Dutch oven. A dough hook can help you mix a stiff dough without overworking your hands.
A Dutch oven offers the best steam trapping when properly preheated. To use it, heat the Dutch oven in the oven at 450°F for 30 to 45 minutes. Once heated, carefully place your dough inside, then bake covered for 20 to 30 minutes. Removing the lid for the remaining time allows the crust to brown. Always handle hot cast iron with care and trim parchment to prevent it from blocking the lid opening. For Bundt-style baking, a precise oven spring and crust can be achieved with proper steam retention similar to a Dutch oven.

Homemade Favorites: The Lodge Seasoned Cast Iron Baker’s Skillet is designed for rolls, cobblers, breads, and everyday recipes fresh from the oven

Even Heat for Better Rise: The Lodge Seasoned Cast Iron Loaf Pan provides even heat distribution that helps breads and cakes rise well while baking evenly

Shape Your Dough for No-Pan Success
Since you’re not using a loaf pan, shaping your dough correctly is essential for a tall, well-structured loaf. Start with a pre-shape: divide your dough into equal portions, then pull the edges underneath to create surface tension. Keep the shape compact, as the dough’s hydration level will influence how tight you can make it. Patience in shaping helps prevent splitting during baking. For additional guidance, you can refer to an ultimate piping tips chart for inspiration on decorative finishing techniques. If you prefer a round loaf, a springform pan can provide structure without needing a traditional loaf pan. To keep your baking surface in top condition, it helps to clean your baking sheet after each use to prevent residue buildup.
Allow the pre-shaped dough to rest for 10 to 15 minutes, covered, to relax the gluten before the final shaping process. For a batard, flatten the dough smooth side down, fold the far side toward the center, tuck the corners underneath, and then roll into a log shape. For a boule, use both hands to pull the sides of the dough under, rotating it until the surface feels tight and smooth.
These shaping techniques direct the dough to rise upward rather than outward, simulating the support normally provided by a loaf pan. Proper shaping is crucial because it encourages a tall, airy crumb and ensures your loaf holds its structure during baking.
Choose Your Baking Surface: Sheet Pan vs. Cast Iron
Choosing cast iron over a sheet pan results in a darker, crispier bottom crust and more stable oven temperature. A preheated cast-iron skillet traps heat more effectively than a thin sheet pan, giving you stronger bottom heat and better crust control. However, it is heavier to handle. If you prefer ease and flexibility, a sheet pan is the simpler choice — it offers a quick start with less friction. Use cast iron when you want more precise crust development and consistent heat, while sheet pans are ideal for effortless baking. Alternatively, a Silpat non-stick silicone mat can be placed on a sheet pan to provide even heat distribution and promote consistent browning without needing grease. For best results, ensure your oven temperature remains steady throughout baking, as consistent heat is crucial for achieving professional-quality crust and texture, similar to the performance found in top-rated stand mixers. Proper lubrication of moving parts, such as with food-grade grease, is essential for maintaining kitchen equipment over time. After baking, you can clean any residue from the piping bag used to apply toppings by soaking it in warm soapy water to lift baked-on grease.

Secure Dual Assist Handle: The Lodge Seasoned Cast Iron Dual Handle Pan features dual assist handles for a secure grip when moving this cast iron skillet

PREMIUM MATERIAL: This Cast iron dutch oven made of high-quality cast iron core, coated with food grade enamel coating; Durable and sturdy structure, the cast iron core achieves even heat distribution, maximizing the preservation of the original nutrition and taste of the food

Proof Your No-Pan Loaf for Better Structure
Final proofing is crucial for your no-pan loaf because it allows the dough to rebuild the gas structure lost during shaping, creating a light and airy crumb. During this stage, you want a taut outer skin, formed through gentle shaping, to support the loaf’s structure and prevent sideways spreading. Proper gluten development, aided by the dough’s hydration level, is essential in creating this surface tension. Handle the dough gently at this point to avoid deflating the built-up gas. Choosing the right tea loaf pan can provide similar structural support for standard baked loaves, but for a free-form loaf, using a stainless steel proofing basket offers superior durability and non-reactive support. Use a proofing basket or a lined bowl to support the loaf’s height and shape. Cover it loosely to prevent the surface from drying out, as a dry skin can hinder expansion during proofing. To determine if your loaf is ready, rely on feel rather than just time. Perform the finger dent test: gently press the dough; a slow-filling dimple indicates proper proofing. If the dough springs back quickly, it is underproofed; if it collapses, it is overproofed. A perfectly proofed loaf feels airy and jiggly but still holds its shape, signaling it’s ready for the oven. For doughs mixed in a stand mixer, achieving proper gluten development often requires adjusting the mixer’s speed to build the surface tension needed for free-form shaping.
Score Your Bread to Control Expansion
Scoring your loaf immediately before baking is essential for controlling where it opens during oven spring. By making precise cuts, you guide the expansion to desired areas, creating a more attractive and consistent bread. Use a lame—a razor blade on a handle—because it makes the job safer and easier. Always ensure the blade is very sharp; a dull blade tears the dough instead of slicing cleanly, which can compromise oven spring. Cut about 3 to 6 millimeters deep at a 30 to 45 degree angle. This angle causes the dough to open outward rather than along the sides or bottom. You can experiment with different scoring shapes, such as a single slash, cross, or leaf pattern, each directing expansion uniquely. Chilling the dough beforehand firms it up, helping the blade glide smoothly without dragging. Score your loaf right before baking to keep the gas trapped inside, allowing the bread to bloom precisely where you want it. After baking, always transfer your loaf to a cooling rack to prevent a soggy bottom and maintain a crisp crust. Proper scoring ensures controlled expansion during oven spring, preventing uncontrolled splitting and promoting a desirable shape. For consistent, clean cuts every time, consider using a dough hook attachment on your stand mixer to develop the gluten evenly before shaping, which makes the dough’s surface tauter and easier to score. Using a precise food scale to weigh your ingredients ensures consistent hydration levels, which directly affects how cleanly the dough scores and rises.
Bake at the Right Temperature for Your Surface
Preheat your baking surface for at least 30 to 60 minutes at 450–500°F to ensure optimal oven spring. A hot surface, whether a baking stone, steel, or Dutch oven, stores heat that transfers quickly into the dough, helping it rise properly. Without this preheating, the crust can set too early, restricting expansion and resulting in a flatter loaf. Using precise measuring spoons ensures your ingredients are accurately portioned for consistent dough hydration and structure. For consistent results, a commercial mixer provides the power needed to handle stiff artisan doughs without overheating.
Match your oven temperature to your baking surface. Use 475–500°F with the lid on for a Dutch oven to create a steaming environment. For stones or steels, set the oven to 450–500°F, often lowering to 450°F after loading to prevent overbrowning or scorching. Keep in mind that lean artisan breads generally require higher heat than enriched doughs. Starting with high heat is crucial—it drives the initial oven spring in the first 20 minutes. After that, reduce the temperature to 425–450°F to control browning and avoid burning the bottom crust.
How to Tell When Your No-Pan Loaf Is Done
To tell when your no-pan loaf is fully baked, rely on multiple cues for accurate results. First, tap its bottom: a hollow, drum-like sound indicates doneness, while a muffled thud suggests it needs more baking. For precise measurement, use an instant-read thermometer; lean breads typically reach 200–210°F, while enriched breads are done at 190–200°F. Examine the crust color; a deep golden-brown with a firm surface indicates moisture loss and proper baking, whereas a paler crust suggests it needs more time. The loaf should feel set and stable, not soft or slumped. Combining sound tests with temperature readings is ideal for crusty artisan loaves, while temperature alone can suffice for softer, enriched varieties. Avoid judging by early browning alone—always verify internal temperature first. Keep in mind that different flavor variations may influence the optimal internal temperature, so adjust accordingly. Once all tests confirm doneness, allow the loaf to cool fully before storing to preserve the crust crispness and crumb quality.
Avoid These 5 Mistakes That Wreck a Pan-Free Loaf
Knowing your loaf is done isn’t enough—you also need to shape, proof, and support it properly. Weak shaping destroys surface tension, leading to a flat or misshapen loaf. To avoid this, pinch seams tight and fold the dough multiple times to create a smooth, even surface. Underproofing is another common mistake; it results in a dense, tight crumb. Instead, judge readiness by how the dough springs back when lightly pressed, not by the clock.
Overproofing weakens the dough’s ability to hold gas, which can cause the loaf to collapse or turn out flat. Watch for the dough to slightly expand and pass the “poke test” without collapsing. Ingredient substitutions that increase hydration can compromise structure unless you support the dough properly. Wet dough benefits from being proofed in a banneton basket to help maintain its shape, rather than adding extra flour which can toughen the crust.
Finally, skipping scoring or making shallow, uneven cuts can lead to random splitting or lopsided rises. Proper scoring directs the expansion, helping the loaf rise evenly and preventing uncontrolled cracks. Focus on tight shaping, accurate proofing, and adequate support, and you’ll prevent pan-free baking failures.

SPLINTER-FREE, SMOOTH AND NON-STICK: Carefully crafted to always expose smooth surface. With sufficient dusting, dough will easily stay in shape as well as slipping out smoothly onto baking surface.
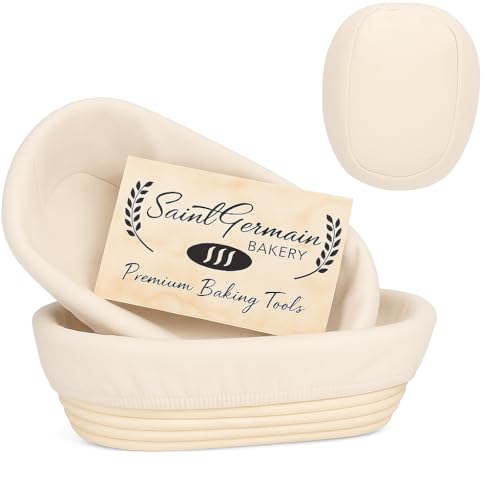
"EXCELLENT CRAFTSMANSHIP: Beautiful handmade using natural rattan, absolutely free from dye and free from chemicals. Made with love and care by a small family business in Vietnam."

BREATHABLE & FRESH-KEEPING DESIGN: These bread proofing baskets are made of high quality cotton that allows airflow to carry away excess moisture, helping to maintain a fresh environment for perfect bread-proof results. These sourdough proof baskets are free of debris and easy to keep clean
Cool on a Wire Rack for a Better Crumb
Once your loaf comes out of the oven, transfer it to a wire rack immediately once it’s cool enough to handle. This prevents trapped steam beneath the bread, which can make the bottom crust soggy. An open wire rack allows air to circulate around the loaf, speeding up moisture escape and promoting an even, crispy crust.
Avoid covering the bread; leaving it uncovered during cooling keeps the crust crisp and prevents moisture buildup. The cooling process allows internal steam to redistribute and the starch structure to solidify. Cutting into the bread too early risks a gummy interior. Most loaves need about three hours on the rack to cool completely. Larger or denser loaves, especially those with unique flours or flavor additions, may require longer, sometimes overnight, to cool fully.
Always wait until the loaf is fully cool to the touch before slicing. This extra patience results in a cleaner crumb and better texture. Trust the cooling process, and your pan-free loaf will reward you with perfect results.