

Wondering how to fine-tune your KitchenAid stand mixer so it works perfectly? Adjusting the beater or bowl height is the key to smooth mixing and avoiding splatters.
With just a few simple steps, you can get your mixer running at the ideal height. Keep reading to learn how to make these quick adjustments safely and effectively.
How to Tell if the Beater Height Is Off (The Dime Test)
To check if the beater height is correct using the dime test, place a dime in the center of the bowl. Attach the flat beater and run the mixer on the lowest stir speed. Observe the dime’s movement to assess your beater alignment. Proper clearance means the dime moves in a slow, steady circle, advancing about a quarter inch with each pass. If the dime doesn’t move at all, your beater is too high, leaving ingredients at the bottom unincorporated. If the dime races around quickly, the beater is too low and may scrape the bowl, reducing efficiency and potentially damaging the beater. Adjust the beater height slightly upward or downward until the dime moves smoothly in a controlled, slow circle. The ideal setting allows the beater to nearly reach the bowl’s bottom without scraping, ensuring thorough mixing and preventing unblended ingredients. For precise results, you may also consider using a quality food scale to verify ingredient portions for consistent baking outcomes. This adjustment process helps maintain consistent baking results by verifying beater height accuracy for optimal performance. For even baking with thin batters, a half sheet pan can provide reliable heat distribution and prevent batch-to-batch variation. For those using other brands, similar adjustment methods apply to ensure Hamilton Beach stand mixer attachments fit correctly and improve mixing efficiency.

Designed, engineered, and tested by KitchenAid
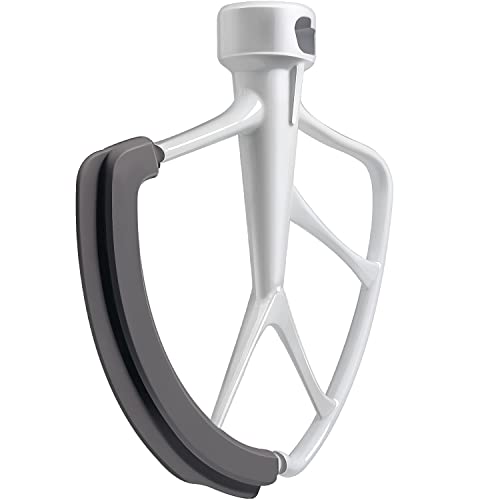
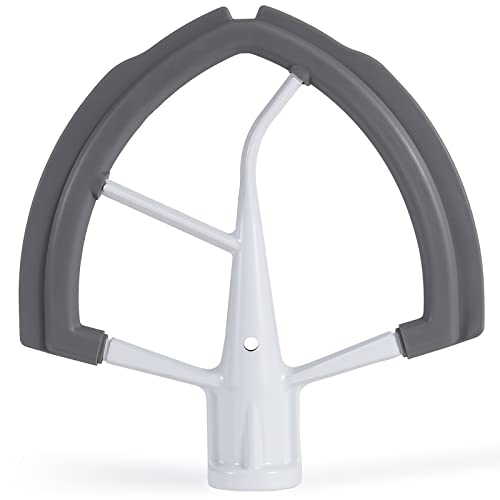
Your Best Flex Edge Beater: Continuously beats, scrapes and mixes ingredients inside mixing bowl including side & bottom. With flexible edge, you can thoroughly scrape ingredients into the bowl. No more scraping the bowl.

Durable Stainless Steel - This paddle attachment for kitchenaid mixer made from 100% food-grade stainless steel, no coating to chip or wear off. Say goodbye to paint flakes in your food!
Safety First: Unplug Before You Adjust
Unplug the mixer completely before making any mechanical adjustments. Relying solely on turning off the speed control is not enough; always isolate the power by unplugging it from the outlet. Firmly grasp the plug and pull it straight out of the grounded three-prong socket to ensure there’s no electrical contact. Using an adapter or extension cord that bypasses grounding can increase shock risk and should be avoided. Similarly, placing a pizza directly on an oven rack disregards the manufacturer’s warnings about heat and material limits, which can damage the appliance. For those storing the mixer in a cabinet, a stand mixer lift can provide safe and convenient access to the appliance.
These precautions are essential to prevent the mixer from starting unexpectedly while you’re working on the beaters, bowl, or attachment hub. Confirm visually that the plug is fully removed before handling any parts. Keep your workspace dry and stable to reduce hazards. After completing your adjustments and ensuring all parts are secure, you can reconnect the power. Until you do, treat the mixer as if it might turn on, emphasizing safety over convenience. Once the mixer is safely disconnected, you can explore top attachments for your specific baking needs.
How to Adjust a Tilt-Head KitchenAid Mixer
To adjust a tilt-head KitchenAid mixer, locate the adjustment screw in the hinge area where the head meets the base. Turn the screw slightly counterclockwise to raise the beater or clockwise to lower it—only make quarter-turn adjustments. The goal is for the flat beater to just clear the surface of the bowl without scraping. Perform a dime test by placing a dime in the bowl, running the mixer on low, and observing the movement. If the beater moves too much or not enough, adjust accordingly. Avoid overadjusting to prevent the head from not locking properly. Always clean the mixer before making adjustments to remove debris that could interfere, as baked-on residue can prevent the screw from turning smoothly. Use a flathead screwdriver for accessing the screw in tight spaces under the head. If issues persist, check for wear on spare parts and make small turns, then recheck the beater height. For those without a rolling pin, using a flat beater can help achieve similar results when pressing dough. For intricate cake decorations, choosing the right piping tips ensures your mixer’s attachments are used consistently with your design goals.

Designed for Stand Mixers - The kit includes the exact screw pattern for vertical mixer construction, simplifying gear removal and greasing, reducing downtime by eliminating the need for additional tools for quick oiling and maintenance.
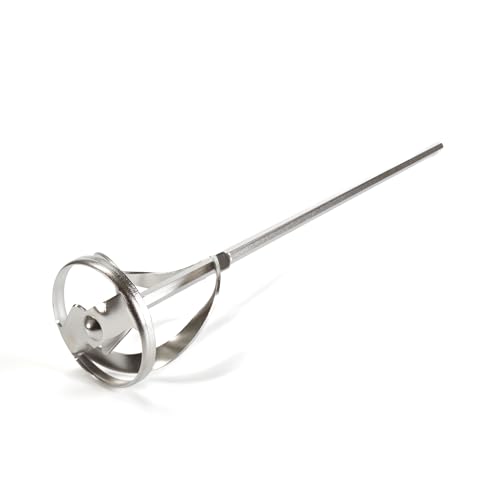
Food grade safe stainless steel - only use stainless steel for food or drink

STRENGTH AND DURABILITY: Made of heat-treated alloy steel
How to Adjust a Bowl-Lift KitchenAid Mixer
To adjust a bowl-lift KitchenAid mixer, start by unplugging it and lowering the bowl to its down position. Attach the flat beater to ensure proper clearance. Next, lock the bowl onto its locating pins. Locate the adjustment screw behind the bowl area, between the locking arms. Turn this screw counterclockwise to raise the bowl, which reduces the gap between the beater and the bowl. Turn it clockwise to lower the bowl, increasing the gap. Make only quarter-turn adjustments at a time, as the full range of movement is about 180 degrees. Over-adjusting can cause the beater to strike the bowl, potentially damaging your mixer or affecting its performance. For best results, use a tube cake pan that offers even heat distribution for consistent baking outcomes. For a crisp pizza crust, consider using one of the top baking sheets reviewed online. When baking, selecting the proper pot holder ensures you can safely handle hot bakeware without burning your hands.
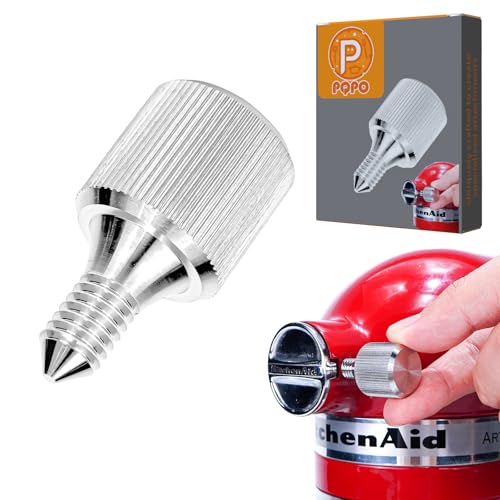
PQPO Fixing Attachment Screw - Mixer attachment knob part compatible with Kitchen Aid bowl-lift/tilt-head stand mixers.

Are you still worried about your mixer not being able to touch the paddle to the bottom of the bowl when mixing a small amount of food, are you still suffering from the inability to whip an egg or a small amount of egg and the inability of the ingredients to be mixed well, our products can effectively solve these kinds of problems for you

Dimensions: you will receive 1 package of appliance blender lift block platforms measuring 13 1/2" wide x 18" long x 1 1/2" high; This standardized size ensures compatibility with most appliance lift mechanisms; Balanced proportions provide stable support; Note: lift mechanism not included
How Small a Turn Adjusts Your KitchenAid Mixer
A quarter turn is typically all you need to adjust a KitchenAid mixer because the screw’s full range is only about 180 degrees. Turning counterclockwise raises the beater, while clockwise lowers it. This small adjustment allows for precise clearance without risking contact issues, which can happen if you turn too much at once. Using just a quarter turn ensures you fine-tune the beater height effectively, especially for tasks that require accurate mixing, like ingredient substitution. After each adjustment, check the clearance by testing the beater with a dime— it should pass through about a quarter inch away from the beater as it rotates. Make sure to recheck after every small turn to avoid over-adjustment. This gentle calibration method keeps your mixer functioning smoothly and prevents residue buildup caused by improper beater contact during cleaning. Always perform the dime test before making any adjustments to confirm the current clearance is actually off. For effective calibration, knowing the standard sheet cake pan dimensions helps when mixing large batches to ensure even ingredient distribution. Many home bakers save money by crafting DIY piping tips from common materials instead of buying new ones. Regular cleaning of the beater and bowl with baking soda paste will also help prevent residue that can affect height readings.

Reduces mixing time when used on your KitchenAid 4. 5 and 5 quart tilt-head stand mixer
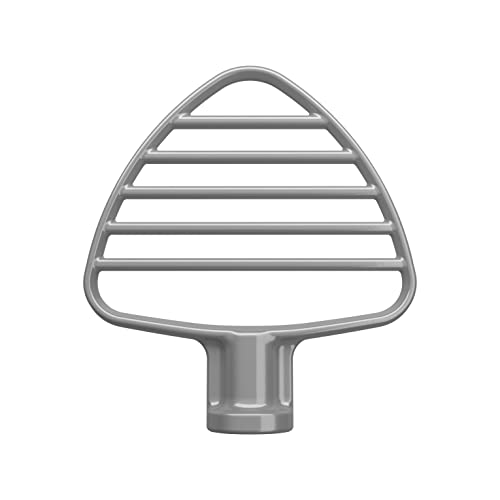
Fits all 4.5 and 5 Quart KitchenAid Tilt Head Stand Mixers, sold separately
Kitchenaid professional 5 plus accessories - ⚠️Only for Professional 5-Plus: KV25G0X, KV25G8X, KV25H0X *Suitable mixing bowl size: 9.8" diameter, 7" depth, (Plesae measures the size that needs to be confirmed before purchasing)⚠️This mixing whisk blade is not for Costco, Sams club mixers, tulip shaped bowl (KSM657), not for 5 QT hand mixers.
How to Confirm Your KitchenAid Mixer Clearance
Unplug your mixer for safety before making any adjustments. Attach only the flat beater and a clean bowl, avoiding other attachments. Place a dime in the bowl as your gauge. For tilt-head models, lock the head down; for bowl-lift models, ensure the handle is in the up position. Run the mixer on the “Stir” speed and observe the dime. If the beater just clears the dime with about a quarter to half an inch of movement per pass, the clearance is correct. If the dime stays stationary, the beater is too high; if it spins continuously with no clearance, it’s too low. A dime pushed up against the bowl indicates tight clearance. Adjust the screw at the hinge or bowl support with small turns—counterclockwise to raise, clockwise to lower. From household knowledge, you can also gauge a 3/4 cup volume using a dime as a rough reference for small measurements. Repeat this process, testing after each adjustment, until the beater just clears the bowl without scraping. For cutting a piping bag without a nozzle, you can use scissors for clean cuts instead of a knife to achieve a similar precise opening. For achieving even heat distribution in your oven, a roasting rack similarly ensures proper clearance for consistent cooking results.

Built to take it all on with the durable and built-to-last metal construction, and 59 touchpoints around the mixer bowl for great mixing results.

#1 MIXER BRAND IN THE WORLD* *Source: Euromonitor International Ltd. for retail sales revenue, USD, all retail channels. More information, including date ranges available at: mixerclaim.kitchenaid.com

Pouring Chute makes ingredients go where you want them: into the stand mixer bowl, not on the counter; compatible with most KitchenAid, Cuisinart, Kenwood & SMEG stand mixers with metal mixing bowls
Still Scraping? What to Do Next
If scraping persists after you’ve adjusted the beater clearance, start by rechecking the gap with the dime test using only the flat beater. Make tiny adjustments—about 1/8 to 1/4 turn—with a flathead screwdriver, then retest. The goal is for the dime to barely shift when touched; if it spins easily, the beater sits too low. To avoid over-adjusting, make small changes and check frequently. For a stuck Bundt cake, gentle pan tapping can help release it without damaging the cake.
Next, inspect your attachment. A worn or bent beater, especially if it’s coated or stainless steel, can cause false scraping. Swap it out for a standard flat beater to rule out attachment issues before changing the clearance. Also, ensure your bowl is fully seated—bowl-lift models require locked pins. A loose bowl fit can change the gap and lead to scraping.
After each adjustment, confirm results with the dime test. It should move slightly but not spin freely. Repeat this process until the dime barely shifts without spinning. Additionally, regularly inspect attachments for wear, as even new parts can cause scraping if damaged. Keep in mind that one or two scrapes during mixing are normal; persistent scraping despite proper clearance points to issues with the attachment or bowl rather than the beater gap itself. Black cooking gloves are a popular choice for heat resistance when handling hot bowls or attachments during adjustments.
When to Call for Professional KitchenAid Service
If your KitchenAid mixer still won’t turn on after troubleshooting electrical issues—checking the outlet, resetting the breaker, and waiting at least 30 minutes—then it’s time to seek professional service. Persistent failure to power on suggests internal problems, such as a faulty motor or damaged wiring that require expert diagnosis and repair.
Additionally, if you notice ongoing mechanical problems like the beater turning poorly or hearing clicking or grinding sounds even after rechecking the attachment fit, a mechanical inspection is necessary. These issues often indicate internal wear or motor failure that can’t be fixed through simple adjustments.
Warning signs like recurring overheating, a burning smell, or oil leakage also signal that the mixer needs professional attention. If you observe visible damage or damaged cords, stop using the appliance immediately and contact an authorized service center with your model number. Never continue using the mixer under these conditions—schedule repair to avoid further damage or safety hazards.