

If you’re wondering how to get the best results from your silicone baking mat, you’re not alone. It’s easy to want your baked goods to turn out perfectly, but knowing the right steps makes all the difference.
When used correctly, a silicone mat can be a game-changer for even baking and easy cleanup. The tips below will help you get the most out of your mat every time.
Why Your Silicone Baking Mat Must Be Clean and Dry
Your silicone baking mat must be thoroughly clean and dry before each use to maintain its nonstick effectiveness. Residues of oil, butter, batter, or leftover detergent create sticky spots that cause baked goods to stick and can alter flavors. A proper wash with mild soap and thorough rinsing helps remove all residue and prevent flavor transfer. After washing, dry the mat completely to avoid uneven baking. Moisture left on the surface can lead to shifting during baking, cause mold growth, and produce musty odors. For storage, let the mat air-dry fully on a rack, then store it flat or rolled. Never fold a damp mat, as trapped moisture in creases can damage its surface and compromise its nonstick qualities. Using a high-quality springform pan can help prevent leaks and ensure even baking for delicate desserts like cheesecake. Baked-on residue lifts more easily when you soak the mat in warm, soapy water before scrubbing. Proper cleaning and drying extend the life of your silicone baking mat, keeping it reliable and hygienic for every batch. For best results, consider pairing your mat with top-rated attachments for your stand mixer to streamline your baking process.
How to Place a Silicone Baking Mat Correctly on Your Sheet
To place your silicone baking mat correctly on your sheet, start by ensuring it is clean and dry. Match the mat’s dimensions exactly to your baking sheet—whether it’s a quarter, half, or full sheet. A snug fit prevents overhang, which can cause the edges to curl and affect your cookies near the rim. If the mat is too small, you won’t utilize the full baking surface effectively. Measuring spoons are also essential tools for accurately portioning ingredients before baking. Center the mat flat inside the rimmed baking sheet for accurate placement. For heavy-duty results, a commercial mixer can handle large dough batches that might overwhelm standard appliances. Keep it smooth, with no wrinkles or folds, to ensure even heat transfer. The entire mat must sit completely within the sheet’s edges—avoid any part hanging off. Using a flat, sturdy metal sheet provides the necessary support, keeping the mat stable and preventing shifting during baking. Glass loaf pans are not recommended for sourdough, as they can shatter under high oven temperatures. Before adding dough, double-check that the mat is level. Proper placement guarantees even heat distribution, resulting in consistent baking and reliable results.
Silicone Baking Mat Temperature Limits You Should Never Ignore
Most standard silicone baking mats max out around 450°F, with premium options handling up to 500°F. Exceeding these limits can degrade the material, reducing flexibility and nonstick performance. Pushing a mat beyond its rated temperature—such as into broiler territory or above 450°F—will shorten its lifespan or cause it to fail entirely. Always check the printed temperature limit on your specific mat, as generic claims can be misleading. For high-heat tasks like roasting, verify the rating beforehand, and it’s safest to stay at or below 425°F to prevent damage. Maintaining this temperature range helps preserve your mat’s integrity and performance over time. Similarly, most plastic measuring cups are not considered microwave safe above 212°F and will warp or leach chemicals if exposed to high heat. For bundt cakes, using a properly rated nonstick pan ensures even heat distribution and easier release, just as a silicone mat does for baking sheets. A top rated food scale can also help ensure precise ingredient measurements for consistent baking results.

Best German Silicone: We attach great importance to the health of our customers. Therefore, we use the best German WACKER silicone as the raw material in the industry. Food Grade, BPA Free, PFOA Free, Non-toxic. NOT made in Germany.
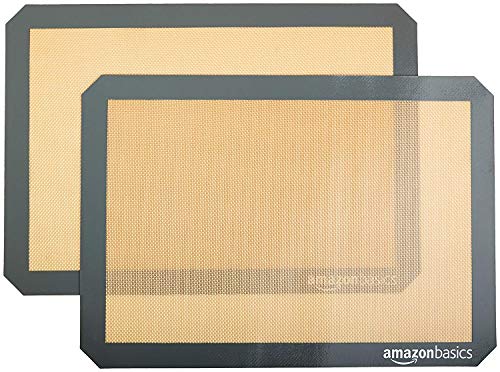
Baking mat (2-pack) for easy and convenient baking, roasting, or food prep

MULTI-PURPOSE SET:3 packs Silicone Baking Mats, 2 pack of half-sheet size mats (11 5/8" x 16 1/2") & 1 pack of quarter-sheet size cooking mats (11 1/2" x 8 1/2"). Let the food heat evenly, without uneven browning, no residual odor
Baking on Silicone: Why Your Cookies Need More Space
Your cookies need at least two inches of space between each dough portion on a silicone baking mat. This gap allows for the dough’s natural expansion, which tends to spread more on silicone than on parchment or bare metal. Leaving ample space prevents cookies from merging into one large, shapeless mass. The extra room also lets heat circulate better around each cookie, promoting even baking and helping them maintain their intended shape. Use the printed guides on your silicone mat to ensure consistent spacing; this makes managing dough expansion easier and results in uniformly baked cookies every time. The mat’s fiberglass mesh and food-grade silicone construction ensures consistent heat distribution for even browning. For precise portioning and prep, stainless steel bowls offer excellent durability and a non-reactive surface that pairs well with silicone tools.

Premium Silicone Bakig Mat: Our kitchen baking mat is crafted with 100% food grade silicone. With 0.7mm thickness reinforced design (2x thicker than standard 0.3mm mats) can withstand daily kneading sourdough, rolling pizza dough, and shaping sticky fondant without warping or degradation

Precision Baking with Circle Guides: Built-in printed circles help you space macarons, cookies, or candies evenly. Say goodbye to uneven sizes — great for beginners and pro pastry lovers.
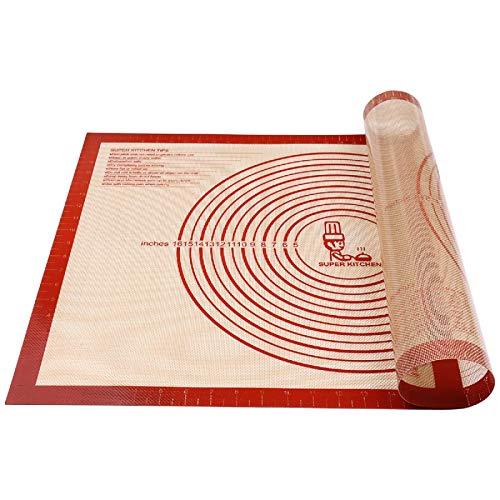
Premium Safe Silicone:We attach great importance to the health of our customers.So we offer the premium food grade silicone to pretect your safe.
Clean Your Mat Without Damaging It (No Scrubbers Needed)
To clean your silicone baking mat without damaging it, start by allowing the mat to cool completely. Wipe off crumbs and grease using a soft cloth or sponge with gentle pressure to avoid harming the delicate nonstick surface. Make sure to clean both sides of the mat, as oils transfer during baking and can cause buildup. Unlike a flat beater for KitchenAid, your mat requires no metal tools for cleaning.
For routine cleaning, wash the mat with warm water and a few drops of mild dish soap, using a soft sponge or cloth. When dealing with stubborn spots, soak the area briefly in warm water and then gently circle a microfiber cloth, delicate scrub pad, or soft-bristle brush over the stains. Avoid using abrasive scrubbers like steel wool or scouring powders, which can scratch the surface. Rinse thoroughly to ensure no soap residue remains, helping keep the surface smooth and stain-free for years of use. Using the proper fats and liners prevents sticking and ensures even baking results.

Easy Cleanup: The surface helps reduce baked-on residue, and the mats can go in the dishwasher once cool for convenient cleanup between batches

EXTRA THICK FOR DURABLE BAKING: Made of 100% food-grade silicone, the thickness is upgraded to 0.7 mm; this rolling mat resists tearing during heavy dough kneading, providing home bakers with a reliable workspace for sourdough and bread making

PERFECT NON-STICK RELEASE: Our non-stick surface prevents sticking to hot Dutch ovens, preserving loaf shape and crust; the bread sling won't stick to dough for clean, frustration-free release
Store Flat or Rolled: 3 Steps to Prevent Creases and Cracks
To prevent creases and cracks, store your silicone baking mat either flat or loosely rolled. The best method is flat storage: place the mat in a drawer or on a shelf where it lies evenly. This prevents heavy items from pressing down and creating compression marks, helping to keep its shape intact. If space is limited, you can roll the mat loosely, not tightly, to minimize stress on the silicone. Secure the roll with a soft band or place it inside a tube to maintain its shape. For a durable and long-lasting option, stainless steel bowls are often recommended for mixing batters and doughs. Avoid folding, creasing, or crushing the mat, as these actions can lead to permanent wrinkles and weaken the material. Ensure the mat is completely dry before storing—wipe away any residue and air-dry it fully. Protect the mat from pressure, heat, and sharp contact to maximize its flexibility and lifespan. Unlike a baking sheet used as a griddle, a silicone mat should never be exposed to direct stovetop heat as it can cause damage or fire. For the best results, consider pairing your mat with top measuring cups that offer quality and value for consistent baking measurements.
7 Mistakes That Wreck Your Silicone Mat (and How to Avoid Them)
Avoid using steel wool or abrasive scouring pads to clean your silicone mat. These tools can scratch the surface, damaging its nonstick coating and shortening its lifespan. Instead, opt for soft sponges or cloths that clean effectively without harming the material. Never cut food directly on the silicone mat, as knives can pierce the surface and expose underlying fiberglass layers. This exposure makes the mat harder to clean and may compromise its durability. Keep the mat away from high heat sources like broilers or open flames, since excessive heat can cause caramelized sugar to stick aggressively or damage the silicone. Stick to hand washing with mild soap and fully drying the mat afterward, as dishwasher use or residual moisture can accelerate wear. Avoid folding or stacking heavy objects on top, which can create creases or pressure marks that weaken the material over time. Finally, steer clear of harsh detergents or bleach; these chemicals can trigger reactions that lead to discoloration, tackiness, or surface degradation. Gentle cleaning and proper handling will keep your silicone mat in top shape longer. For baked-on residue, a paste of baking soda can lift stubborn spots when gently rubbed with a soft sponge.

Perfect Fit for Half Sheet Pans: Sized at 16.54" x 11.62", these reusable silicone baking mats fit all standard half sheet trays. Ideal for baking cookies, bread, pastries, or roasting vegetables — no parchment paper or foil needed.

2 Half (16.53 x 11.61 inches) & 2 Quarter sheet (11.81'' x 8.26'')Silicone Baking Mats, perfect for keeping different recipes separate—no more mixing flavors
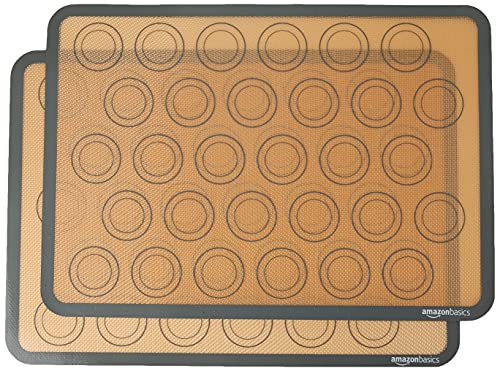
Baking mat (2-pack) with macaron cookie template (includes guidelines for 30 macaron halves per sheet)
When Should You Replace Your Silicone Baking Mat?
You should replace your silicone baking mat when you notice visible damage such as cracks, cuts, fraying edges, or exposed fiberglass mesh. If you see white fibers, it’s a sign to retire the mat immediately. A decline in performance, like sticking, uneven browning, or a tacky surface, indicates the silicone has degraded and the mat no longer functions properly.
Strong chemical odors or permanent warping are also safety concerns that warrant immediate replacement. Even if the mat appears intact, if its nonstick ability weakens, or it no longer lies flat or traps food in damaged areas, it’s time for a new one. Don’t wait for complete failure—prolonged use of a compromised mat can affect your baking results and safety.

【Healthy & Reusable】Our baking mats are made of food grade silicone and added fiberglass mesh exhibits excellent characteristic of flexibility, Without any harmful substance, Heat resistant and would not releasing any chemicals at any temperature, Holds up well after repeated use and doesn't warp or damage easily, Making it a cost-effective, Reusable and sturdy for long time use, A good replacement for single-use parchment paper or aluminum foil

Baking mat (4-pack) for easy and convenient baking, roasting, or food prep
One Secret to Flawless Nonstick Release
The key to flawless nonstick release is maintaining a clean, dry surface with zero added grease. You do not need to use oil, spray, or flour—skip them completely. Unlike cooking with parchment paper, you won’t grease the silicone mat. Doing so preserves the silicone’s intended nonstick properties and prevents residue buildup that can impair release over time. This mat is heat resistant up to 480°F, making it safe for standard oven temperatures. For sourdough starter maintenance, many bakers recommend using a reliable kitchen scale to ensure precise hydration ratios when feeding your starter. When used with a roasting pan, this mat works best alongside a sturdy roasting rack to elevate meat for even air circulation and browning. Choosing a top silicone baking mat can further enhance your baking results by providing superior durability and consistent performance across all recipes.
Place the mat flat on a sturdy baking sheet, with the smooth side facing up. Bake on the center rack at the temperature specified in your recipe. Allow your baked items to cool for 2 to 5 minutes before lifting; delicate items like macarons may require full cooling before removal.
Avoid using metal utensils on the silicone mat, as they can cut or damage the silicone layer and expose the fiberglass core beneath. Keeping the mat clean and grease-free ensures you get perfect release every time, with minimal sticking or tearing.