

If you’ve ever wondered how to create practical, homemade pot holders on a loom, you’re in the right place. With just a simple setup and some basic weaving techniques, you can craft durable quilted-like pads perfect for kitchen use.
By the end of this guide, you’ll know how to set up your loom and work through the steps needed to make your own cozy, heat-resistant pot holders.
Essential Tools and Materials for a Potholder Loom
You need a sturdy loom, typically a 7-inch metal or wood frame with pegs, to get started. A standard beginner kit usually includes enough cotton loops for two potholders and illustrated instructions to guide you through the process. Don’t forget a weaving hook, which is essential for pulling loops through the pegs, and a crochet hook or finishing hook to handle edge binding. Consider alternative loom sizes such as larger 10-inch frames if you plan to create bigger projects. You can also explore decorative loop options like nylon or cotton-blend loops for varied textures. Scissors and a tapestry needle are useful for tidying loose ends and finishing your potholder neatly. Match your loop count to your loom size: an 18-by-18 loop square creates a 6-inch potholder, while a 27-by-27 loop set yields an 8-inch piece. Always plan your materials carefully before starting to ensure the best results. Unlike an angel food cake pan, which has a central tube and a removable bottom, a potholder loom uses a flat peg frame. For precise material selection, check a review of measuring cups to ensure accurate loop counts for consistent potholder dimensions.

Classic Potholder Weaving Kit: Create colorful handmade potholders with this traditional potholder loom kit. The 7"" x 7"" metal loom allows you to weave two functional 6"" x 6"" cotton potholders perfect for everyday kitchen use, fiber craft projects, and handmade gifts.


This classic potholder weaving kit teaches how to weave handmade taditional potholders using the sturdy metal loom.
Set Up Your Potholder Loom the Right Way
To set up your potholder loom correctly, start by placing it on a stable, level surface where all pegs are clearly visible for proper alignment. Ensure the frame isn’t twisted, as proper handling of the material prevents problems during weaving. Keep your work area clear of clutter and hazards to avoid snags. Arrange your loops in a planned color sequence, working from left to right or top to bottom for consistency. Stretch each loop snugly onto the pegs but avoid overpulling, since even tension helps produce a balanced stitch. Use stretchy loops to create the foundation for the potholder, as their elasticity ensures a secure base. Cover every active peg with a loop, matching each one to its corresponding opposite side for a strong foundation. Make sure all loops are sitting parallel and no pegs are left empty. Before starting to weave, inspect for slipped loops or uneven spacing. For those who also enjoy cooking, a similar focus on proper equipment setup is found when comparing top KitchenAid mixer attachments. Proper setup saves time and ensures your project turns out neat and even. Using the right tools, such as dry measuring cups for accurate ingredient portions, can further improve your baking results alongside your woven creations. For baking projects, using a tea loaf pan of the appropriate material ensures even heat distribution and consistent results.

Classic Potholder Weaving Kit: Create colorful handmade potholders with this potholder PRO loom kit. The 10" x 10" metal loom allows you to weave two functional 8" x 8"" cotton potholders perfect for everyday kitchen use, fiber craft projects, and handmade gifts. "

Cotton Loops for the 7" Traditional Size Potholder Loom: Custom-sized loops crafted to fit perfectly on the 7" x 7" Friendly Loom Traditional Potholder Loom, delivering smooth, consistent weaving without bunching or crowding. Loom and accessories are sold separately.

Cotton Loops for the 7" Traditional Size Potholder Loom: Custom-sized loops crafted to fit perfectly on the 7" x 7" Friendly Loom Traditional Potholder Loom, delivering smooth, consistent weaving without bunching or crowding. Loom and accessories are sold separately.
Warp Your Potholder Loom: Step by Step
To start warping, stretch each loop from a peg on one side to the matching peg directly across. This creates the vertical structure your weft will weave through. Ensure each loop is placed without twisting to keep the band flat and parallel to its neighbors. Proper peg alignment is essential for maintaining consistent warp tension across the loom. Pull each loop snug—tight enough to maintain shape but not so tight that the loom distorts. Continue placing one loop per peg across the full width, keeping even spacing to prevent gaps or crowding. Much like proper pan prep, a consistent foundation prevents the final structure from sticking or distorting. Check that all warp loops run in the same direction and sit securely on their paired pegs. Begin with an even number of pegs to support pattern progression, such as 67 or 18. The warp should form a firm vertical grid, ready for the weaving process. For optimal durability, consider the material compatibility of your loops with the loom, similar to how glass bowls are chosen to withstand high mixing speeds.
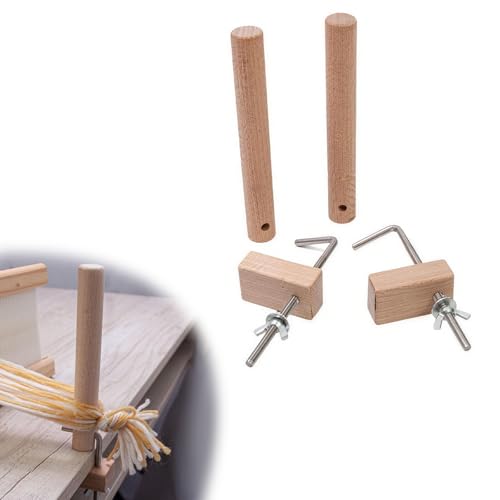
【Wooden Craftsmanship】: The product is made from quality wood material ensuring durability and longevity while adding an aesthetic appeal to your workspace.


Stackpole Books-Pin Loom Weaving
Weave Your First Row: Over One, Under One
To weave the first row, you start with your warp threads stretched tightly across your loom. Using a hook, pass it over one pair of warp loops, then under the next pair, repeating this over-one, under-one pattern across the entire width. Treat each pair of warps as a single unit, and avoid pushing the hook through the center of a loop, which can distort your tension. Keep your pattern consistent by following the same passing direction from start to finish. Once you reach the opposite side, pull a new loop through to secure the row. To maintain even tension along the edges, ensure each loop sits snugly around its peg. Press the completed row downward with your fingertip to keep it flat. This first row forms the foundation for the alternating weave pattern that follows, so attention to tension and pattern accuracy at this stage is crucial. To keep your loom tools free from sticky residue, occasional gentle soap cleaning lifts baked-on buildup without damaging surfaces. While these woven pot holders provide a protective layer, black cooking gloves are also truly heat resistant due to their silicone and cotton construction. For a durable finish, consider storing your loom tools in a homemade organizer.

【Extreme Heat Resistance】Our barbecue gloves & oven mitts, are designed to withstand temperatures up to 1472°F(Test max temperature tolerance), providing perfect protection for your hands from high temperatures whether you're grilling, baking, or cooking.

OVEN MITT: Comes with 1 machine washable, hot surface handler Ove Glove

【Upgraded Heat-Resistant Food-Grade Silicone】Ditch bulky traditional silicone oven mitts! Our advanced food-grade silicone is lightweight, flexible, and heat-resistant up to 500°F. It’s odorless, BPA-free, and 100% safe for direct food contact—perfect for grilling, baking, or cooking.
Stay Loose: Fix Uneven Rows and Tight Spots
Uneven rows usually stem from warp tension issues. If threads are tighter in one area, it causes humps; looser threads create dips. Check your tension first— it should feel firm and consistent across the loom. For low spots, quickly fill the gap by weaving back and forth over that area only. Make sure each pass moves across adjacent warps to distribute bulk evenly. Addressing these early prevents dips from worsening. For consistent tension, consider using a Hamilton Beach mixer stand to stabilize your loom setup. Using a reliable food scale can help you measure warp weights accurately to avoid tension inconsistencies during setup. For a more durable result, consider using Top Piping for Bags to reinforce the edges of your pot holders after weaving.
To fix slack imbalance, gently shift excess slack from tight spots to looser ones by pulling warp threads sideways. This helps redistribute crowding and reestablish even spacing. Keep a close eye on turning points—misplaced turns cause vertical lines to drift. Consistently turn on alternating warps to maintain alignment. If a section feels pinched, loosen it gradually rather than yanking. Flatten your weaving on a surface to identify distortions clearly. Reinforcing weak spots from the back can stabilize the weave without starting over. If loops unintentionally slip out during removal, carefully push loops back onto the loom to prevent unwoven sections from worsening.

【Premium 100% Cotton Warp Thread】Our 8/4 weaving warp yarn is crafted from high-quality 100% pure cotton, providing exceptional strength and durability for all your weaving projects. The tightly spun threads resist fraying and breaking, ensuring smooth operation on any loom while maintaining superior softness for comfortable handling

【Premium 100% Cotton Warp Thread】Our 8/4 weaving warp yarn is crafted from high-quality 100% pure cotton, providing exceptional strength and durability for all your weaving projects. The tightly spun threads resist fraying and breaking, ensuring smooth operation on any loom while maintaining superior softness for comfortable handling

【Premium 100% Cotton Warp Thread】Our 8/4 weaving warp yarn is crafted from high-quality 100% pure cotton, providing exceptional strength and durability for all your weaving projects. The tightly spun threads resist fraying and breaking, ensuring smooth operation on any loom while maintaining superior softness for comfortable handling
Weave Evenly When the Loom Gets Crowded
When the loom gets crowded, keep your weave pattern even by maintaining consistent tension and following an alternating over-under sequence on each row. As you fill the loom, push completed rows downward to make room for new weaving, and avoid piling loops on pegs, which can lead to uneven density. Handle each loop gently by pulling it through smoothly and securing it on the first peg to prevent congestion. Always recheck the placement of loops at the edges, where crowding tends to occur first, and adjust loops slightly apart if needed to keep the over-under pattern visible. Maintaining a level working edge and a steady rhythm until the loom is fully covered ensures a uniform and tight weave, even as the space becomes limited. For stubborn residue on your baking sheet, baking soda paste works effectively to lift baked-on grime without scratching the surface. Its mildly alkaline pH helps break down grease and food debris safely. Packing left loops downward maximizes space at the top, making it easier to finish the final rows. Using a hand mixer or stand mixer can help you prepare a consistent batch of baking soda paste quickly.
Finish Your Potholder Loom Project: Binding Off
Start at a corner or the bottom-right edge of your finished potholder. Insert your hook into the lowest loop on the first peg and lift it off. Pull the next loop through the first to create your first bound-off stitch. Continue peg by peg around the loom, maintaining a consistent sequence so the edge stays even and loops don’t twist. For neat color blending, handle each color loop separately when multiple layers stack. As you work, support the work by hanging loops on pegs periodically to prevent it from slipping. Hold the working edge taut to prevent slipping. Use a paper clip to anchor finished sections and keep them in place. Treat doubled-up loops one by one, moving the top loop aside to reach the one underneath. This prevents snagging during the edge finishing process. Continue this process until only the final loop remains. Then, pull it through the first bound-off loop to secure the edge. Fasten off tightly; that last loop becomes your hanging loop. Finally, smooth and shape the potholder flat, checking for any gaps or uneven areas. To ensure the finished piece lies flat, place it on a cooling rack to allow even air circulation while it sets. For a more decorative edge, you can vary the stitch pattern by choosing from different piping tip styles to create scalloped or textured borders instead of a plain finish. A reliable method for pressing the final flat piece involves checking for accuracy in liquid measurement to avoid uneven moisture distribution.
3 Beginner Potholder Loom Mistakes (and Fixes)
Twisted loops are a common mistake that can distort the weave and create uneven edges. To fix this, re-seat each loop so it lies flat before pulling it through. Ensuring loops are properly aligned will help your potholder look neat and professional. Unlike cotton oven mitts, which require careful washing to avoid shrinkage or damage, loom potholders are typically made from synthetic loops that can handle being tossed in the machine.
Tension issues are also frequent among beginners. Pulling loops too tightly compresses or curls the fabric, while leaving them too loose causes gaps and floppy rows. Maintain consistent, moderate tension across every row. If the edges pucker, loosen the tension slightly. If you notice holes developing, tighten the loops just enough to close the gaps.
Losing track of the weave path—skipping the over-under sequence—results in misaligned rows. Check each new loop against the previous one before pulling it through to ensure the pattern stays consistent. If you realize you’ve made a mistake, backtrack only to the point of error instead of starting over entirely. With practice, you’ll become more adept at following the correct weaving sequence. Even in printed guides, chart mistakes can occur, such as the incorrect row depiction found in a popular potholder loom weaving book that confused weavers following a mosaic pattern.
Choose a Simple Two-Color Pattern for Your First Project
Start with two contrasting colors and 18 loops per color on a standard loom. This simple two-color pattern keeps things straightforward for your first project. Alternating the colors in the warp creates woven stripes, and weaving in the opposite order makes the pattern pop evenly on both sides. Avoid more complex designs like twills or block patterns at first—they can be confusing and slow you down. A pinstripe variation, where you place the same color twice near the center pegs, creates a defined stripe that adds visual interest without complicating the process. This setup helps you develop consistent weaving habits, reduces mistakes, and results in a neat, reversible potholder that’s both functional and attractive. Working from the outside toward the center and back again creates a mirrored pattern with opposite color placements on each side.