

Struggling to get precise measurements with your kitchen scale? It’s a small tool, but using it correctly makes a big difference in your cooking and baking results.
When operated properly, your scale can help you measure ingredients quickly and accurately, saving you time and frustration.
Keep reading to learn the simple steps for using your scale like a pro.
How to Set Up Your Kitchen Scale on a Flat, Stable Surface
A flat, stable surface is essential for accurate kitchen scale readings. Choose a truly level, hard surface such as stone, granite, quartz, or a solid butcher block. Soft or uneven surfaces like carpet, towels, or foam mats can cause skewed measurements because they compress or wobble under the weight. Place your scale on a level countertop or table, far from vibrations caused by mixers or oven doors, which can affect accuracy. For example, an inexpensive scale may struggle with inconsistent readings if placed too close to flex edge beaters in operation. Before weighing, press each corner of the scale to check for wobble; if it wobbles, adjust the scale or use adjustable feet to level it. To avoid interference from other appliances, keep your scale away from the Kitchenaid Mixer Attachments reviewed in our guide, as their operation can introduce disruptive vibrations. For the most reliable results, consider selecting a top option from our scale reviews that includes a sturdy, vibration-resistant base.
Ensure the underside of the scale and the counter are free of crumbs, moisture, or debris that may interfere with proper contact. Let the scale rest for a few seconds after placement to allow sensors to stabilize. For consistent results, always use the same spot on your counter, avoiding clutter or support layers that flex under weight. A stable, flat surface is key to precise measurements and reliable cooking results.

𝗘𝗳𝗳𝗼𝗿𝘁𝗹𝗲𝘀𝘀 𝗪𝗲𝗶𝗴𝗵𝗶𝗻𝗴: Supports 5 units (oz/lb:oz/fl'oz/g/mL), tare function, and includes 2 AAA batteries for hassle-free operation

Digital kitchen scale with food-safe, BPA-free plastic components

Contemporary Slim Design: Made of Stainless Steel Material; It is easy to use and clean; Provides accurate weight data with a user-friendly control panel and system; With high precision sensors to ensure correct performance and readouts
Why Taring Your Bowl Saves Time and Prevents Mistakes
Taring your bowl simplifies measuring by resetting the scale to zero after placing the bowl. This allows you to add only the ingredient, without counting the weight of the container. It automates mental subtraction, minimizing errors.
Using the tare function makes it easy to add multiple ingredients into one bowl without transferring contents. Simply press tare after each addition, which saves time and reduces cleanup since you’re not juggling multiple containers. For optimal accuracy, choose a stand mixer model that includes a high-quality paddle attachment, as its design ensures even mixing when working with precisely weighed ingredients. For sourdough bread, a loaf pan designed for sourdough ensures the final shape matches the precise hydration levels you have measured. Unlike a roasting pan, a baking sheet is often better for tasks requiring even heat distribution during lower-temperature baking.
Taring also increases measurement accuracy, especially for recipes that depend on precise ratios. Digital scales with tare can achieve errors as low as 1–2%, compared to 15–20% with volume measurements. For baking, this level of accuracy helps maintain consistent results. Just place your bowl, press tare, add the ingredient, and tare again for the next. Remember to tare before each addition; skipping this step can distort your measurements. This process eliminates the need for multiple bowls per ingredient, simplifying cleanup with fewer dishes to wash.
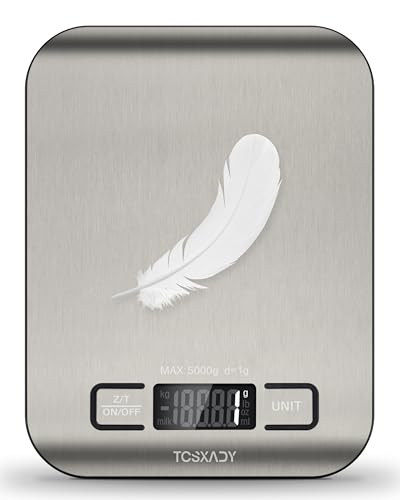
【Versatile Measurement Mastery】Tcsxady food scale supports 6 units (g/kg/lb/oz/ml/milk ml) for baking, meal prep, or liquid tracking. Optimized for recipes requiring precise conversions, it replaces guesswork with quick-tap unit switching. Ideal for food scales for kitchen enthusiasts prioritizing flexibility.

【PRECISE WEIGHT】 The digital food scale built-in four high-precision load sensors, quickly and accurately response 1g or 0.1oz increments when adding ingredients, its measuring range: 0.1oz to 22 lbs and 3g to 10kg(Min. weigh at 0.1oz or 3g).

Lightweight Postal Scale - Max. Capacity: 440lb/200kg, Min. Readability: 40g, Display Resolution: 10g. Features a Carbon Fiber platform paired with a durable ABS housing. Lightweight + sturdy, easy to clean, move, and store.
How to Read Your Scale’s Display: Grams, Ounces, and Stable Readings
In gram mode, wait for the numbers to freeze—that’s your stable reading. Most scales settle in 1-gram increments, which is ideal for precise small measurements. When the display shows a steady number, record it. If the numbers keep flickering or jumping, avoid recording until you get a stable, consistent read.
Check for 0 g or 0.0 as your readiness indicator. If you see “UnSt”, the surface is unstable; reposition the scale on a flat, firm surface. An “O-Ld” alert means you’ve exceeded the scale’s capacity—reduce the load. Weak batteries can cause the display to flicker or give inconsistent readings, so replace or recharge if needed. Always ensure the scale is resting on a flat, hard surface before trusting the measurement for accuracy. Unlike wax paper, baking sheets are designed to withstand high oven heat for stable, reliable weight measurements. Unlike universal attachments for stand mixers, which may vary by model or hub design, your scale’s display works the same way regardless of the bowl or beater you use. For more consistent results, choose a top rated food scale that balances quality and value for your kitchen needs.

[MULTI-FUNCTION SWITCHING MODE]--Food scale can bear a maximum weight of 11LB, and can also provide you with a weight scale accurate to 1 g/0.05 oz. The measurement results are highly accurate. Food scale grams and ounces also has six unit conversion functions: g/kg/lb/oz/ml/milk ml to meet your different needs. When you are making food, there is no need for complicated operations, just one button to easily switch to any unit you want, providing all-round convenience for kitchen work.
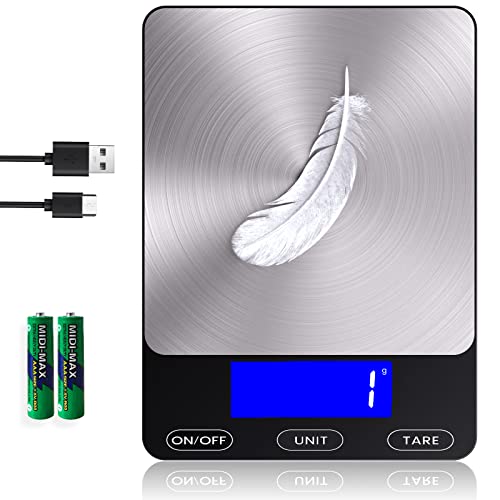
【Precise Weight Food Scale】Our Food Kitchen Scale equips four high-precision load sensors, waterproof Anti-collision glass weighing panel. Large measuring capacity with 1g precise graduation from 0.1oz/3g to 33 lbs/15kg.

【Precise Weight Food Scale】This digital food scale features four high-precision load sensors to deliver accurate 1g or 0.1oz increments. With a capacity from 3g to 15kg (0.1oz to 33lbs), it’s the perfect gram scale and kitchen scale for baking, meal prep, and portion control.
How to Weigh Dry and Liquid Ingredients Without Guessing
Use a separate container for liquids and always tare it first. Pour slowly until you reach the desired weight—this prevents overpouring and saves cleanup time. Since water has a density of about 1 gram per milliliter, measuring liquids in grams or milliliters is straightforward when you need precision. When a recipe only lists cups, rely on standard cooking conversions: one cup of water equals approximately 240 grams or 240 milliliters. Keep your scale on a flat, stable surface, and add ingredients gradually near your target weight to avoid overshooting. Precise measurement methods like these remove guesswork from your cooking and baking.

【Precise Weight】 10kg/22lb capacity, 1g/0.1oz resolution, Great for cooking, baking, weight loss, Meal Prep, Coffee, Package, Postage.

𝗠𝗮𝘅 𝗖𝗮𝗽𝗮𝗰𝗶𝘁𝘆: Weigh objects as heavy as 22 lb/10 kg and as light as 2 g in increments of 1 g

Common Kitchen Scale Mistakes (and How to Avoid Them)
To avoid common kitchen scale mistakes, always tare your container before adding ingredients. Start by placing an empty bowl or container on the scale, then press the tare button to reset the display to zero. Only add your ingredients after this step. Taring after adding some ingredients will give inaccurate readings because the scale includes the container’s weight. Also, take care to keep the platform clean—residue can cause unstable readings and drift. For comparison, when using a dough hook instead of hand kneading, precise ingredient weights from a scale are critical for consistent dough hydration and proper gluten development. Periodically calibrate your scale using a known weight to ensure long-term accuracy. For baking a cake, using a properly tared scale ensures perfect square pan results every time.
Ensure your scale is on a flat, stable surface away from vibrations, heat, or steam, which can all affect accuracy. Never exceed the maximum capacity of your scale, as overloading can damage the load cell and lead to faulty measurements. Confirm that the unit of measurement is set correctly—grams or ounces—before starting. Wait for the display to stabilize before recording your measurement to avoid errors. Regularly clean the platform after use to keep results consistent and accurate. Cheap, unreliable scales tend to give inconsistent readings, which can cause mishaps in your recipes or adjustments.
How to Keep Your Scale’s Results Consistent Over Time
To keep your scale’s results consistent over time, regularly verify its repeatability using a known reference weight. Use the same weight consistently and check if the readings cluster tightly together. A wide spread indicates unstable performance. Test with both small and large reference weights to assess accuracy across the full range. Record the difference between the highest and lowest values to monitor stability. Just as oven rack safety depends on respecting material limits and heat exposure, your scale’s performance relies on staying within its specified operating environment. Gently wipe the scale surface with a slightly damp cloth to remove any residue that could interfere with readings. For best results, always perform verification using a calibrated reference weight that is traceable to a known standard.
Schedule verification regularly—once a month for casual use and more frequently for baking or precision tasks. Recheck immediately after any drop or impact. If readings begin to drift over time, it signals potential accuracy issues that need troubleshooting. Keep a simple log noting the date, reference weights used, and measured values. Review this log periodically to identify gradual drift rather than random errors.
Environmental factors can cause measurement drift. Place your scale on a stable, level, and rigid surface away from sources of heat or moisture. Weak batteries can also lead to fluctuating results; replace batteries whenever you notice inconsistent readings. Adhere strictly to calibration procedures to catch wear and tear early, maintaining consistent performance over time.
How to Clean, Calibrate, and Store Your Scale for Long-Term Accuracy
To ensure your scale stays accurate over the long term, cleaning, calibration, and proper storage are essential. Start by unplugging the scale, then wipe its surface with a slightly damp microfiber cloth. Use mild soap only for stubborn spots, and avoid liquids near seams and buttons. Dry the scale thoroughly before reconnecting to prevent damage.
For calibration, place the scale on a flat, stable surface and allow it to warm up. Follow the manufacturer’s instructions for the built-in calibration process or test the accuracy with a known weight placed precisely in the center. Recalibrate after moving the scale or if you notice measurements drifting over time. Choosing a scale with heavy-gauge cast aluminum construction can provide the same lasting stability found in premium bundt pans.
Storage involves keeping it flat in a dry, protected area. Remove batteries during long periods of nonuse to prevent corrosion. Never stack items on top of the scale, as this can damage internal components and affect accuracy. Deep-clean every few months, inspecting the feet and compartments for debris that could interfere with stability or precise readings. Proper storage is similar to how you would protect a delicate angel food cake pan from being dented or warped. Regularly check its accuracy with certified weights and replace batteries promptly if performance seems off. Always follow the specific care instructions provided by the manufacturer for your model.

[SOFT & LINT FREE] Microfiber glass cloth have a soft, plush touch. Perfect cleaning rags ideal for streak free and lint free cleaning. cloth have a soft, plush touch. Perfect cleaning rags ideal for streak free and lint free cleaning.

Package content: you will receive enough quantity of microfiber rags with 6 different colors, khaki, gray, blue, green, white and purple, enough to meet your cleaning needs, using these microfiber cleaning towels, you can handle housework more easily

Effective Streak-Free Cleaning: Clean kitchen countertops, windows, mirrors, bathroom surfaces, stainless steel, car interiors, glass, and other delicate surfaces with just water or your favorite cleaner—these microfiber cloths deliver streak-free, neat results with minimal effort, making daily cleanup fast and simple