

Ever wonder how to turn heavy cream into fresh, homemade butter using a stand mixer? It’s surprisingly simple and requires just a few minutes of your time.
By the end, you’ll have delicious, creamy butter ready to enjoy or share. Keep reading for all the easy steps to make butter right in your own kitchen.
What You Need to Make Butter in a Stand Mixer
To make butter in a stand mixer, you’ll need a few essential ingredients and tools. Start with heavy cream or heavy whipping cream—full-fat is essential for proper separation. A pint of cream yields about 8 ounces of butter, so plan your quantities accordingly. Use a stand mixer equipped with a whisk attachment; a five-quart bowl is suitable for small batches. For straining, gather a fine-mesh sieve and a bowl to catch the buttermilk. Have ice water on hand for washing the butter and a rubber spatula for scraping. If you prefer salted butter, add salt to taste. Once made, wrap the butter in parchment paper or plastic wrap and keep it refrigerated to maintain freshness. Using a precise food scale ensures accurate cream measurements for consistent butter yields. Consider reviewing top attachments for your mixer if you plan to scale up production for larger batches. To select the best model for your kitchen, compare the top options reviewed for accuracy and capacity.
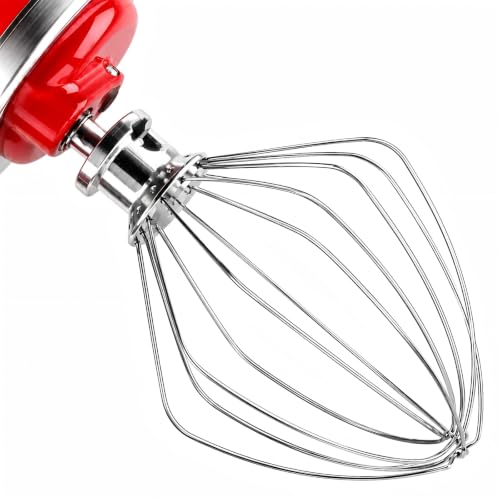
Compatible with 4.5-5 Qt tilt-head stand mixers. Works with Artisan, Classic, Classic Plus and more.

ONLY FOR KITCHENAID TILT HEAD MIXERS: wipe your stand mixer whisk and bowl in seconds
How to Prep Cream for Stand Mixer Butter
To prep cream for stand mixer butter, start by selecting plain, fresh heavy cream with high butterfat content. Let the refrigerated cream rest at room temperature for 10 to 60 minutes until it reaches 50 to 70°F. Gradual warming is key—avoiding rapid temperature changes ensures that the cream thickens properly without becoming too warm or too cold. Chilling the cream too much can make churning slow, while too warm can prevent the butter from solidifying. Pour the cream into your stand mixer bowl, leaving enough space for expansion. Using a splash guard helps contain early splatter. Begin mixing on low speed, gradually increasing to medium. You’ll notice the cream first thickening into soft peaks, then turning grainy as butter grains begin to form. For optimal results, choose a high-quality stand mixer with a sturdy bowl that maintains consistent churning speed throughout the process.
Why a Stand Mixer Beats Store-Bought (Brief)
Using a stand mixer allows you to make butter that’s fresher and more flavorful than store-bought options. Since you churn it right when you need it and choose the cream source, you have full control over both freshness and ingredients. This transparency means no hidden additives or standardized salt levels, so you know exactly what’s going into your butter. It also lets you create endless flavor variations, from adding sea salt or herbs to experimenting with spices, all without sacrificing freshness or quality. For bakers who want to pair their homemade butter with the best loaf pans for perfect bread baking, the right equipment ensures equally impressive results. Homemade butter retains more natural flavor compounds, especially when made from high-quality, grass-fed cream. You also have the advantage of managing sodium levels precisely, making unsalted butter easier to use in baking or for lower-salt diets. While store-bought butters prioritize shelf stability and longer shelf life, your homemade version offers peak aroma and taste immediately after making. Overall, freshness and customization are the key reasons why using a stand mixer beats store-bought butter.
Start Slow, Then Go Fast: Speed Settings for Butter
Start at a low speed, around 1 to 3, to prevent splashing when making butter. This slow beginning allows the cream to gather around the beater evenly, reducing mess as aeration increases. Gradually raise the speed over 20 to 30 seconds to ensure even whipping without splatter. Jumping straight to high speed can cause the cream to splatter or whip unevenly, so a slow ramp-up is key. For best results, use a model that ranks highly for quality and performance in the churning process. Choosing the right attachment, such as a dough hook for related mixing tasks, can also improve your overall kitchen workflow. A springform pan is not suitable for this task, as its removable sides are designed for delicate cakes and cheesecakes.
For the main churning, use medium to medium-high speeds, roughly 4 to 6. At this range, the mixture has enough force to push past whipped cream and begin separating into butter. Avoid staying at too low speeds longer than necessary, as higher force helps speed up the process. When you notice the mixture nearing separation, there’s no need to increase the speed further. Continue until the fat finally splits from the liquid, then stop immediately. Proper speed management helps keep the process smooth and spill-free.
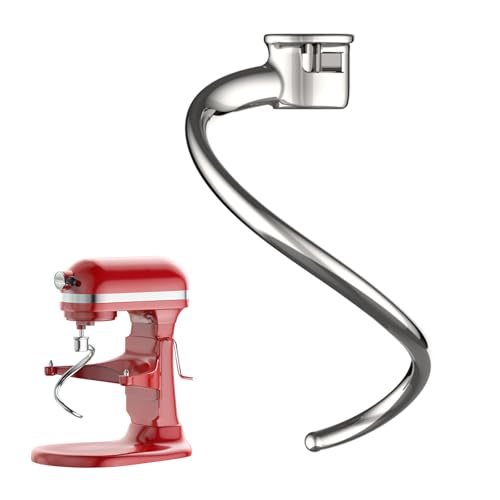
Durability & Material: This dough hook kitchen aid is made of premium 304 stainless steel, offering top durability and rust resistance. It’s non-coated and rustproof—say goodbye to flaking coatings—so you can enjoy a food-safe, easy-to-clean baking experience that’s just what you need

Why Choose a Spiral Dough Hook?Unlike C-shaped kitchen aid dough hook that just rotate and pull, this spiral dough hook actively pushes dough down while kneading.The spiral design creates continuous downward pressure that ensures even kneading of heavy doughs.

FOOD-GRADE STAINLESS STEEL – SAFE & HEALTHY- Upgrade your KitchenAid with a stainless steel dough hook kitchen aid you can trust. Never worry about coating chips or rust again! Precision-forged from solid 304 stainless steel, this one-piece design is completely coating-free, rust-resistant, and built to deliver a safer, healthier baking experience for your family.
Four Signs Your Cream Has Separated
Your cream is about to separate into butter and buttermilk if you notice these four signs. First, a grainy, curdled texture appears—your once smooth and fluffy cream becomes broken and dense as butterfat granules form. Second, the color shifts toward yellow, indicating the butterfat is clumping together. Third, solid lumps or butter grains start sticking to your whisk and the sides of your bowl, breaking up the foam. Lastly, liquid separates from the fat, creating a thin, watery buttermilk around the butter solids. You might also hear your mixer change to a sloshing splash sound. For the best results, using a high-powered stand mixer ensures the cream whips and separates evenly without overheating. These signs mean butter ripening is happening right before your eyes, not fermentation going wrong. Consistent speed and bowl control are easier to maintain when you choose a model with a sturdy tilt-head design, which reduces splatter during this final stage. A well-designed pan, like a straight-sided loaf pan, can also help stabilize the bowl during mixing by providing a wider, non-slip base.
Stop at the Splash: How to Know When Separation Is Done
Listen carefully for the mixer noise. It shifts from a thick whipping sound to a looser, splashing slosh. That splash indicates the emulsion has broken. Don’t wait — stop the mixer immediately when you see solid butter chunks and hear that watery sound. Overmixing can push the butter toward overchurning, which creates mess and reduces quality. Use your eyes and ears as your guides, not the clock. Stop at the first clear split before buttermilk starts splashing out. Once you see that, your separation is complete and you’re finished. This method avoids the extended churning 15-20 minutes needed after initial butter forms in manual churns.
How to Wash Stand Mixer Butter for Longer Shelf Life
Once the butter separates, pour off the buttermilk and wash the butter immediately to extend its shelf life. Use ice-cold water during rinsing to keep the butter firm and prevent melting. During the wash, knead and press the butter to force out trapped buttermilk, which helps improve texture and reduces spoilage. Repeat rinsing until the water runs clear—usually two to three cycles—since cloudy water indicates residual buttermilk that can cause faster spoilage. After the final rinse, drain thoroughly and press out any remaining moisture. Using fresh cream results in butter that can last up to a month when refrigerated, especially if you wash it well and store it airtight. Skipping this step increases the risk of the butter turning rancid within a few days. For precise butter yields, remember that 2/3 cup measurement in baking ensures accurate ratios for recipes requiring large amounts of fat. For the best results, consider how the butter’s final texture compares to the even heat distribution you’d expect from choosing the right kitchen tool, as proper washing is just as critical to quality as selecting the correct bakeware.
How to Salt or Flavor Butter Without Overmixing
To add salt or flavorings without overmixing, switch to the flat beater and incorporate ingredients in short bursts. Beat only until just combined to maintain a smooth, non-greasy texture. Gradually add savory or sweet additions, tasting as you go to achieve the right balance. For final seasoning, knead the butter by hand to prevent overworking. Keep the butter chilled if it begins to soften too much during mixing. Using these techniques ensures even distribution of flavors without making the butter grainy or overly soft, and working in small batches helps you control the seasoning and flavor level precisely. A bowl-lift stand mixer provides the stability and power needed for larger butter batches, especially when working with heavy cream. Piping bags are reusable if properly cleaned, offering an eco-friendly alternative to disposable options. For easy cleanup afterward, use a paste of baking soda and dish soap to lift any residual grease from your mixing bowl and tools.

Designed, engineered, and tested by KitchenAid
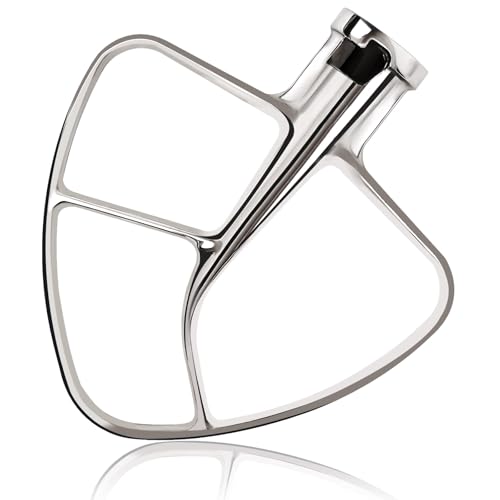
COMPATIBILITY: Stainless steel Paddle attachments Fits all 4.5 and 5 Quart KitchenAid Tilt-Head Stand Mixers perfectly.

MATERAL:Made Of Die-Cast Aluminum With White Ford Teflon Coating And Silicone Flex Edge,Which Is Safer And Healthier Than a Traditional Mixer Paddle. Perfect For Healthy Cooking.Perfect For Thin Cookies Dough, Compound Butters, Pie Pastry, Creamed Frostings, Mashed Potatoes And More, But Not For Hard Dough. Do Not Use Blade In a Dry Bowl.
Shape, Wrap, and Stash Your Homemade Butter
Shaping your butter into a uniform block or log helps remove excess air and moisture, making it easier to wrap and store. Use your hands, a mold, or a bowl to form a smooth, compact shape that minimizes gaps, which can trap odors and cause uneven aging. For daily use, portioning smaller pieces before chilling allows quick access and reduces waste. For precise measurements during this process, consider using top digital kitchen scales to ensure consistent portion sizes. Just as a clean release from a pan requires thorough preparation, ensuring your butter block is free of air pockets will improve its storage quality. This careful shaping process mirrors the step-by-step instructions for crocheting pot holders, where each compact stitch prevents gaps and ensures a durable finished product.
Wrap your butter tightly with parchment or butter paper as the first layer, ensuring a snug fit. Follow with foil or plastic wrap to prevent air, light, and odors from penetrating. Seal all edges thoroughly to limit oxygen exposure. For longer storage periods, consider moisture-proof, light-blocking wraps to preserve freshness.
Store your butter in the coldest part of the fridge, away from strong-smelling foods. Freezing backup portions, labeled with the date, can extend their shelf life up to nine months. Rotate daily-use butter from the fridge into a small covered dish for convenience. Before wrapping, feel free to add flavors or herbs for extra variety.

Digital kitchen scale with food-safe, BPA-free plastic components

𝗘𝗳𝗳𝗼𝗿𝘁𝗹𝗲𝘀𝘀 𝗪𝗲𝗶𝗴𝗵𝗶𝗻𝗴: Supports 5 units (oz/lb:oz/fl'oz/g/mL), tare function, and includes 2 AAA batteries for hassle-free operation

Contemporary Slim Design: Made of Stainless Steel Material; It is easy to use and clean; Provides accurate weight data with a user-friendly control panel and system; With high precision sensors to ensure correct performance and readouts
Save Your Buttermilk and Fix Common Butter Mistakes
To fix common butter mistakes, start by ensuring you use non-homogenized cream with 35 to 42 percent fat content. This range helps prevent failures because higher fat content produces better butter. If your cream is too cold, it won’t form grains properly, resulting in a less desirable texture. Conversely, if it’s too warm, the butter may turn greasy and lose structure. Selecting a stand mixer with a paddle attachment can improve the consistency of your churning process.
Be mindful of the cream’s temperature—ideally around 55 to 60°F (13 to 16°C)—to avoid these issues. Overfilling your mixing vessel or using high speeds can cause the butter to become oily and separate too quickly. Keep the vessel neither too full nor mixing at excessive speeds to achieve a proper grain and texture.
Watch out for sour flavors, which indicate contaminated cream or unclean equipment. Always check your cream type—preferably fresh, high-quality cream—and ensure your tools are thoroughly sanitized. Properly managing temperature, vessel size, and cleanliness will significantly improve your chances of making perfect butter every time.