

Ever wonder how to make your own pot holders that are both functional and durable? Crafting a simple crochet potholder is a great way to add a personal touch to your kitchen and keep your hands safe from heat.
By following a few easy steps, you’ll be able to create a flat square with thick enough padding for everyday use. Keep reading to learn the full process and tips for finishing your project perfectly.
Why Cotton Yarn Works Best for Potholders
Cotton works best for potholders because it doesn’t melt under high heat like acrylic or nylon. Its superior heat resistance comes from the way it chars gradually, giving you more warning before failure. Cotton’s fiber durability allows your potholder to withstand repeated contact with hot pans without deforming. It also insulates well, slowing heat transfer to your hand when worked into dense stitches. Additionally, cotton’s absorbency helps grip hot items even when light moisture is present, making it ideal for handling kitchen spills. You can wash cotton potholders frequently without damage, unlike synthetic fibers that soften around 300°F. For a complete setup, consider pairing your potholder project with top attachments for your mixer to simplify dough preparation. For maximum protection, ensure your potholder is thick enough to mimic the heat resistance found in quality bakeware. Users often choose cotton specifically because of its superior heat resistance compared to other common yarns. Overall, cotton’s safety, durability, and practicality make it the best choice for reliable kitchen protection.
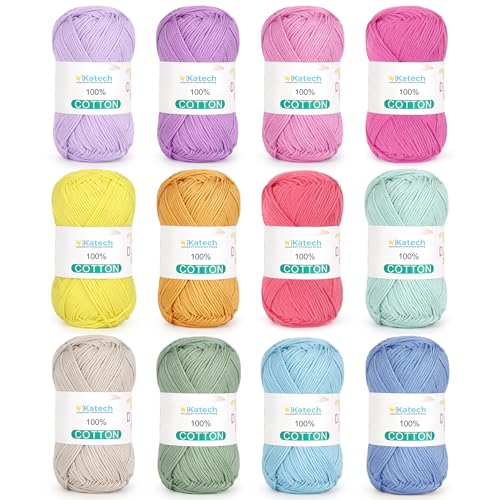
1.Premium Pure Cotton Material: Crafted from high - quality pure cotton, our baby cotton yarn offers a soft, skin - friendly touch. Ideal for making kitchen essentials like dishcloths, potholders, as well as cozy blankets, cute baby hats, and delicate scarves. Perfect for knitters and crocheters with experience, ensuring smooth stitching without snagging


Content: 100% Cotton. This yarn is great for knitting, crocheting, amigurumi and craft projects. Easy to care for, machine wash and dry. USA grown cotton.
Start Your Potholder With a Foundation Chain of 30 Stitches
To start your potholder, you should make a foundation chain of 30 stitches. This length provides a standard width that’s practical for a kitchen project. Using your cotton yarn, create a loose, even chain to prevent twisting or bunching as you work. After chaining 30, insert your hook into the second chain from the hook and single crochet across all remaining chains. This first row establishes your width and offers a base for adding texture or stripes later. At the end of the row, chain one for the turning chain—do not count this as a stitch. Keep your turning chain consistent to maintain straight edges throughout your project. A 30-chain start works well because it is an even number, supporting symmetry in pattern repeats. Use a 5mm US H crochet hook with worsted weight cotton yarn for optimal results. Place a stitch marker in your first stitch of the row; it helps prevent miscounting and keeps your project neat. For a potholder that can withstand heat, consider using a metal wire rack to elevate the finished piece while cooling. Choosing a yarn in a heat-resistant material is crucial for safety and durability. This project can also benefit from proper prep to prevent the potholder from warping or sticking to pans during use.
Build a Perfect Square in Single Crochet
To build a perfect square in single crochet, ensure each side has 30 stitches. Maintaining consistent stitch count, tension, and stitch size across all rows is key to achieving a balanced square. Count your stitches at the end of each row to keep opposite sides equal, and mark row numbers to avoid losing track. For corners, work three single crochets into each corner stitch to create a smooth turn and prevent rounding. This technique works by crocheting 3 single crochets into each corner stitch to keep the corner squared and even. Using a top stand mixer can help ensure your buttercream frosting is smooth and lump-free for a consistent finish. For safety when using an air fryer, avoid placing a baking sheet inside due to fire and damage risks. For expert advice on kitchen tools, refer to expert reviews and buying tips for selecting the best equipment.
Work each row straight by crocheting one single crochet into every stitch along the edge. Be mindful when placing your first and last stitch of each row to avoid losing edge stitches. When changing yarn colors, keep the stitch count and tension consistent to maintain the square’s shape. Periodically measure your work to confirm that height and width are equal, ensuring a flat, even finish.
Add Thickness With Two Panels or a Folded Pocket
To add thickness with two panels or a folded pocket, ensure your seams are secure to prevent shifting and unraveling over time. Use a strong stitch such as a mattress stitch or whip stitch for durability. These stitches help keep the layers aligned and prevent bunching or shifting after repeated washing and use. Pay close attention to how tightly you sew; too loose, and the layers may wobble, too tight, and they may pucker. Reinforcing the seams consistently will extend the lifespan of the added thickness and keep your project looking neat. The double-thick, folded design is achieved by working 20 rounds of 80 single crochets each in a rectangle, then folding to form the square pouch shape. For a similarly even and reliable finish, aim for consistent tension throughout, much like how a high-quality nonstick coating ensures a cake releases cleanly from the pan. Choosing a sheet cake pan with a sturdy, flat edge helps maintain even heat distribution for consistent baking results. A sturdy dough hook attachment is similarly essential for even mixing and consistent texture in bread recipes.
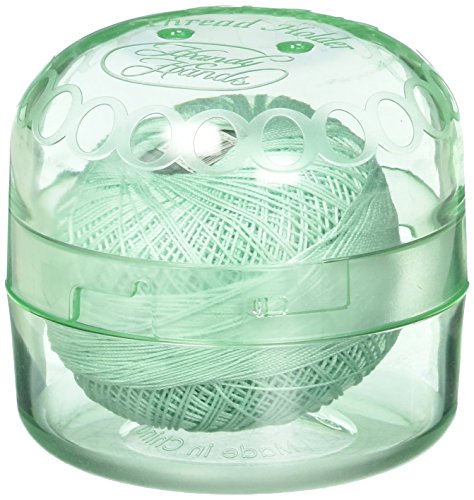
Ribbon to hang from the wrist,neck or anywhere

This charming Spring-themed Crocet Pot Holder adds a playful touch to your kitchen decor.

Side opening for easy changing of thread - no need to cut the thread from the ball
Finish Your Potholder With Edging, Panels, and a Hanging Loop
Once your added thickness panels or folded pocket are securely sewn in, finish your potholder with edging, panels, and a hanging loop to create a polished, functional piece. Start with a single crochet border to neatify the raw edges, join the layers, and add stability. Work three single crochets in each corner to keep the border flat and prevent puckering. Along the side edges, evenly space stitches across the row ends for a uniform look. Use just two rounds of single crochet for a clean, finished appearance. To make a hanging loop, chain 10 to 15 stitches, slip stitch into a corner of the potholder, then reinforce the loop by crocheting back along the chain. Using a high precision food scale can help you measure yarn or materials for consistent weight if you plan to make multiple matching potholders. Match your edging color to your potholder or get creative with decorative stitches like crab stitch for extra flair. This border not only secures both layers but also provides a sturdy, practical loop for hanging. If the stitch counts along the edges do not align, use a single crochet two together to fix discrepancies and ensure even tension. For best results, choose a sourdough bread loaf pan that offers even heat distribution to match your potholder’s heat-resistant qualities.
Join Panels and Weave in Ends the Easy Way
To join your panels and weave in ends for a neat and durable potholder, follow these steps. First, lay the panels flat on a smooth surface, aligning their stitches carefully to ensure a seamless look. Pin the panels in place to prevent shifting during the sewing process. When joining, work two panels at a time for cleaner seams.
Choose your favorite joining technique based on the look and strength you want. Slip stitch seaming creates a sturdy join that holds well, while whip stitch offers a quick, visible seam. You can also consider seam color options: matching yarn blends the seam in for a discreet finish, while contrasting yarn adds a decorative touch. For a unique detail, try using front or back loop only stitches to create a distinctive seam line. To ensure consistent height between panels, use a slip stitch sequence that connects each new row to the corresponding row of the first panel. For a similar cost-saving approach, consider making your own piping bags at home to reduce expenses on kitchen tools. When layering your ice cream cake, a springform pan keeps the cake intact and easy to unmold. If you plan to test your potholder’s heat resistance, remember that a standard cooling rack is not safe for direct oven use.
Begin at one corner, inserting your hook through matching stitches on both panels. Keep your tension even as you work to ensure a uniform seam. When you reach the end of your seam, fasten off and leave a long tail of yarn. Weave this tail through the seam in multiple directions to secure it thoroughly. Finally, trim the excess yarn close to the woven ends. This method results in no loose ends or puckers, giving you a professional-looking, sturdy potholder.
Test Your Potholder for Flatness and Safety
To test your potholder for flatness and safety, start by laying it on a completely flat surface. Press the center and edges—if it is flat, it should spring back evenly without ripples or curling corners. Check for diagonal twists or warping, which can compromise safety. A flat potholder lies square and holds its shape, reducing the risk of slipping during use. Many black cooking gloves achieve their color through manufacturing processes that do not affect heat resistance.
Next, verify safety features. Ensure your potholder is made from heat-resistant materials; thin layers can transfer heat too quickly and cause burns. Always use a dry potholder—moisture reduces insulation, increasing burn risk. Test its grip on dry cookware handles; it should hold firmly without slipping or exposing your fingertips. Material-wise, look for dense construction and flexible folds that cover your hand comfortably without stiffness or gaps. Inspect for loose stitches or weak seams, as these can compromise integrity. For reliable heat protection, a durable silicone baking mat offers non-slip performance similar to a well-made potholder. For added safety, choose a potholder made with heat resistant materials rated for high temperatures.
Keep your potholder away from open flames and only use it for brief contact with hot pans, especially above 100°C. If you notice wear at the edges or pressure points, replace it immediately. Using intact, dry potholders is essential for safety and effective heat insulation.
Troubleshoot Common Potholder Problems
If your potholder curls, twists, or refuses to lie flat, adjusting tension is your first step. Loosen your grip on the yarn to relax tight stitches that pull edges inward. Working with a loose foundation chain also helps prevent early distortion—don’t pull it too tight. Choosing the right hook size is crucial; a hook too small creates dense, curling fabric, while a larger hook improves drape and helps fix stiffness.
Uneven stitch counts can distort your potholder as well. Skipped stitches cause the edges to narrow, and extra stitches create ruffles. Carefully count your stitches regularly and use stitch markers to stay on track. If the edges are crooked, adding a simple single crochet border can help stabilize and straighten them. When curling still occurs, blocking the potholder can relax the fibers and flatten the piece. These small adjustments and techniques make your potholder lie flat and functional.
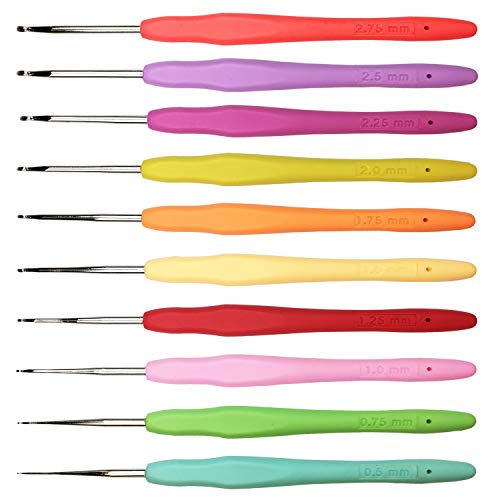
FULL SMALL CROCHET HOOK SET - 0.5mm,0.75mm,1.0mm,1.25mm,1.5mm,1.75mm,2.0mm,2.25mm,2.5mm,2.75mm.Each crochet handle is engraved with a permanent size,easy to identify.It is perfect for small crochet thread project and Getting thread through beads

Various Sizes Available: Our ergonomic crochet hooks are approximately 5.5 inches in length, with different sizes options of crochet hook sizes in 1.0mm, 1.25mm, 1.5mm, 1.75mm, 2.0mm, 2.5mm, 3.0mm, 5.0mm, 7.0mm, 9.0mm.The color of each crochet hook is shipped randomly you can use it in combination according to daily needs.

Versatile Crochet Set: Our crochet kits include 12 pieces different sized hooks from 2mm to 8mm to suit all your crochet needs. You will also get 25 colorful crochet stitch markers(Random colors), 9 darning needles, 1 scissors(Random color), 1 row counter, 1 crochet ring cutter(Random color), 1 measuring tape and 1 crochet hook case. The perfect knitting and crochet supplies, crochet accessories and crochet starter kit