

Struggling with baked-on grease on your cookie sheet? You’re not alone, and thankfully, there’s an easy way to tackle it.
With a few simple steps, you can loosen and lift stubborn residue, making your cleanup much quicker.
By the end of this, you’ll have a clean, almost-new baking sheet ready for your next batch.
Keep reading to learn the best methods to restore your bakeware.
Why That Grease Won’t Budge (and What Actually Works)
You can’t simply scrub away hardened grease on your own. Alkaline cleaners like baking soda work by breaking down the molecular bonds of the grease. Soaking the area allows the cleaner to penetrate deeply and loosen the stubborn layer. Applying heat helps soften the bonds, making the grease easier to lift or remove. Fizzing cleaning agents produce bubbling reactions that can lift grime, but they need extended contact time to be effective. Choosing the right baking sheet material determines how much heat and soaking the pan can tolerate. Without soaking or using a specialized grease-lifting agent, you’re just pushing the polymerized gunk around rather than truly removing it. For delicate surfaces like a Silpat mat, avoid abrasive scrubbing and instead rely on a gentle soak with warm, soapy water. Using a non-scratch sponge helps protect the pan’s finish while you scrub.
Tools and Ingredients for Every Cookie Sheet Cleaning Method
The right tools and ingredients depend on your cookie sheet material and the type of grime. For non-stick surfaces, use non-scratch sponges or plastic scrapers to avoid damaging the coating. On durable metal sheets, nylon pads are effective at removing baked-on residue without scratching. When choosing cleaning products, a baking soda paste or white vinegar soak can lift grime safely without harsh chemicals. Dish soap and hot water work well for lighter residue, softening grease easily. Hydrogen peroxide can be used to boost stain removal, especially for tougher spots. For heavy buildup, Bar Keepers Friend offers a more abrasive option, but avoid mixing bleach with ammonia to prevent hazardous fumes. Gather soft cloths, a plastic scraper, and your preferred cleaner before starting. With these supplies tailored to your sheet’s material, you can clean efficiently and effectively. You can also try a baking soda paste combined with hydrogen peroxide for particularly stubborn baked-on residue.

TIPS: A quick soak in warm water restores its full, fluffy texture—great for tackling cookware, sinks, and tubs with ease

SIX SCRUBBING SPONGES: This pack of Scotch-Brite Odor Resist Non-Scratch Scrub Sponges includes 1 pack of six sponges.
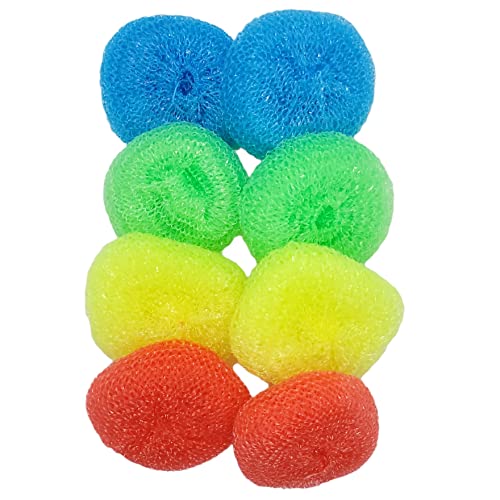
SAFE AND SCRATCH-FREE CLEANING: Crafted from soft, durable nylon, these 2.5-inch diameter scouring pads deliver non-abrasive scrubbing that’s safe for all surfaces—perfect for non-stick cookware, porcelain sinks, and delicate glassware.
The Best Soak-and-Scrub Method for Light to Medium Grease
For light to medium grease, a soak-and-scrub approach is effective without needing harsh chemicals. Fill your sink with hot water and a few drops of dish soap, then fully submerge the cookie sheet. Allow it to soak for about 30 minutes. This duration softens baked-on residue, making scrubbing easier and reducing the effort needed later. For best results, the precision of your soaking time can be as important as using a top rated food scale for consistent baking outcomes.
Don’t rush the soak—extending it by another 10 to 15 minutes can help loosen stubborn grease and prevent the need for aggressive scrubbing that might damage your pan’s surface. After soaking, use a non-scratch scrub pad to clean the sheet in gentle circular motions. Pay special attention to edges and corners where grease tends to collect. Wipe away any loosened grime as you scrub. The gentle circular motions work similarly to how a tube pan’s center promotes even heat distribution during baking. A sturdy roasting rack can also help elevate baked goods to prevent grease pooling and improve airflow.
Once the residue is removed, wash the sheet as usual with warm water and soap, rinse thoroughly, and dry completely. Proper drying helps prevent water spots. This method restores your cookie sheet effectively while preserving its seasoning and finish, leaving it ready for your next batch.

THREE SCOURING PADS: This pack of Scotch-Brite Zero Scratch Scour Pads includes three scrub pads for dishes
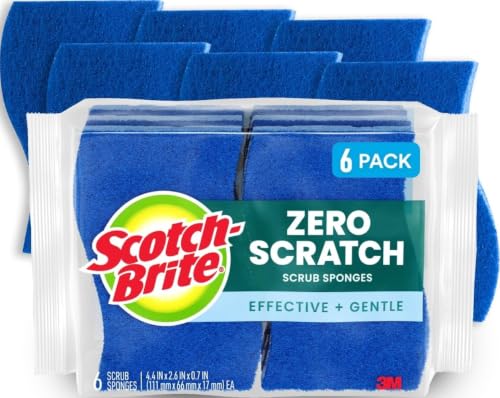
SIX SCRUBBING SPONGE: This pack of Scotch-Brite Zero Scratch Scrub Sponges includes 6 sponges

Non-Scratch Cleaning: Safely cleans non-stick cookware, glass, ceramic, and other delicate surfaces; scrubbing side removes grease and stuck-on food without scratching; sponge side quickly absorbs spills and wipes away residue, leaving surfaces clean
How Baking Soda and Vinegar Clean Stuck-On Cookie Sheet Grease
To clean a stubborn, greasy cookie sheet using baking soda and vinegar, you’ll need about half a cup of each for a sink soak. The fizzing reaction from combining equal parts creates bubbles that help lift baked-on grease without harsh scrubbing. Submerge your sheet in the solution for 30 to 60 minutes; heavier grime may require a second soak or longer contact time. This method is gentle enough for most pans, but avoid using abrasive tools on nonstick or aluminum surfaces to prevent damage. For best results, ensure your pan is a top half sheet for even heat distribution during future baking.
Once the soaking is complete, take a soft, non-scratch sponge and gently scrub the surface. The fizzing reaction has already loosened the grime, so minimal effort is usually enough. Pay special attention to stubborn spots, and carefully clean around delicate coatings. After scrubbing, rinse the sheet thoroughly with soap and water, then dry completely to prevent any new stains. If areas still appear greasy or stained, repeat the soaking process to achieve a cleaner, brighter surface.

Mrs. Meyer's Baking Soda Cream Cleaner removes soap scum and grease build-up to make your kitchen sparkle

A HOUSEHOLD CLASSIC: This 2.7 lb resealable bag of ARM & HAMMER Baking Soda unlocks 100+ uses across your home—from kitchens and laundry rooms to crafting tables and beyond

EXCEPTIONAL RESULTS: Introducing Tillbrook Cleaning Vinegar—the perfect choice for natural cleaning and maintenance. Our powerful formula, made from 6% all-natural vinegar and infused with a fresh citrus scent, delivers an unmatched cleaning experience without unnecessary additives.
When Baking Soda Alone Isn’t Enough: Try the Deep-Clean Paste
If baking soda and vinegar don’t remove baked-on grease, a deep-clean paste can help break down stubborn grime. Mix 1/4 cup baking soda with 2 to 3 tablespoons of hydrogen peroxide until it forms a thick paste. Spread this evenly over the stains and leave it for two hours, allowing chemical reactions to loosen the carbonized residue. For aluminum pans, combine equal parts washing soda and cream of tartar with hot water, but limit the contact to 15 minutes to protect the surface. Use a soft scrubber for aluminum to avoid scratching, while heavier pads are suitable for steel. Commercial soft cleansers like Bar Keepers Friend also work well, as they can be mixed into spreadable pastes. Always rinse thoroughly after cleaning and dry to prevent residue buildup. These methods effectively tackle tough grease when simpler solutions fall short. For routine care tips that keep your tray looking new, avoid using aerosol sprays that leave sticky buildup. Unlike bakeware, KitchenAid mixing bowls are generally not designed for microwave use due to their material and heat limits. Using a food scale for accurate measuring ensures you apply the correct paste-to-surface ratio, preventing waste and uneven cleaning.

HYDROGEN PEROXIDE DISINFECTANT: Clorox Healthcare Hydrogen Peroxide Cleaner Disinfectant delivers great surface compatibility, low residue and fast kill times (1); pack may vary
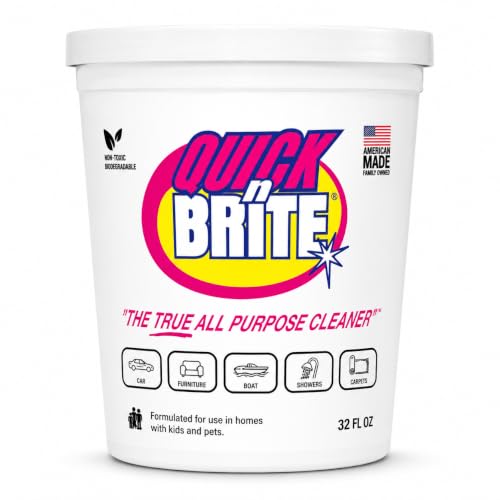
All-in-one cleaning power: Quick ’n Brite all purpose household cleaner cuts grease, grime, stains, and spills in kitchens, bathrooms, carpets, BBQs, tubs, shoes, and more. One cleaning product for your home to keep surfaces cleaner and routines easier.

Contains One - 16 fl oz Bottle of Food Grade Hydrogen Peroxide
Boil Away the Toughest Grease on Bare Metal Pans
To remove tough grease from bare metal pans, boiling water with dish soap is highly effective. Fill the pan with enough water to cover the greasy area and add a few drops of dish soap. Bring the water to a gentle boil and keep it covered for 5 to 10 minutes. This heat helps loosen stubborn grime. After boiling, add a couple of tablespoons of baking soda to boost the cleaning power through its alkaline properties, which further break down grease buildup. Baking soda is a base on the pH scale, typically around 8.4, making it effective at saponifying fats. Turn off the heat and allow the pan to cool completely before scrubbing. Once cooled, use a stainless steel pad to scrub away any remaining residue, then rinse thoroughly. Dry the pan completely to prevent spots. If residue persists, repeat the process, extending the soak time if necessary. For tasks requiring similar durability, KitchenAid attachments offer versatile stainless steel options for your mixer. Unlike some pans used for oven rack placement, bare metal cookie sheets can generally withstand these high-heat boiling methods without risk of warping.
How to Clean Nonstick Cookie Sheets Without Scratching Them
To clean nonstick cookie sheets without scratching them, start by allowing the sheet to cool completely after use. This prevents thermal shock that can damage the coating. Remove loose crumbs with a soft cloth or paper towel. Use warm water and a small amount of mild dish soap along with a non-abrasive sponge or cloth to gently clean the surface. For stubborn baked-on residue, apply a paste of baking soda and water, then let it sit for 15 to 60 minutes; avoid using steel wool or abrasive scrubbers. After soaking, rinse thoroughly with warm water to remove all residue. Dry the sheet carefully with a soft towel to prevent water spots. Proper storage involves stacking cookie sheets with a cloth or paper towel between them to prevent scratches. Never use harsh cleaners, metal spatulas, or abrasive pads that could damage the nonstick coating. For similar care of other kitchen tools, consider using flex edge beaters to ensure gentle mixing without harming your nonstick bakeware. Following this gentle routine helps preserve your cookie sheets’ nonstick surface, ensuring they stay functional and scratch-free for years. For similar care of other kitchen tools, consider investing in compatible stand mixer attachments to expand your baking options without compromising your cookware. A high-quality roasting rack provides comparable durability and performance when cleaning your baking essentials.

Sponge Cloth 20 cm x 18 cm x 5 mm ( 7.9 in x 7.1 in x 0.2 in)

USA Pan baking pans feature Americoat which promotes quick release of baked-goods plus fast and easy clean up; wash with hot water, mild soap and gentle scrub brush or sponge

PURE UNCOATED ALUMINUM & SUPERIOR HEAT CONDUCTION: Crafted from 100% bare aluminum with NO chemical coatings – guarantees safe, toxin-free cooking. Engineered for lightning-fast, even heat distribution (up to 30% faster than steel!) for perfectly crispy cookies, golden roasted veggies, and juicy meats every time. The aluminum baking pans are made of thick and heavy aluminum, with a heavy rolled edge making this truly "commercial-grade"that provides maximized scratch resistance
5 Cleaning Mistakes That Warp or Scratch Your Cookie Sheet
Using the wrong cleaning tools or methods can easily warp or scratch your cookie sheet. First, avoid steel wool or stiff-bristle brushes because they leave permanent scratches and dents. Stick to soft sponges to keep the surface smooth. Second, never scrub a hot sheet; the thermal shock from the heat can cause warping. Always let it cool completely before cleaning. Third, skip the dishwasher altogether—hot water and harsh detergents can corrode aluminum and lead to warping. Fourth, never plunge a hot pan into cold water, as rapid temperature change bends the metal. Finally, don’t soak your sheet in bleach or abrasive cleaners, which can damage the aluminum surface. Instead, use mild soap, warm water, and a soft cloth for an effective clean that preserves your cookie sheet’s shape and finish.
Quick Habits to Reduce Cookie Sheet Cleaning Between Bakes
To reduce cookie sheet cleaning between bakes, adopt these quick habits. First, avoid greasing the sheet unless the recipe specifically calls for it. Cookie dough already contains fat, so adding extra grease just leads to residue that’s harder to clean. Second, line your sheets with parchment paper or silicone mats. These barriers prevent direct contact, making cleanup faster and supporting eco-friendly practices by reducing the need for harsh scrubbing later. For those who prefer using a mixer for their dough, consider a model known for quality and performance to ensure consistent results that minimize mess. Using a smart food scale can also help you measure ingredients precisely, preventing overflows or uneven baking that create extra mess.
Right after removing baked goods, wipe the sheet while it’s still warm. Hot water and dish soap work well to dissolve light grease and prevent baked-on film from forming. Between batches, perform a quick wash using a soft sponge and warm water—this routine keeps your sheets in top shape. Steer clear of aerosol sprays, as they tend to create sticky films that are difficult to remove. Following these habits will keep your baking sheets non-stick, clean, and ready for future use without extra effort.
What to Do With Stubborn Grease That Still Won’T Come off
To remove stubborn grease that won’t come off, start by soaking the affected area in hot water with a few drops of dish soap for 30 to 60 minutes. This helps loosen the grime and makes it easier to scrub away. If grease still persists, create a paste by mixing baking soda with water until it reaches a toothpaste-like consistency. Spread this paste over the grease stains and let it sit for a while before scrubbing with the abrasive side of a sponge.
For more resistant baking residue, enhance the paste by adding hydrogen peroxide or use vinegar for a fizzing action that lifts grime. Another effective option is Bar Keepers Friend; make a paste with water, allow it to rest a few minutes, then scrub gently. When cleaning aluminum pans, a mixture of cream of tartar and water heated together works wonders. For extreme buildup, repeat soaking or paste application overnight. Using a sturdy mixer dough hook can also help scrape off thick residue, but always ensure you’re using methods suitable for your pan’s material to prevent damage, and dry the surface thoroughly afterward.