Ever dealt with a burnt baking sheet that just won’t scrub clean? You’re not alone—such stubborn stains can be frustrating.
The good news is, with the right methods, you can restore your pan without causing damage.
In this article, you’ll learn simple steps and tricks to effectively remove burnt residue and keep your baking sheets looking their best.
Why Scrubbing Alone Won’t Remove Burnt Food (Pre-Treat First)
Scrubbing alone won’t remove burnt food from a pan. Burnt residues create strong bonds with the surface that friction alone can’t break. When you scrub a dry or crusted pan, you often end up just spreading the mess around and risking scratches or damaging any non-stick coating. To effectively loosen the burned material, you need to pre-treat first. Applying a baking soda paste or hydrogen peroxide mixture softens the residue, making it much easier to scrub away without harming your pan’s surface. This step reduces the amount of force needed and helps preserve the integrity of delicate coatings. For non-stick silicone surfaces, using a gentle dish soap soak prevents damage while lifting burnt food. To achieve similar precision in cooking tasks, consider using a top rated food scale for accurate ingredient measurements. For heavy-duty cleaning, the best results come from using a pan with a durable, non-stick coating that resists buildup.
How to Pre-Treat and Soak for Maximum Residue Loosening
Pre-treating and soaking your baking sheet is key to loosening stubborn residues effectively. Start by rinsing the pan with warm water, then apply a generous amount of grease-cutting dish soap. Let it soak for 15 to 30 minutes for light grime; extend the soaking time to an hour for tougher buildup. For heavily burnt or carbonized stains, opt for an overnight soak—ensure the pan is fully submerged so the burnt layer remains in contact with the cleaning solution. Alternatively, you can do a vinegar pre-soak by filling the pan with equal parts white vinegar and water, heating it to a gentle boil, and letting it sit for 15 to 20 minutes before rinsing thoroughly. Always rinse off loose particles before soaking to allow the solution to penetrate directly to the burnt areas. After soaking, the loosened residue should wipe away with minimal effort. For optimal cleaning precision, consider consulting a piping tips chart to ensure you choose the right tools for delicate scrubbing. To prevent future burnt-on buildup, using top rolling pin bands can help you roll out dough evenly across the baking sheet. For similar kitchen maintenance, learning how to adjust the mixer head can help you maintain consistent pressure when scrubbing.

Mrs. Meyer's Baking Soda Cream Cleaner removes soap scum and grease build-up to make your kitchen sparkle
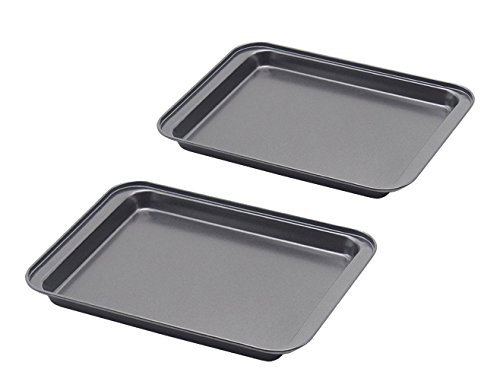
✔LITTLE PANS - Perfect size for a two-person household--frozen rolls, few cookies, etc. Outside SIZE: 9.5inch X 7.1inch X 0.8inch, Actual use inside SIZE:7.5inch X 6inch X 0.5inch. These little pans are great for one person or small items for two.
Make a Baking Soda Paste That Tackles Stubborn Burnt Spots
To effectively tackle stubborn burnt spots, you need to make a thick baking soda paste. Mix baking soda with a small amount of water until it resembles toothpaste, using a 3:1 ratio of baking soda to water. The goal is a paste that is thick enough to stick to charred areas without sliding off, unlike a runny mixture. For added cleaning power, toss in a drop of dish soap.
Start by targeting the worst burnt sections first. Apply a generous half-inch layer of the paste directly onto heavily carbonized spots, ensuring you cover corners and edges completely. Allow the paste to sit—at least 30 minutes for minor buildup or overnight for severe burns. This dwell time is crucial; it helps loosen the burnt residues, a technique refined through effective cooking and cleaning practices.
Once the waiting period is over, use a damp sponge or soft brush to scrub the area gently in circular motions. Non-abrasive tools are key to preventing scratches on your cookware or bakeware. Rinse thoroughly with warm water. If some burnt spots linger, reapply the paste only to those areas, then repeat the process.
Mrs. Meyer's Baking Soda Cream Cleaner removes soap scum and grease build-up to make your kitchen sparkle

For Baking, Cleaning, and Deodorizing
Does Vinegar Actually Help Clean a Burnt Baking Sheet?
Vinegar can help clean a burnt baking sheet, but it works best for light stains rather than heavy, hardened residue. The acetic acid in white vinegar softens burnt-on grease, making it easier to lift. For mild stains, spray or pour vinegar onto the affected area and let it sit for 15 to 30 minutes. Pairing vinegar with baking soda enhances the cleaning process because the fizzing reaction helps break down grime more effectively. However, vinegar isn’t very effective against thick, hardened carbon deposits, which may require scraping or multiple treatments. Regular use of vinegar as part of your cleaning routine can prevent future buildup by dissolving residues before they become difficult to remove. Consider using a silicone baking mat as a protective layer to minimize burnt residue on your sheet in the first place. Remember to rinse your baking sheet thoroughly afterward to remove any lingering smell and to dry it completely to prevent odors or rust formation. For best results, using the right measuring tools ensures accurate application of cleaning ingredients like vinegar and baking soda. Choosing accurate measuring cups helps maintain the proper ratio of vinegar to baking soda for optimal cleaning performance.
Mrs. Meyer's Vinegar Gel Cleaning Spray not only breaks down everyday grime, but also lifts dirt from surfaces leaving a cleaner surface

Mrs. Meyer's Vinegar Gel Cleaning Spray not only breaks down everyday grime, but also lifts dirt from surfaces leaving a cleaner surface to make your bathroom look spotless

ALL-PURPOSE VINEGAR SPRAY - There’s nothing quite like a great all purpose cleaner spray for those quick cleanup tasks around the house. Originally Yellow’s vinegar spray combines the power of natural distilled white vinegar with certified organic lemon extract for a clean you can see, touch, and smell! No lingering vinegar odor, just a lemony-fresh aroma that will leave your home feeling squeaky clean.
The Best Scrubbing Tools That Won’t Scratch Your Pan
Non-scratch sponge pads and soft dish brushes are your best options for cleaning your pans without causing damage. A non-scratch sponge paired with mild detergent is ideal for daily cleaning and removing residue after soaking. Use a soft brush with nylon bristles after each use to reach into corners without scratching the surface. For tougher, burnt-on spots, try a microfiber cloth or an eco-friendly scrubber like a Skoy pad, which provides gentle abrasion. Avoid steel wool or heavy-duty scouring pads, as these can damage your pan’s coating. Selecting the right tool ensures your bakeware stays in good condition over time. Unlike a dough hook, which is designed for kneading thick mixtures and is typically made from stainless steel or coated metal, these cleaning tools prioritize surface safety over mechanical strength. For reference, the 5 quart bowl for KitchenAid mixers is often made from similar durable materials that resist scratching when cleaned properly.

THREE SCOURING PADS: This pack of Scotch-Brite Zero Scratch Scour Pads includes three scrub pads for dishes

Gentle Cleaning: AIDEA non-scratch cleaning sponges tackle messes effortlessly; protect surfaces from scratches; sturdy abrasive scour pads remove stuck-on food; high-density sponge maintains rebound resilience and resists deformation

NINE SCRUBBING SPONGES: This pack of Scotch-Brite Zero Scratch Scrub Sponges includes 9 sponges
Still Burnt After Scrubbing? Try These Stronger Stain Removers
If non-scratch sponges and soft brushes haven’t removed the burnt stains, stronger household ingredients can help. Make a paste with baking soda and hydrogen peroxide to achieve a toothpaste-like consistency. Spread it over the burnt areas and let it sit for two to three hours or overnight for more stubborn stains. You can also try a reaction between baking soda and vinegar: sprinkle baking soda, pour in vinegar, and let the fizzing sit for 15 to 30 minutes. For deep-set stains, a paste made from cream of tartar and water, left to dry overnight, can be effective. Another option is a heavy-duty paste made from equal parts washing soda and cream of tartar mixed with hot water; let it sit for about 20 minutes. The alkaline nature of baking soda on the ph scale helps neutralize acidic burnt residues during these reactions. For particularly stubborn residue, using a digital kitchen scale to measure exact ingredient ratios ensures consistent results. Remember to use nonabrasive pads and rinse thoroughly afterward to protect surface coatings from potential damage caused by these stronger cleaners. For best results, choose a strong mixer attachment to blend the cleaning paste evenly.

A HOUSEHOLD CLASSIC: This bulk 7 lb resealable bag of ARM & HAMMER Baking Soda unlocks 100+ uses across your home—from kitchens and laundry rooms to crafting tables and beyond

A HOUSEHOLD CLASSIC: Pack of 12 x 1 lb boxes of ARM & HAMMER Baking Soda unlocks 100+ uses across your home—from kitchens and laundry rooms to crafting tables and beyond
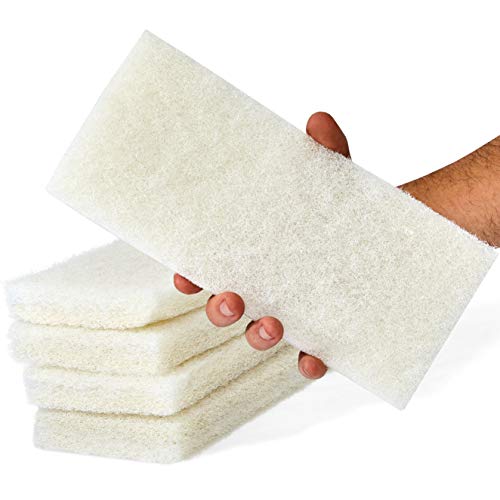
NONSCRATCH PAD FOR USE ON ANY SURFACE. This non-abrasive sponge scrubs away dirt and grime without damaging delicate surfaces. Our scrubbies are strong enough to last, but gentle enough for use on most household items.
Rinse, Dry, and Prevent New Burns (Final Steps)
After scrubbing away burnt stains, rinse the sheet thoroughly with warm water until all cleaner residue is removed. Repeat this process until the water runs clear, paying close attention to corners and edges where residue can linger. Immediately towel-dry the sheet to prevent water spots and rust formation. If moisture persists, place the sheet in a warm oven briefly to ensure it dries completely. Avoid air-drying, which can leave moisture that may cause future damage. For best results, consider using one of the top measuring cups reviewed for precision when portioning oils or batters.
To prevent new burns, line the sheet with parchment paper or a silicone mat before use. Wipe up spills as soon as the sheet cools. Adjust your cleaning frequency to wash the sheet shortly after each use, as this helps prevent grease and food buildup from baking on. Store the sheet only when it is fully dry, preferably in a dry cabinet. Use liners between multiple sheets to protect nonstick surfaces, and inspect for warping after each cleaning. Following these steps extends your sheet’s lifespan and keeps it burn-free.