

Wondering when to take your cake out of the pan? The right timing can make all the difference between a perfect release and a disaster.
Typically, waiting 10 to 15 minutes after baking allows the cake’s crumb to set and prevents sogginess.
Knowing these signs ensures your cake comes out clean and looks just as good as it tastes.
The full guide below helps you master that delicate timing every time.
Why the 10- to 15-Minute Pan Cooling Rule Works for Most Cakes
The 10- to 15-minute rest in the pan is crucial for most cakes because it allows the crumb to stabilize, preventing cracking and facilitating a smooth release. During this time, excess steam escapes, and moisture redistributes within the cake, which helps maintain a moist, tender crumb rather than ending up dry or fragile. This period also gives the cake just enough firmness to handle turning without tearing, while still staying warm and flexible enough to avoid crumbling. Placing the pans directly on a cooling rack during this rest allows air circulation underneath, which helps the heat escape evenly. For bakers who want to ensure precise handling, using a quality food scale to weigh ingredients before baking can further improve the cake’s structural stability. Using a clean, sharp scissor cut is a workable alternative for trimming piping bags when no nozzle is available. A cooling rack that is also rated to hold heavy baking pans can prevent warping during this critical rest period.
Additionally, this rest period causes the cake to contract slightly, pulling away from the pan edges. This contraction makes removing the cake cleaner and easier, especially when working with bold flavors or unconventional ingredients that can affect the cake’s structure. However, leaving it in the pan for too long risks overcooling, which can cause the greases in the pan to re-stick and make removal more difficult. Sticking to this brief pause ensures you avoid both a fragile collapse and a stuck, hard-to-release cake.

SUPERIOR QUALITY: Qukaka's cooling racks are made of sturdy stainless steel, durable and resistant to bending and rusting, structurally sound to hold heavier foods securely, rust and corrosion resistant, healthy and safe for everyday baking

HEALTHY & STURDY: The cooling racks are made of pure stainless steel core with healthy non-stick coating, Without any toxic or chemical materials, Won’t leach into food, Healthy for daily cooking use, Rust resistant and no deformation for long serving life
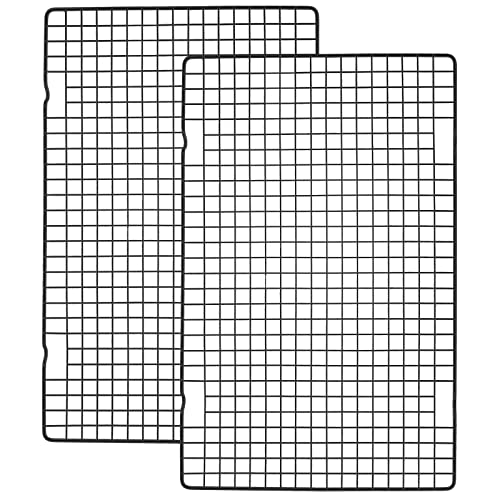
Value Pack of 2 cooling racks in black; Each measures 16" x 10" x 3/4"
3 Signs Your Cake Is Ready to Release From the Pan
The three reliable signs your cake is ready to release from the pan are as follows. First, check the edges. They will pull away from the sides of the pan, creating a small gap, and the perimeter will look firm instead of wet or sticky. This separation indicates that the crumb has set and the cake is baked through. Second, perform the spring-back test. Gently press the center of the cake with your finger; if it bounces back quickly, it’s a good sign the cake has finished baking. If the indentation remains, it may need more time and could be underdone. Finally, insert a toothpick into the middle of the cake. When you remove it, the toothpick should come out clean or with only a few dry crumbs attached. If wet batter clings to it, the cake needs a few more minutes in the oven. These three clues together can help ensure your cake is perfectly baked before turning it out of the pan. For best results, using a stainless steel roasting pan with a rack allows for even heat distribution and proper airflow during baking. Using safe kitchen hot pads will protect your hands when handling the hot pan. To protect your countertops from the hot pan, place it on a heat resistant mat designed for high temperatures.
How to Release a Stuck Cake Without Breaking It
To release a stuck cake without breaking it, start by gently loosening the edges. Use an offset spatula or a paring knife and carefully run it around the sides of the cake, keeping the blade close to the pan wall. For Bundt pans, also trace around the center tube. This helps release the cake gradually without tearing the crumb. Always avoid aggressive prying to prevent breaking the cake.
Next, set the pan on a hot, damp towel for 10 to 15 minutes. The heat and moisture cause the metal to expand slightly, helping to loosen the cake from the sides. After this, place a plate over the top of the pan, invert the whole assembly, and tap lightly on the bottom. If the cake remains stuck, repeat the warming process rather than trying to force it out sharply. Multiple gentle attempts preserve the cake’s shape and surface. Using a digital food scale to measure ingredients accurately can help prevent cakes from sticking in the first place. For those who frequently bake, a KitchenAid mixer with the best attachments can improve batter consistency and reduce sticking issues.
Once the cake releases, let it cool completely before storing. This gentle method reduces the risk of damaging the cake and ensures a smooth, attractive finish perfect for decorating or presentation. Patience and repeated small efforts yield better results than aggressive prying. Just as a dough hook uses a curved metal design to knead dough effectively without overworking it, using the right tools and techniques for cake removal prevents damage to the delicate crumb.

Small Offset spatula by Ateco

Professional quality small sized spatula, 4. 25- . 75-Inch blade
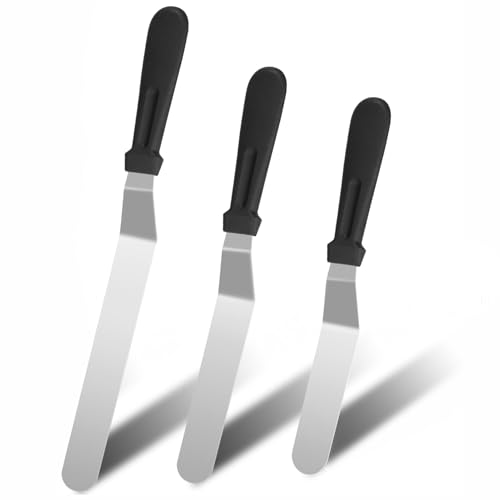
【MULTIPLE SIZES] Icing spatula set comes in Three different sizes 6, 8, 10 inches for different applications. It's great for icing cakes, cheese, pizzas, sandwiches, even cutting curds. This is your best choice to decorate a cake perfectly.
What Happens If You Take the Cake Out Too Soon?
If you take the cake out too soon, you risk damaging its structure and appearance. While the inside may look cooked, the exterior hasn’t had enough time to set and shrink away from the pan’s sides. Removing it early can cause cracking or collapsing because the cake is still fragile and prone to breaking when unmolded hot. The center may not be fully stabilized, leading to layers breaking apart during inversion or falling apart completely.
Sticking to the pan becomes more likely because the cake hasn’t shrunk sufficiently, leaving it clingy and easy to tear during release. Applying a proper release method ensures the pan is prepared to minimize adhesion. The textures also suffer—edges can tear, crumbs can break off, and the smooth top can become deformed. This makes storage more difficult since uneven layers won’t stack neatly or look as neat when frosted. Additionally, frosting becomes tricky; a damaged layer doesn’t hold frosting evenly, resulting in uneven coverage and a less polished appearance. Using the wrong measuring tools can also contribute to structural issues in baked goods, just as improper timing does. For bakeware that encounters stubborn residue, baked-on residue can be lifted with gentle cleaning products rather than abrasive scrubbing.
Waiting about 10 to 15 minutes after removing the cake from the oven allows it to firm up. This short rest helps the structure set and shrink slightly away from the pan, making it easier to unmold cleanly. It preserves the cake’s overall appearance and ensures a smooth surface, so you avoid cracks, tears, and other damage that can ruin the final look.

Fat-free cooking spray, 5 ounces

Gluten-Free: La Tourangelle Baking Spray is gluten-free. Many other baking sprays contain flour to keep them non-stick, however La Tourangelle uses lecithin, a plant-derived non-stick agent.

ALL-PURPOSE SPRAY: All- Purpose Professional no stick cooking spray.
What Happens When You Leave the Cake in the Pan Too Long
Leaving your cake in the pan too long causes several issues. The trapped steam creates a humid environment that softens the crust and leaves the surface tacky. This moisture also redistributes sugars and fats unevenly, diluting the cake’s flavor. Prolonged contact with the hot pan strengthens bonds between sugar and crumbs, making the cake stick firmly to the sides. When you try to remove it, you risk tearing the crumb and losing that tender texture. Additionally, the bottom crust becomes denser and compressed from extended heat, which can lead to a heavy, uneven crumb. The cake may also settle unevenly against the pan walls, causing distorted edges. To avoid these problems, give your cake a brief 10 to 15-minute rest before removing it from the pan. Removing it too late allows the environment inside the pan to compromise the cake’s structure and taste.
Why Cooling on a Rack Actually Matters
Cooling your cake on a wire rack is essential because it allows air to circulate all around the pan, pulling heat away from every side. This rapid airflow prevents residual heat from overbaking the crumb, helping you maintain a tender, moist interior. It also facilitates moisture escape, stopping excess steam from pooling beneath the cake and creating a soggy bottom. Using a silicone baking mat under your cake pan can also prevent sticking and ensure even heat distribution during baking. For similar reasons, lining the pan with parchment paper can further protect the cake from sticking and create a clean release. While glass measuring cups like Pyrex are not recommended for rapid temperature changes, wire rack cooling avoids such thermal shock by allowing gradual, even heat dispersal.
A dry, evenly cooled cake surface is crucial before decorating, as any dampness can cause frosting or fondant to slip or ruin your design. Additionally, cooling on a wire rack helps stabilize the crumb structure, making it easier to apply flavor infusions such as syrups or glazes later on. Overall, this method ensures your cake cools more quickly, evenly, and without damage, resulting in a lighter, more professional finish every time.

QUALITY STAINLESS STEEL CONSTRUCTION: Made from food grade stainless steel instead of metal plating or coating, the grill is stronger, more durable, less likely to rust, warp or bend and safer

STURDY STAINLESS STEEL CONSTRUCTION: Our baking cooling rack is made of quality materials, prevents bending or deformation when carrying heavy loads. Smooth polished surface of cookie cooling rack without coating or plating, no burrs, no rust, no peeling, protect your daily food safety

HEAVY DUTY STAINLESS STEEL STURDY DESIGN: Set of 2 cooling racks for half sheet baking pans are food-safe, professional grade 304 (18/8) stainless steel with strong, heavy duty wire grids, small holes, smooth no-snag edges, and a full 1 inch height resulting in greater all around airflow for even cooking, cooling and roasting every time
How Long Different Cakes Should Cool in the Pan
Most cakes should cool in the pan for 10 to 20 minutes before removal, but the exact time depends on the cake type. For standard layer cakes, 10 to 15 minutes usually suffices. Sheet cakes typically need 10 to 20 minutes, with thicker varieties requiring a bit longer. Bundt cakes benefit from 15 to 20 minutes of cooling in the pan, and some larger ones may need up to 30 minutes to set properly. Cupcakes require only 5 to 10 minutes, as they cool quickly and are easier to handle early on.
Delicate cakes like angel food or chiffon demand longer cooling times. They should stay inverted in their pans for an hour or even two to maintain their airy structure. Packaging instructions often specify extended cooling steps for these types to ensure they do not collapse. Pound cakes follow the general 15 to 20-minute rule, with cooling times tailored to their density and moisture content. Always check your recipe’s specific instructions, as ingredient variations and cake styles can significantly impact cooling schedules.
When Can You Actually Frost or Slice Your Cake?
Frost or slice your cake only when it is fully cooled and the crumb feels set and cool to the touch. You should wait until the cake has cooled in the pan for about 5 minutes for cupcakes or up to an hour for larger cakes like angel food. Frost only when residual heat is gone because warm frosting melts easily and can ruin your decorating. If you need to speed up cooling, you can transfer the cake to a cookie sheet to allow air to circulate more evenly. For best results, briefly chill the fully cooled cake layer to firm the crumb and improve frosting adhesion. Wrapping layers and refrigerating overnight is also fine with proper storage. For cleaner, professional-looking results, consider using a stand mixer with bowl to whip your frosting to a stable consistency before applying. Using a cast iron loaf pan with a lid can help ensure even heat distribution and moisture retention during baking.
For slicing, wait until your cake reaches room temperature, typically 1 to 2 hours, depending on the size and density. Dense cakes, like fruitcake or pound cake, may require longer to reach the right temperature. Chilling the cake for 10 to 15 minutes before slicing helps create cleaner cuts. Using a warm knife during slicing also makes smooth, crumb-free slices easier to achieve.
5 Cooling Mistakes That Cause Cracks, Sogginess, or Sticking
Leaving a cake in the pan too long traps steam, preventing moisture from escaping. This results in soggy edges and a sticky bottom, which can cause tearing when you remove the cake. To avoid this, always transfer the cake to a wire rack after the initial cooling period of about 10 to 15 minutes. Using a quality wire rack improves airflow during cooling, preventing condensation from collecting under the cake. Cooling in the pan without airflow causes condensation to build up, further increasing sogginess and making it difficult to release the cake cleanly. Precise measuring cups ensure the correct batter volume, which helps the cake bake evenly and release from the pan more reliably. Avoid cooling the cake in a closed pan with sugary residue, as this can cause it to stick. Lastly, never invert fragile cakes without loosening around the edges first, as this can lead to cracks and damage. Proper cooling techniques help maintain the cake’s structure, prevent cracks, and ensure it stays moist and easy to decorate or slice later.

【Healthy Material】 The baking sheet with wire rack are made of high quality stainless steel without any chemical coating, wouldn't create chemicals at high-temperature baking, great replacement to aluminum pan, rust free and healthy for your daily use.

100% Solid 304 (18/8) Stainless Steel Construction - No metal platings or coatings that can chip or scratch and transfer toxins/chemicals to your food the way non-stick racks can. They also won’t rust, warp or bend.

【Collapsible 4 tier Cooling Rack】 Features a sturdy construction with a collapsible & adjustable design. Geesta wire cooling rack works works well for everything, from small items like cupcakes and muffins to large pies and cakes of significant weight.