

Ever wondered what kind of pan is best for making that perfect rolled sponge cake? A jelly roll pan is your go-to tool—shallow, rimmed, and typically measuring 10×15 inches with one-inch sides.
It is designed to give you an even, thin layer of batter that’s easy to roll without cracking. When used right, it makes baking and finishing your jelly-filled or rolled cakes much simpler.
Keep reading to learn everything you need to choose and use the perfect one.
What Is a Jelly Roll Pan? Definition and Core Purpose
A jelly roll pan is a shallow, rectangular baking pan typically measuring around 10 by 15 inches with sides about an inch high. Its main purpose is to bake a thin sponge cake that you can fill and roll without cracking, making it ideal for classic jelly rolls or bûche de Noël desserts. The pan’s even, low sides create a uniform layer of batter that turns into a flexible cake sheet, perfect for rolling. While jelly roll pans differ from circular pans, choosing the right baking pan shape is crucial for achieving desired cake results.
This pan is essential for achieving consistent cake thickness and smooth edges, which helps with neat fillings and decorations. Its low profile also makes it easy to store by stacking under larger sheet pans, saving space in your kitchen. Constructed from materials like aluminum or aluminized steel, a jelly roll pan can also be used for baking bars or roasting vegetables. However, its original design—containing batter to produce a rollable, thin cake layer—remains its primary function. For those seeking a professional mixer to whip cake batter, the high-performance KitchenAid HD models offer the power needed for consistent results. These models are often praised for durable construction and reliable performance, as documented in detailed reviews.
Why a Jelly Roll Pan Differs From a Standard Baking Sheet
A jelly roll pan differs from a standard baking sheet primarily because of its rim height. The jelly roll pan has a continuous 1-inch rim that contains batters and juices, preventing spills and allowing for even baking. In contrast, a standard baking sheet typically features flat or low edges, which prioritize airflow. This design promotes crispier textures in baked goods like cookies or roasted vegetables by encouraging even browning.
While both pans are commonly made from materials like aluminum, the key distinction lies in the rim height. The raised edge of a jelly roll pan makes it suitable for thin cakes, bars, or dishes with moist ingredients that need containment. Meanwhile, the low-profile edges of a baking sheet enhance airflow around food, resulting in crisp, browned exteriors. Ultimately, choosing between the two depends on whether you need a rimmed surface to hold wetter mixes or an open, ventilated surface for dry, crispy results. For recipes requiring both containment and even browning, products like best baking sheets with wire racks combine a rimmed pan with a wire rack to optimize airflow and drainage. Additionally, for bakers who already own a stand mixer, understanding which KitchenAid mixer model best handles thin batters can further streamline your jelly roll preparation. Applying a food-grade grease to the mixer’s moving parts helps maintain smooth operation when working with delicate batters.

INGENUITY DIAMOND TEXTURE - This rimmed baking sheet has a diamond texture on the base increases its non-stick properties and ensures even and quick heat airflow to the cookie, which makes the cookies consistently baked without any over or undercooked part

Naturals commercial bakeware is made of pure aluminum which will never rust for a lifetime of durability.

2-PIECE BAKING SHEETS SET: Cookie sheets for baking nonstick set includes 2pcs 15x10x1 inch cookie sheets which is the right size for baking jelly rolls, champagne gold color, meet most of your daily oven pans need, help you take your baking to the next level
Jelly Roll Pan Dimensions and Materials to Look For
A 15 x 10 inch pan with a 1-inch depth is standard for a jelly roll cake. The interior measurements should be 10 x 15 inches inside the rim, as outer edges can vary. A shallow rim is crucial for ensuring even baking and making it easier to roll the cake without cracking. For consistent results, using a stainless steel bowl with a stand mixer ensures the batter is evenly mixed and aerated.
For materials, aluminum or aluminized steel are ideal choices because they are lightweight and resist warping. A nonstick coating helps with releasing the cake cleanly and simplifies cleanup, especially when dealing with delicate sponge cakes. Uncoated aluminum pans work well for traditional bakers, while hard-anodized versions offer extra durability. Sturdy construction minimizes warping over time, which is critical for achieving flat, even bakes that roll smoothly. Choosing the right dimensions and material ensures your sponge cake bakes evenly and rolls without cracks, providing a dependable base for decorating. For wet ingredients in the batter, using liquid measuring cups ensures accurate measurement and better consistency. To further expand your baking toolkit, KitchenAid mixer attachments can streamline mixing the batter for your jelly roll sponge.

WHAT'S IN THE BOX: one 15-inch carbon steel cookie sheet. Measures 15 x 10 inches.

WHAT'S IN THE BOX: One 15-inch carbon steel cookie sheet. Measures 15 x 10 inches.

2-PIECE BAKING SHEETS SET: Cookie sheets for baking nonstick set includes 2pcs 15x10x1 inch cookie sheets which is the right size for baking jelly rolls, Rose gold color, meet most of your daily oven pans need, help you take your baking to the next level
How to Prep, Bake, and Roll a Sponge Cake Step by Step
Preheat your oven to 350°F. Grease your pan or line it with parchment paper to ensure easy removal later. Beat eggs and sugar together until the mixture is thick, pale, and falls into a ribbon when drizzled from the whisk. This stage indicates your batter has enough air incorporated, which is crucial for a light sponge cake.
Gently sift your dry ingredients—typically flour and sometimes cornstarch or baking powder—over the egg and sugar mixture. Fold them in carefully using a spatula or gentle stirring motion to avoid knocking out the air. Overmixing at this stage can deflate the batter, resulting in a denser cake.
Pour the batter into your prepared pan immediately after mixing. Use a spatula to spread it evenly, ensuring the thickness is uniform across the surface. Place the pan in the oven and bake for 7 to 15 minutes. You’ll know it’s done when the top springs back when lightly touched and a toothpick inserted into the center comes out clean.
Once baked, let the cake cool for just a minute or two in the pan. Then, invert it onto a towel dusted with powdered sugar. Carefully peel off the parchment paper or silicone baking mat. While still warm, gently trim any crusty edges if necessary and roll the warm cake with the towel inside. This rolling process shapes the cake and helps develop a natural curve, which will be beneficial when you later fill and reroll it. To keep your silicone mat in top condition, avoid using abrasive cleaners and instead follow the gentle cleaning methods that lift baked-on residue without damaging the surface. Allow the rolled cake to cool completely in this shape to set the curve.
When cooled, unroll the cake, spread your filling of choice—such as lemon curd, chocolate ganache, or whipped cream—and reroll carefully. This technique opens up endless opportunities for flavor variations and decorative options, from dusted sugar to piped icing, allowing you to tailor your sponge cake to any occasion.

【WIDELY USE】 This number silicone mold not only can used in oven, but also refrigerators, dishwashers and microwave ovens. You can use this with your family and friends to make your own special desserts, resin, chocolate and so on.

High quality: Swiss roll cake mat made from 100% food grade silicone which is safe and does not leach onto foods, eco-friendly, flexible, reusable and durable. Special non-stick surface will, Please identify the trademark "Brainver" before purchasing
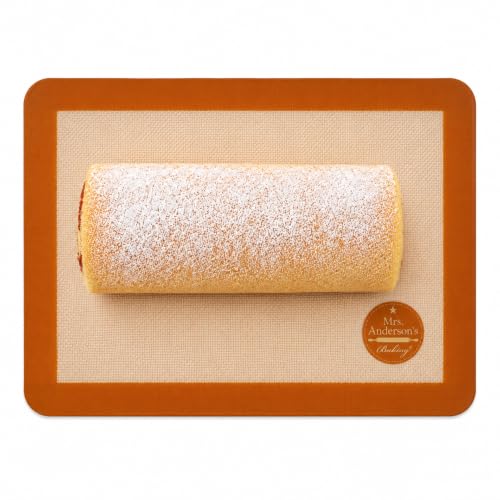
Mrs. Anderson's Baking Silicone Jelly Roll Baking Mat: Delivers effortless food release without greasing for beautifully baked jelly roll cakes, cookies, breads, pastries, and savory recipes while replacing disposable parchment paper for cleaner baking and easier cleanup
Common Mistakes When Rolling Cakes (and How to Fix Them)
To avoid cracks and tears when rolling a cake, aim for a light, even bake. Don’t overbake, as dry edges tend to split first. Check the sponge at the end of the bake—it’s ready when it’s just set and springs back lightly when touched. When rolling, apply gentle, even pressure to avoid stressing the cake. Forcing a tight spiral can cause tears and cracks. For a more reliable roll, consider using a loaf pan for baking sourdough to ensure even heat distribution and a uniform crumb structure. Keeping your tools clean, including washing oven mitts safely, helps prevent grease transfer that can damage a delicate sponge. Using the right frosting for piping can also ensure you have a smooth, spreadable consistency that won’t tear the cake.
Filling compatibility is also key. Heavy or cold fillings put extra strain on the sponge, increasing the risk of splits. Spread an even, thin layer of filling close to the edges, avoiding thick piles that can interfere with rolling smoothly. If minor cracks or tears appear, use whipped cream or frosting to patch them up, acting like glue to hold everything together. Place the seam side down after rolling—this hides imperfections and keeps the cake looking neat. A light dusting of powdered sugar can also help mask any small cracks or tears, giving your roll a polished finish.