

Have you ever wondered how to get perfectly kneaded dough using a stand mixer? The key is knowing how to properly attach and operate the dough hook.
With a few simple steps, you can turn a messy mixture into a smooth, elastic dough ready for baking. Keep reading to learn the easy process that delivers consistent results every time.
Attach Your Dough Hook Securely
Ensure your dough hook is securely attached before operating your mixer. Turn off and unplug the mixer to prevent any accidental start-up during installation. For tilt-head models, tilt the motor head back; for bowl-lift models, lower the bowl to access the shaft. Slide the dough hook onto the shaft, making sure it aligns precisely with the pin or notch. Rotate the hook until you feel a firm lock or hear a click, indicating it is securely in place. Gently tug the hook to verify it does not wobble or come loose. For easy access, practice bowl removal and cleaning tips to maintain your equipment. After confirming the attachment, lower the head back and lock it in position. Check the clearance so the hook does not scrape against the bowl. Properly securing the dough hook ensures effective mixing and helps your dough rise perfectly. A clean release like a Perfectly Released Bundt Cake depends on careful preparation and the right techniques. For best results, consider using a dough hook attachment from the top-rated KitchenAid options to improve mixing performance.

🍐【Compatible】K45, K45SS, KN15E1X, KSM75, KSM85PS, KSM88PSQ, KSM90, KSM95, KSM96, KSM97, KSM100, KSM103, KSM105, KSM110, KSM120, KSM150, KSM150A, KSM151PS, KSM152, KSM153, KSM154, KSM155, KSM156HB, KSM158, KSM160A, KSM175,KSM180, KSM180LEBK, KSM180RPMB

√ Package: Including 2 pack dough hook for kitchenaid hand mixer dough hooks.

Why Start With a Flat Beater Before the Hook?
Starting with a flat beater before switching to the dough hook is a key step to ensure optimal dough consistency. Use the flat beater for 1 to 3 minutes on low speed to evenly combine dry ingredients like flour and sugar with wet ingredients such as water, milk, or eggs. This initial mixing helps distribute ingredients uniformly without overworking the flour, which can develop gluten prematurely. For precise control over ingredient amounts, using a top rated food scale ensures accurate measurements before mixing. For particularly sticky doughs, a flex edge beater can help scrape the bowl sides more effectively during this initial blend. A stainless steel roasting pan with a rack can also be used to support proofing doughs that require a stable, heat-safe surface.
Step-by-Step: Knead Dough With a Hook
Watch the dough as it transforms—pulling away from the sides of the bowl, gathering around the hook, and developing a smoother appearance as gluten forms. Don’t rush this process. Continue kneading with the hook until the dough no longer sticks to your fingers and feels consistently elastic throughout. To test its readiness, pinch off a small piece and gently stretch it; if it can be pulled into a thin, translucent sheet without tearing, you’ve reached the right stage. Once this windowpane test passes, stop kneading. Keep in mind that the stand mixer’s weight may shift slightly during heavy kneading due to its motor and metal construction. For heavy dough batches, a 5 quart mixer provides extra capacity and stability compared to smaller models. Placing the mixer on a heat resistant mat can help prevent it from sliding on the countertop during vigorous kneading.

Built to take it all on with the durable and built-to-last metal construction, and 59 touchpoints around the mixer bowl for great mixing results.

Built to take it all on with the durable and built-to-last metal construction, and 59 touchpoints around the mixer bowl for great mixing results.

【Digital Switch Control and Display】Brand new upgrade. This kitchen mixer has an electronic screen display, 8-speed and 15-minute adjustment, access to multipurpose and a variety of recipes. After clicking power on, press speed/time, increase or decrease the time and speed by twisting the knob, and then click power-on again to start the machine.(For specific operations, please refer to the Operation Guide section of the manual)
Best Dough Hook Speed for Kneading
You should always knead yeast dough at speed 2 on a stand mixer. This setting strikes the right balance between developing gluten structure and protecting your motor. Speed 2 provides enough momentum to effectively mix and knead the dough without overworking it. Using a lower speed can result in insufficient gluten development, while a higher one may strain the motor or damage the dough’s delicate structure. For best results, consider using liquid measures in a clear, spouted cup for precise hydration levels. Maintain speed 2 throughout the entire kneading process, which usually lasts between 5 and 15 minutes depending on your recipe and dough hydration. Avoid changing speeds mid-process, as consistency is key to achieving reliable results. A hand mixer with dough hooks can also work for smaller batches, but a stand mixer is recommended for heavier doughs. Trusting this steady, moderate speed ensures the dough is kneaded thoroughly, avoiding overmixing or underdevelopment. Pairing your mixer with a stainless steel bowl ensures even heat distribution and durability during prolonged kneading.
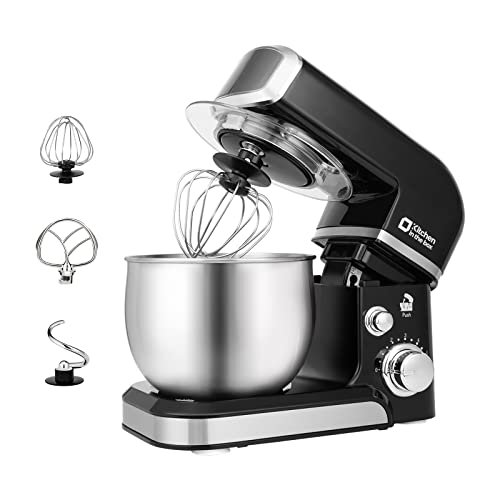
Compact Designed And More Color Options - The stand mixer is less than 7lbs with dimension 12.9*7*10.2 In, small and easy to storage,which could help space-saving. Perfectly suitable for small kitchen,apartment,or limited storage space. And multiple colors to choose,meet a variety of aesthetic needs for your kitchen.

Compact for Everyday Use - Weighing under 5 lb, this small stand mixer saves you the hassle of moving a heavy machine back and forth. The compact bowl fits easily in the refrigerator, so you can chill ingredients without changing containers.

Compact Designed And More Color Options - The stand mixer is less than 7lbs with dimension 12.9*7*10.2 In, small and easy to storage,which could help space-saving. Perfectly suitable for small kitchen,apartment,or limited storage space. And multiple colors to choose,meet a variety of aesthetic needs for your kitchen.
Signs Your Dough Hook Kneading Is Done
Your dough hook has finished kneading when the dough feels smooth and elastic. You can perform the windowpane test by pinching off a small piece and stretching it thin enough for light to pass through without tearing; this indicates proper gluten development. The poke test is also reliable: press a finger into the dough, and if it springs back quickly, the kneading is complete. If the dough responds slowly or doesn’t spring back at all, it needs more working. Additionally, your dough should hold a tight ball shape and pull away from the sides of the bowl. It will produce softer sounds and slap against the bowl less vigorously, confirming the kneading process is finished. These visual and tactile cues are your best indicators that your dough hook has done its job.
Common Dough Hook Mistakes and Fixes
Even if your dough hook seems straightforward to use, several common mistakes can prevent it from working effectively. First, check your hook height; if it’s too high, it won’t knead the dough properly. Adjust the mixer head so the hook just clears the bottom while still reaching the dough. Also, don’t underestimate batch size. A small dough amount often rides around the hook without developing structure. Fix this by doubling your recipe or kneading small batches by hand. Your common ingredient ratios matter too. High hydration doughs stick and smear, so add flour gradually until the dough clears the bowl. Finally, consider mixing time. Starting at low speed builds structure; if your dough stays stubborn, redistribute it and resume. Inspect your hook for wear and check bowl height adjustments to guarantee effective kneading.

Note: Compatible with almost all KitchenAid 4.5-quart and 5-quart tilt-head stand mixers. You can find your model on the bottom of the mixer. Compatible models include: K45, K45SS, KN15,KDM90, KA15, BEA30, RRK150, KSM45, KSM75, KSM85, KSM88, KSM90, KSM95, KSM96, KSM100, KSM103, KSM106, KSM110, KSM111, KSM120, KSM125, KSM150, KSM151, KSM152, KSM153, KSM154, KSM155, KSM156, KSM160, KSM170, KSM175, KSM177, KSM180,KSM195, KSM200

Why Choose a Spiral Dough Hook?Unlike C-shaped kitchen aid dough hook that just rotate and pull, this spiral dough hook actively pushes dough down while kneading.The spiral design creates continuous downward pressure that ensures even kneading of heavy doughs.

Anti-Rise Disc Baffle: Unlike ordinary hooks, this dough hook attachment for KitchenAid features a metal Disc Baffle that stops dough from spreading up onto the mixer’s hub and body while kneading. This clever upgrade protects your Kitchen Aid mixer accessories and keeps your machine clean during heavy mixing
Stop Dough From Climbing Your Hook
Matching your batch size to the hook and bowl is crucial. Use enough dough to secure the hook without overloading it. Too little dough won’t provide stability, and too much can cause the dough to climb upwards. Lightly oil the hook to reduce sticking and ease removal. Incorporate short pauses during mixing: stop the machine, scrape down the sides, and let the dough settle. This resets the kneading process and minimizes clinginess. Also, verify that the hook is properly engaged with the bowl, with the right contact and height. Proper alignment ensures the dough stays in the bowl and doesn’t climb the shaft. For best results, use a KitchenAid tilt-head mixer that is reviewed for quality and performance. After cleaning the hook, treating it with baking soda paste can help lift stubborn residue. Consider the batch capacity of your mixer, as it is analogous to how a half sheet pan dictates the volume of batter for even baking.
Fix Wet or Dry Dough on the Hook
To fix dough that’s too wet or too dry while on the hook, start by identifying the problem early. If the dough smears or sticks heavily to the sides of the bowl, it’s too wet. Add flour a tablespoon at a time on low speed, mixing until the dough pulls away from the bowl cleanly. If the dough crumbles or tears and doesn’t come together, it’s too dry. Add water a teaspoon at a time near the dough mass, mixing until the dough is cohesive and smooth. Avoid pouring large amounts of liquid all at once, as this can damage gluten development. Pause after each addition to check texture before adding more. Rest the dough briefly to allow flour to absorb moisture before making further adjustments. This helps keep fermentation on track. Your goal is a smooth, elastic mass that’s slightly tacky to the touch, not overly sticky or dusty. Discontinue adjustments once the dough clears the bowl and moves in a single cohesive piece. This careful adjustment technique is similar to the step-by-step process for making butter with a stand mixer, where gradually adding or removing ingredients ensures a clean, cohesive result.
Clean Your Dough Hook in 3 Easy Steps
After kneading, remove the dough hook immediately to prevent dough from drying on it. Unplug your mixer before separating the hook. Check if the hook is dishwasher-safe; coated hooks usually are (top rack), while burnished aluminum ones are not. When uncertain, hand-washing is the safest choice. For a similar approach, consult paddle attachment reviews to compare care for coated vs. uncoated mixer accessories. For similar baked-on residue, a short soak in warm, soapy water helps loosen stubborn bits effectively. You should also consider how the hook’s material compares to baking sheet materials when making care decisions.
Soak the hook in warm, soapy water for a few minutes if there’s stubborn residue. Use a soft sponge or brush to gently scrub away any remaining dough. For grooves and tight spaces, a toothbrush is effective. Avoid abrasive pads on coated finishes to prevent scratches.
Rinse the hook thoroughly under clean water. Dry it immediately with a soft towel to prevent tarnishing or rust, especially if it’s not stainless steel. Inspect the attachment point and spiral curves for any leftover dough. To keep the hook in good condition, store it fully dry and away from moisture to prevent corrosion.

Innovative Design with Comfortable Grip: The unique spiral design mimics the kneading action of fingers, ensuring thorough mixing. The ergonomic handle offers a comfortable grip, making the Danish dough whisk easy to hold and use

Upgraded 2-Eye Design for Even Mixing: Blends thick sourdough, pizza dough, and pastry batter without clumps; replaces traditional dough hooks, mixing spoons, and hand mixers to cut prep time; ideal for artisan home bread and pastry baking

Attachment Compatibility Guide: This stainless steel dough hook is designed for KitchenAid 6Qt bowl-lift stand mixers, including professional 600 Series, pro 600 Series, KP2671X, KP26M1X, KP26M8X, KP26M9X. As a reliable dough hook attachment for kitchenaid, it provides a secure fit, stable operation, and efficient kneading performance for bread, pizza, bagels, and other yeast dough recipes. Please verify your mixer model before purchase. Not compatible with tilt-head mixers
What Is a Dough Hook and How Does It Work?
A dough hook works by rotating to imitate the hand kneading process. Typically, a stand mixer’s dough hook either has a C-shape or a spiral design. The C-shaped hook pushes the dough against the sides of the bowl, while the spiral hook pushes it off the bottom. This repeated folding and stretching help develop gluten, the protein structure that gives dough its elasticity. As gluten forms, it traps air more effectively, creating a better rise and a more uniform, chewy texture in the finished bread or dough. Using a dough hook saves you time and physical effort compared to manual kneading, allowing you to work with larger batches comfortably without straining your hands or arms. For sourdough bakers, pairing the mixer with a quality loaf pan ensures the dough’s improved structure translates into an evenly shaped, well-baked loaf.