

Ever wondered how to pipe cupcakes with that smooth, professional look? It’s easier than you think once you understand the basic techniques.
By mastering a few simple steps, you can create clean lines, beautiful swirls, and intricate designs that elevate your baking game.
This guide walks you through the essential tools and tips to help you pipe like a pro.
Keep reading to learn all the skills you need to get started.
How to Set Up Your Piping Bag the Right Way
To set up your piping bag correctly, start by choosing a disposable bag and trimming the tip opening gradually until it fits snugly around your piping tip. This prevents wobbling and ensures a clean, steady flow of frosting. If you plan to use multiple colors or tips, insert a coupler into the bag, then screw on the desired tip securely. Lock the coupler tightly to prevent leaks during piping. To keep the bag open while you fill it, fold a cuff over a tall glass, which also frees both hands for filling. Fill the bag halfway to two-thirds full; overfilling can make it difficult to control. Push the frosting down toward the tip to “burp” out any air pockets and close the top with a twist. Proper setup directly impacts your piping texture—starting with a well-prepared bag leads to smoother, more consistent swirls every time. Using dry measuring cups for powdered sugar ensures accurate dry ingredient portioning for your frosting base. A food scale can also help ensure precise ingredient measurements for your frosting, leading to more consistent results. For a snug fit, estimate the snip size and snip small sections off at a time. Investing in a high-quality stand mixer can make preparing large batches of frosting far more efficient and consistent.
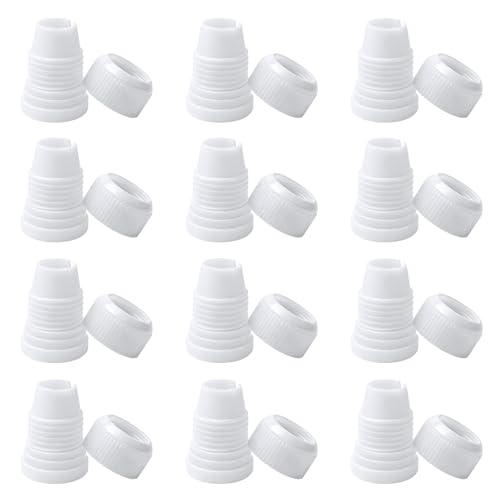
【STANDARD SIZE】- These white cake decorating couplers are universal / standard size and fit most piping tips, designed to pair seamlessly with standard-size piping tips and icing nozzles.

Standard couplers: these white couplers are 3 cm/ 1.2 inch long, and their base' diameters are 2.5 cm/ 1 inch, fit for standard-size icing nozzles
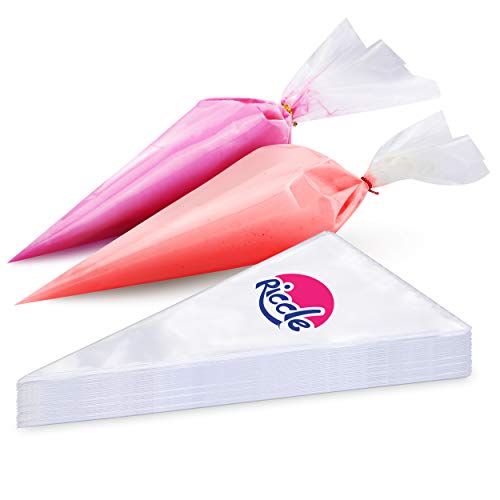
Thick Pastry Bags: Did your previous bags leaked? Are you afraid to squeeze them? Not now! Made of durable, anti-burst, non-slip and food grade plastic that is flexible, strong, reliable and thick enough to bear pressure of squeezing and frosting without any burst or leakage
How to Hold and Squeeze the Bag Like a Pro
To hold and squeeze the piping bag like a pro, grip the bag near the top of the frosting, not the middle. This position reduces leaks and provides better control. Rest the frosting in your palm, while your thumb and forefinger secure the upper section of the bag. Twist the top of the bag to focus pressure as it empties, ensuring a steady flow. Your dominant hand should manage the squeezing pressure, while your other hand guides the tip’s direction. Squeeze from your palm and fingers, rather than directly from the tip, to maintain a smooth frosting texture. Using two hands helps prevent wobbling and results in more even piping, enhancing the overall look. Hold the bag at a 45-degree angle for borders or vertically for dots, keeping steady pressure throughout to avoid lumps. As the bag empties, retwist the top to keep the flow uniform and consistent. For filling, fold the bag in half to create a mess-free cuff and scoop frosting in with a spatula. After use, glass measuring cups used for melting butter or heating frosting are dishwasher safe only if they are properly tempered and not exposed to sudden temperature shocks. For silpat mats, use a gentle sponge with warm soapy water to lift baked-on residue instead of abrasive scrubbers. If your mixing bowl becomes stuck during frosting preparation, try running warm water over the bowl’s rim to expand the metal and loosen the seal.
Pipe the Perfect Cupcake Swirl Step by Step
To pipe the perfect cupcake swirl, start with the frosting close to the surface and your piping tip at a 90-degree angle. Apply steady pressure to initiate a swirl from the outer edge rather than from the center. Use a smooth, circular motion to build a solid base, then spiral inward in overlapping loops. Gradually lift the tip as the frosting climbs higher, keeping it partly buried for a tighter, more defined shape. Finish with a centered peak by easing off pressure before lifting the piping bag. Using a half sheet pan under your cupcakes makes cleanup effortless and provides a stable work surface. For a durable workspace that can handle heavy mixing, consider using a butcher block table as your base. For specific textures, the chart in the guide matches RFAQK tip numbers to distinct frosting patterns.
Different decorating styles can alter this approach; some start from the center outward, but edge-first piping gives you cleaner control and a more polished appearance. For visual interest, layer two different frostings in the piping bag to create striped swirls. The key to a professional-looking finish is maintaining consistent pressure and even spacing between the loops. Avoid sudden pauses or jerky movements, as these leave jagged edges. Using a closed-star tip helps achieve sharp ridges and a detailed texture. For a classic look, begin your swirl tight at the center and expand outward as an alternative approach.
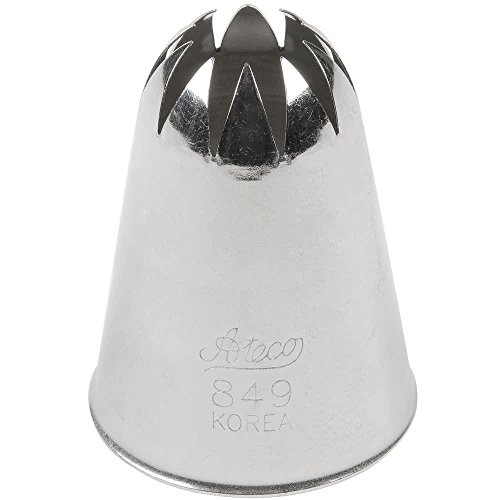
Item Package Dimension 4.5299999953794L x 2.1699999977866W x 1.4599999985108H inches

Tips come in protective plastic case

2D Icing Tip:Ideal for piping star,mashed potatoes,cookies,meringues,nice frilly top on cupcakes,and buttercream roses swirl to makes cute flowers.
Five Piping Techniques Every Baker Should Know
A star tip rosette is a versatile decorating technique that creates a bakery-style volume quickly. To achieve this, start at the center of your cupcake and apply steady pressure as you circle outward. Lift straight up at the end to form a soft peak. This method produces a textured, floral-like appearance with a soft, puffy shape that looks professional and appealing. Proper setup prevents mess and promotes smooth piping, making this technique even easier to master.
Using this technique, you can efficiently top multiple cupcakes with a consistent, elegant finish. The key is maintaining even pressure throughout the swirl and lifting smoothly to avoid a tail or flattening the rosette. This method is ideal for adding height and decorative flair without complicated motions, making it perfect for bakers who want impressive results with minimal effort.

【Effortless Floral Designs】Create stunning floral patterns with ease using our drop flower piping tip set. Designed for both buttercream icing, these cake piping tips allow you to pipe intricate flowers and borders with a single squeeze, transforming your cakes and cookies into art

Starter Piping Set: The Master Cake Decorating Piping Tips set comes with an assortment of round, star, petal, leaf, and specialty tips; it also features two standard couplers and two 1.25-inch flower nails

Riccle Piping Bags and Tips Set, 11.8 Inch 100 Anti Burst Piping Bags, 124 Pcs Cake Decorating Kit with 16 Piping Tips, 1 Reusable Pastry Bags, 3 Cake Scrapers
Getting Your Frosting Consistency Just Right
Your frosting should have a soft peak that bends slightly, similar to thick peanut butter, when ready to pipe. To achieve this, check the texture carefully: it needs to hold its shape while gliding smoothly through the tip. If your frosting stands straight up without any curl, it’s too stiff—add milk or cream one teaspoon at a time, mixing well after each addition. If it flops over and spreads out, it’s too soft—stir in powdered sugar by the tablespoon to firm it up. Keep flavor pairings in mind; strong extracts can thin the frosting, so adjust the consistency accordingly. The color of your frosting also influences how air bubbles appear; darker hues tend to hide tiny bubbles better. Check the texture after each adjustment, as small changes can make a big difference. You’ll know it’s just right when a spoonful of frosting stays on the surface for three to five seconds before dropping back into the bowl. For consistent results, use a roasting pan for tasks like melting chocolate or toasting nuts. If you enjoy DIY projects, you can also save money by building a rolling pin holder at home. Using a food scale ensures your frosting ingredients are measured accurately for reliable consistency each time.
3 Piping Mistakes and How to Fix Them
Holding your piping bag correctly is crucial for achieving smooth, controlled swirls. Keep the bag perpendicular to the cupcake surface to maintain stability. Tilting or angling the bag spreads icing unevenly and makes it harder to control the flow. Start with the tip close to the surface to get clean, defined lines and prevent icing from splattering. For creative effects like fuller, taller swirls, use a larger nozzle. A smaller tip can make your designs look thin and weak, so choose the nozzle size based on your desired look. If your piping tip gets clogged, switch to a slightly larger opening to ensure a steady flow. Regularly clean and secure your tips to prevent blockages and uneven frosting flow. When piping, squeeze from the top of the bag rather than the middle, which helps keep pressure steady and avoids lopsided swirls. Twist the top of the bag closed to keep frosting contained and prevent leaks. Maintain continuous pressure during piping—pulsing creates uneven designs. If a swirl starts to look off, pause, adjust your angle, or reset your stance before piping again. If your consistency is too soft, briefly chill the frosting to firm it up without ruining your work. If the frosting slips or becomes too soft, briefly chill it to firm it up, then resume piping with a steady, confident grip to produce smooth, sharp lines. Always maintain uniform pressure to ensure clean, realistic details in piping.
How to Prevent Air Bubbles in Your Frosting
To prevent air bubbles from ruining your frosting’s smooth finish, start by mixing your buttercream at the lowest speed with a paddle attachment. Stop mixing as soon as the ingredients are combined to limit trapped air. Afterward, press the frosting against the side of the bowl with a spatula to force out small bubbles. For best results, consider using a specialized attachment designed for scraping the bowl clean while mixing. When storing your frosting, let it rest in an airtight container for 1 to 2 hours. This resting period allows air bubbles to rise and settle, reducing bubble formation. Using a half sheet pan as a stable work surface can further help maintain even temperature while you prepare the frosting. Additionally, always use dry measuring cups for dry ingredients to prevent excess moisture from affecting the frosting’s consistency.
When filling your piping bag, fold it over your hand and press the frosting downward to push out any pockets of air. Before piping onto your cake, test-squeeze a small amount over a bowl to check for bubbles—if any appear, gently tap or flick the bag to release them. If stubborn bubbles persist, micro-warm about a quarter cup of frosting for 10 seconds in the microwave and blend it back into the main batch. Keeping your frosting dense and at a workable temperature will also help minimize bubble formation during application.
When to Use a Round Tip vs. a Star Tip
A round tip is ideal when you need smooth, clean surfaces on your cupcakes. Its narrow, circular opening allows for precise control, making it perfect for writing names, creating dots, or designing minimalist patterns. The shape keeps your frosting sleek and untextured, giving you a polished look. For example, using a round tip to pipe a rough round mound is the starting step for the pointed peaks frosting technique. For best results, bake your cake base in a jelly roll cake pan to ensure an even, flat surface for frosting.
In contrast, a star tip is best for achieving that classic bakery-style finish. Its open or closed star shape produces ridges and dimension, making your frosting appear fuller and more decorative. Use larger star tips for big, dramatic swirls and smaller ones for delicate borders or fine details. The piped designs created with star tips have a textured, bold appearance that adds visual interest and a professional touch. Your choice depends on whether you want smooth, modern lines with a round tip or a textured, ornate look with a star tip.

【Assorted Decorative Set】This set comprises 7 different sizes of icing tips made from stainless steel, allowing for the creation of a wide range of patterns on cakes and cookies. With various size options available, our piping tips set enables both large-scale pattern designs and intricate detailing.

Size 12 Piping Tip for Macarons: Great size for piping macaron batter and fillings on cake,cookie and cupcake.
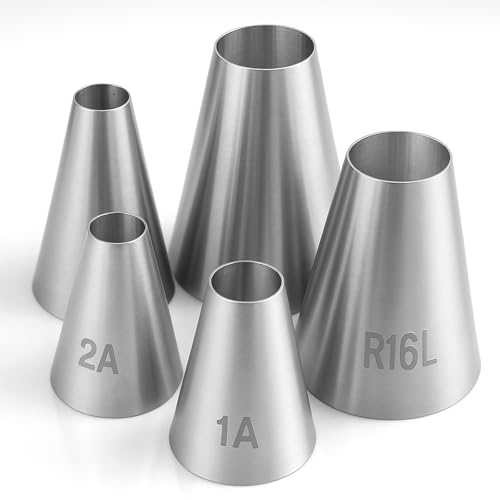
Versatile round piping tips: This large piping tips set includes 5 different sizes, perfect for creating a variety of designs on cakes and cupcakes. From big piping tips for bold decorations to smaller ones for intricate detailing, these pastry bag tips are essential for any baking enthusiast.
Piping Practice Drills to Build Confidence
To build confidence before piping intricate designs, focus on foundation drills that develop steady hands and muscle memory. Use parchment paper to trace simple shapes repeatedly, such as dots, lines, and basic borders, paying close attention to size and spacing. Keep your practice sessions short, around 5 to 10 minutes, to prevent fatigue that can lead to sloppy work. These drills are specifically designed for skill-building and expanding your decorating capabilities. As you refine your technique, remember that even professional bakers rely on proper cooling racks to prevent finished cupcakes from sweating and becoming soggy. Using the correct equipment, such as a high-quality cake pan with a lid, also ensures your baked goods stay fresh and maintain their shape for decorating. Additionally, preparing your piping bag by folding down the top and selecting the right fat, like buttercream, helps prevent sticking during use.
Master pressure control by squeezing from the top of the piping bag, which helps maintain a steady flow. Practice making clean stops for dots by holding the tip steady and lifting gently, and apply continuous pressure to create uniform lines. Hold the bag vertically when piping dots to keep them round, and tilt at approximately 45 degrees for lines to achieve consistent angles. Stabilize the bag with one hand while squeezing with the other to ensure control.
Work through shape-repetition drills like rows of dots, parallel lines, shell borders, and rosettes. Only progress to more complex zigzags and layered designs once your shapes become consistent in size, spacing, and flow. Remember, color mixing does not impact your drill technique, but maintaining your tools is crucial—keep your piping tip clean and ensure your bag is properly twisted for a steady, smooth flow. Prioritize repetition and control over complexity, as these simple drills lay the foundation for clean, professional-looking final designs.

PROFESSIONAL SILICONE PASTRY BAGS: Compared with others,ELK's piping bags uses the 60HA elastic silicone, which is the perfect material for the piping tips set. The slight elasticity ensures its reusability, allowing the viscous liquids to flow smoothly inside. It won’t blow out even if you knead the thick batter with it. Its high stretchiness means that all of the squeezing efforts you make gets transferred to bulging sides as it stretches out, instead of forcing the frosting out the bottom.
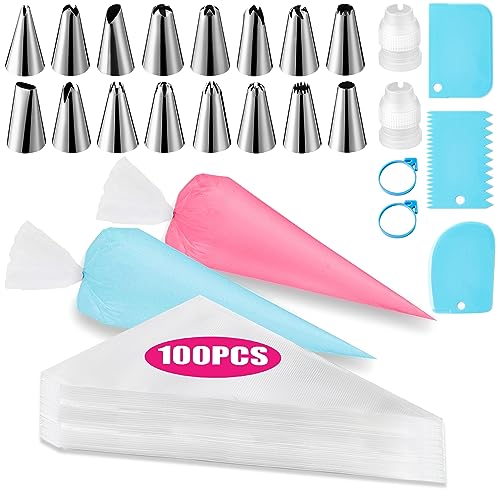
Cake Decorating Supplies: 100 pcs 12-inch large piping bags, 16 pcs stainless steel frosting piping tips set, 2 pcs couplers for piping bags, 2 pcs piping bag ties, 3 x plastic scrapers. You will have all the necessary tools to decorate delectable cakes

1. Eco-Friendly & Extremely Durable Silicone Say goodbye to single-use plastics. Crafted from premium, food-grade silicone, these reusable piping bags are engineered to withstand over 500 heavy-duty squeezes without stretching, tearing, or blowing out. It is a sustainable choice that significantly reduces kitchen waste while providing professional-grade reliability for your thickest doughs and buttercreams.