

Removing a cheesecake from a springform pan without damaging it can feel tricky, especially if you’re worried about cracking or sticking. The key is patience and a few simple techniques to loosen the edges and support the cake.
After chilling the cheesecake overnight, you’ll be able to lift it out smoothly.
Read on for step-by-step tips to make the process as easy as possible.
Cool and Chill Your Cheesecake Completely
Letting your cheesecake cool completely before removing it from the pan is essential to prevent cracks and maintain its structure. Start by cooling it at room temperature on a wire rack for about 1 to 3 hours. During this time, the cheesecake needs to shed its warmth gradually; rushing this step can cause it to crack or become uneven. Make sure not to leave it out for more than 2 hours at room temperature to avoid bacteria growth. Using the wrong measuring tool can affect the consistency of your cheesecake batter, so it is best to rely on dry measuring cups for dry ingredients to ensure accuracy. A similar attention to precision applies when selecting heavy-duty equipment, as the mixer’s weight influences its stability during prolonged beating.
Once the cheesecake is no longer warm, refrigerate it in the pan for at least 4 hours, with overnight chilling being ideal. This step firms up the filling and makes it easier to handle later. To protect your cheesecake from absorbing fridge odors or drying out, loosely cover it with plastic wrap or foil. Fully chilled, it will set evenly and come away cleanly when you remove it from the pan, ensuring a smooth presentation and stable structure. For a perfectly even release, consider using top attachments for kitchenaid mixers to craft a consistent crust and filling.
How to Remove a Cheesecake From a Springform Pan Without Breaking
To remove a cheesecake from a springform pan without breaking, start by chilling the cake thoroughly. Use a thin knife, offset spatula, or cake lifter to gently slide between the cheesecake and the pan base. Carefully circle the entire circumference to loosen any stuck spots, applying light, consistent pressure with a clean, dry blade to prevent crust tearing. If the cheesecake sticks, repeat the pass gently until it’s free. Apply non-stick baking spray liberally to sides and bottom before baking to ensure easier removal later. For best results, also remember to level off dry ingredients when measuring flour or sugar for the crust, as this prevents a dense or uneven base that can make removal more difficult. Next, unclip the side band of the pan and lift the ring straight up to protect the edges. Transfer the cheesecake onto a serving plate using a parchment round or multiple spatulas for full support. This helps prevent cracking during the final release. Once out, you can decorate the sides with fresh fruit or chocolate shavings as desired. To store, place the cheesecake on a flat surface, wrap it tightly in plastic, and refrigerate for up to five days. If you need to reheat or crisp the crust, note that a cooling rack can safely hold the pan in the oven only if it is made of stainless steel without any non-stick coating or plastic parts. Sudden temperature changes can cause metal pans to warp and pop, so always allow pans to cool gradually before washing.

This 9 inch springform pan accommodates standard size recipes

Multi-Purpose: The well-designed 9-inch springform pans are ideal choices for making cheesecake, quiche, mousse, deep dish pizza, smash cakes, various pies, cookies, and is also the best tool for DIY desserts, allowing you to enjoy your baking time
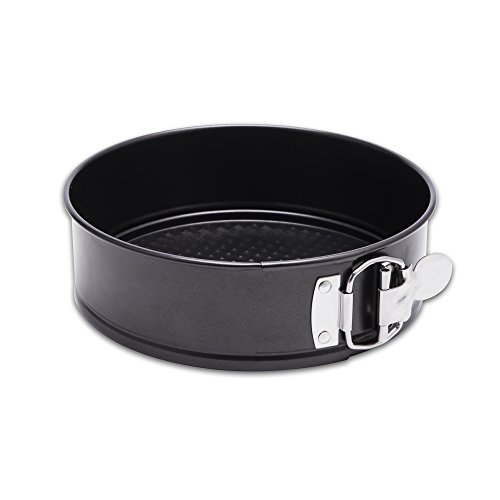
HEALTHY COATING: Our Non-stick coating is a food grade safety coating with no harsh chemicals or hazardous substances. The true double layer coating allows the cake be easily removed without damage. Avoid making it difficult to clean the cake because it sticks to the pan or leaves a lot of cake residue.
Loosen the Cheesecake Edges Before Opening the Latch
Loosen the cheesecake edges before opening the latch by running a thin, flexible blade around the entire perimeter while the cake is still chilled. Use an offset spatula or a flexible palette knife, as these tools stay in contact with the pan wall without gouging the cheesecake. Keep the blade pressed lightly against the pan, not the cake, and trace the full circumference. This helps release any sticky spots that could tear the surface when you open the latch. If you encounter stubborn areas, apply a warm, damp towel to the outside of the pan or gently heat the blade. For best results, using a flat beater ensures even mixing and a smooth batter that reduces sticking. Do not open the latch until all edges are fully free; otherwise, any resistance could cause tearing or damage to your cheesecake’s surface. Taking this step ensures a clean release and a smooth presentation. Heating the tool can facilitate even smoother cake handling when navigating persistent sticky spots, much like using warm water lifts baked-on residue from a nonstick surface.

King Arthur Baking Company Offset Spatula: extra flexible 8-inch blade with rounded tip and perfect flex decorates cakes and baked goods with controlled, comfortable precision; ideal for cakes, cookies, cupcakes, entertaining desserts, and everyday baking

Small Offset spatula by Ateco
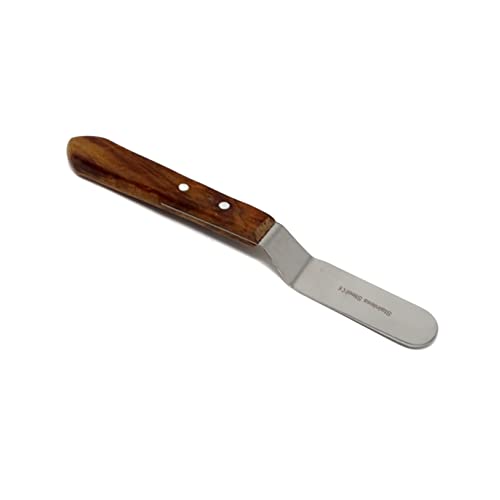
✅ PREMIUM QUALITY MATERIAL –– Made from premium grade stainless steel, this spatula comes with a properties of durability, long life span, and anti corrosion. Paired with a handle made of beautiful fine-grained wood in a painted finish and will not get damaged. A nice solid weight makes it comfortable to grip. The Seamless transition between the wooden handle and body is very balanced. It is heat resistant, sturdy, versatile, and durable.
Release the Springform Ring Slowly
To prevent the cheesecake from breaking or losing its shape, release the springform ring slowly. Carefully undo the latch in a smooth, gradual motion instead of snapping it open all once. This gentle release minimizes sudden movement, which could jostle the cake and cause cracking or distortion. Handle the latch mechanism with care, applying steady pressure rather than forcing or twisting it, as these actions can tear the delicate edges. Let the mechanism glide open smoothly to maintain the cake’s integrity. Ensure the pan’s seam is properly sealed and free of batter residue to avoid future springform pan leaks. Unlike a springform pan, an angel food cake pan has a removable bottom and no side latch, making it a completely different tool for baking. For precise baking, a food scale ensures accurate ingredient measurements for consistent results.
Once the latch is fully open, lift the ring straight upward instead of pulling it outward. Support the base of the pan with your other hand to enhance control and stability during this step. If you encounter resistance, pause briefly, reposition your grip, and continue lifting. This slow, deliberate approach ensures a cleaner separation and results in a professional-looking dessert.

FOOD GRADE & NONSTICK COATING: Made from 0.4mm carbon steel with a food-grade nonstick surface, this spring form pan for cheesecake ensures clean release and reliable baking. Ideal as a cheese cake pan for smooth, consistent cheesecake and baking results.

FOOD GRADE & NONSTICK COATING: Made from 0.4mm carbon steel with a food-grade nonstick surface, this spring form pan for cheesecake ensures clean release and reliable baking. Ideal as a cheese cake pan for smooth, consistent cheesecake and baking results.

Rapid and Complete Demolding: Tired of having trouble unmolding your cakes by inverting them? Our springform pan 9 inch features a removable bottom and spring latch for smooth opening and closing, helping you easily remove delicate desserts
Free the Cheesecake Bottom If the Crust Sticks
If the crust sticks to the pan bottom, gently free it by carefully peeling away any parchment lining if you used it. If not, slide a thin spatula under the crust edge and work slowly around the base to loosen it. Applying a light coating of nonstick spray on the pan surface beforehand can help prevent sticking, but even then, a brief chill in the freezer after baking can make removal easier. Chilling stiffens the butter in the crust, reducing the risk of tearing when you lift it. If needed, gently warm the pan bottom with a soft cloth to soften the bond slightly. Freezing the cheesecake before removal is also effective, as the cold firmness makes it easier to loosen without damaging the crust. This method works particularly well if you used a parchment round between the crust and the pan bottom. Too much butter in the crust can worsen sticking by creating excessive hardening when chilled. Patience is key—slow, careful work will prevent tearing and help you free the cheesecake smoothly. Using a top rolling pin for even crust thickness can help prevent sticking issues from the start. For layered ice cream cakes, choosing a pan with a nonstick coating ensures the cold dessert releases cleanly from the base.

Fat-free cooking spray, 5 ounces

One 5 oz can of PAM Non Stick Olive Oil Cooking Spray

Gluten-Free: La Tourangelle Baking Spray is gluten-free. Many other baking sprays contain flour to keep them non-stick, however La Tourangelle uses lecithin, a plant-derived non-stick agent.
Transfer the Cheesecake Without Breaking It
To transfer a cheesecake without breaking it, start by fully chilling it for 12 to 24 hours. A cold cheesecake is firm enough to move without cracking or slumping. Gently release the sides of the springform pan, then slide an offset spatula around the edge to prevent damage to the crust. Support the cake by sliding a wide spatula or two underneath the base. Avoid lifting it vertically; instead, slide the cake onto your serving plate in a smooth, steady motion to prevent splitting. If the cheesecake is large, ask a second person to help stabilize the pan while you guide the spatula. Using a high-quality stainless steel bowl mixer can help ensure your cheesecake batter is smooth and lump-free before baking. If you lack a measuring cup for a recipe component, remember that you can use household items like standard coffee mugs to approximate 3/4 cup. However, if your Pyrex measuring cups are used for ingredients like melted butter, note that the manufacturer advises against thermal shock from drastic temperature changes, as this can cause glass to shatter. Once on the plate, you can proceed with decorating or serving. Cover and refrigerate immediately after decorating to keep it fresh.

Measures: 9" X 9" X 3"/ 23cm x 23cm x 7.5cm

Leak-Resistant Design for Reliable Baking: RFAQK 9 inch Springform Pan features a secure stainless steel buckle and tight seal to prevent leaks with thick cake batters like cheesecake. While not fully watertight for thin liquids or water baths, it delivers dependable performance for everyday baking.

Two Professional Cake Decorating Spatulas: PUCKWAY offset spatula set comes in two different sizes: 6 inch and 8 inch blade. This is your best choice to decorate a cake perfectly.
6 Pro Tips for a Cleaner Cheesecake Release
To ensure a smooth release, start with careful pan preparation before baking. Spray the sides of the springform pan with nonstick baking spray and line the bottom with parchment paper to reduce sticking. After baking, cool the cheesecake gradually to prevent cracks and then chill it for at least four hours, with overnight chilling providing the best firmness. Before unlocking the latch, run a thin knife around the edge to loosen the sides and help release it cleanly. Unhook the springform slowly while holding the base steady to avoid breaking the crust. For additional release assistance, insert the edge of a cake releaser tool under the crust and carefully slip it around the perimeter, applying slight pressure to help with separation. Using one of the best baking trays for the initial bake can also ensure even heat distribution and prevent uneven browning, and a half sheet pan works well for this purpose. To free the crust from the base, slide a spatula underneath; if it sticks, gently warm it with low heat or a warm towel. Even when handling a hot pan, black cooking gloves offer reliable heat resistance for safe maneuvering. Following these steps creates a flawless surface for decorating and helps keep leftovers fresh and intact.