

Wondering how long to cook your meatloaf in a loaf pan? Temperature and size are key, but shape also plays a big role.
For example, a 2-pound meatloaf typically takes about 55 to 70 minutes at 350°F. Keep reading to find out the precise timing based on your loaf size and how to ensure it’s perfectly cooked.
Why Oven Temp and Pan Shape Change Meatloaf Timing
Oven temperature and pan shape significantly affect meatloaf cooking time. Higher oven temperatures speed up heat penetration, reducing overall cooking time. A wider, shallower pan decreases the depth the heat must travel, allowing the meat to cook faster. Conversely, a deep, narrow pan results in a thicker loaf, meaning heat takes longer to reach the center. The material of your pan also influences conduction: metal pans transfer heat more quickly than glass or ceramic ones, which can shave minutes off cooking time. Because of these variables, you should never rely solely on time — always check the internal temperature. For beef meatloaf, aim for 160°F, and for poultry, 165°F to ensure it is fully cooked and safe to eat. Just as baked-on residue requires specific products to lift, the chosen pan material affects how evenly and quickly your meatloaf cooks. For those who want to expand their kitchen capabilities, a Kitchenaid mixer attachmentcan help prepare meat mixtures with consistent texture and speed. Using even heat distribution is critical, much like mastering the dough without a rolling pin requires patience and proper technique.

HEALTHIER COOKING DESIGN: Innovative perforated insert allows fat to drain away during baking; Elevated design keeps food above grease for healthier results; Perfect for 2 lb meatloaf recipes

Making meat loaf has never been healthier—or easier with a perforated aluminized steel trivet allowing fat to drip away as the meat bakes.

SET OF TWO 8 x 4-INCH MEDIUM LOAF PANS: Great for baking meatloaf, sweet or savory breads, thick cakes or brownies, smaller portions of lasagnas or casseroles, and more for the perfect bake every time
Meatloaf Cook Times for 1–Pound, 2–Pound, and 3–Pound Loaves at 350°F
At 350°F, a 1‑pound meatloaf typically needs about 35 to 45 minutes of baking time. Start checking it around the 35-minute mark to prevent drying out. For a 2‑pound loaf, plan on about 1 hour to 1 hour 15 minutes, while a 3‑pound loaf requires between 1 hour 30 minutes and 2 hours. The type of pan you use influences the timing: a standard loaf pan keeps the bake time more predictable for 1- to 2‑pound loaves, whereas deep or tall pans can extend the cooking time for 3‑pound loaves. Larger loaves tend to need more time than straightforward calculations suggest—about 35 to 45 minutes per pound is a good rule of thumb. Keep in mind that the seasoning blend can affect the density, so adjust the bake time if needed. Using a food scale ensures accurate portioning of meat and seasonings for consistent cook times.

USA Pan classic nonstick loaf pan measures 8.5 x 4.5 x 2.75 - the perfect size for yeast breads, quick breads, pound cakes or even meat loafs

USA Pan Large Loaf pan is a generous 1.5 lb capacity; the perfect size for large loaf sour dough and quick bread

STANDARD 9 x 5-INCH LOAF PAN: This standard loaf pan is perfect for baking meatloaf, sweet or savory breads, thick cakes or brownies, smaller portions of lasagnas or casseroles, and more. Enjoy the perfect bake every time with this versatile bread pan
Meatloaf Internal Temperature: 160°F for Beef, 165°F for Poultry
To ensure your meatloaf is safe to eat, check its internal temperature with a reliable food thermometer rather than relying solely on a timer. For beef, pork, or veal loaves, aim for 160°F in the thickest part of the center. For poultry meatloaf—such as turkey or chicken—the temperature should reach 165°F. Surface browning or appearance aren’t indicators of safety, so always insert the thermometer into the loaf’s center close to the end of baking. Pulling the meatloaf at these precise temperatures helps retain moisture and prevents drying out, especially with lean poultry. Using a thermometer also allows for flavor experimentation, like adding herbs or cheese, without sacrificing safety. Achieving the correct internal temperature results in a moist, sliceable meatloaf that is both safe and appetizing. A similar approach to precision is found when comparing top picks in the kitchen appliance market, where quality and performance directly affect final results.
4 Factors That Speed or Slow Your Meatloaf Bake Time
Your meatloaf’s size and shape are key factors that influence how long it takes to bake. A smaller, 1-pound loaf can be done in about 45 to 60 minutes, while a larger, 3-pound loaf may need nearly two hours. Thicker loaves and those baked in deeper pans slow down heat penetration, extending the cooking time. Conversely, wider, shallower pans allow heat to reach the center faster, reducing bake time. Monitoring the internal temperature is the best way to ensure doneness; aim for 160°F, regardless of the size. Using a silicone mat underneath the loaf pan can promote even heat distribution and prevent the bottom from scorching during longer bakes, with silicone baking mats offering a non-stick, reusable surface for consistent results. Adjust your baking time based on these differences to prevent undercooking or overdoing it. For faster results, a stand mixer with paddle can quickly shred pre-cooked chicken, though it does not affect loaf baking time. Additionally, if you are using a glass loaf pan instead of metal, remember that glass retains heat longer, which can lead to over-browning on the bottom and may require lowering the oven temperature by 25°F to ensure the meatloaf cooks evenly without burning.

【Enhanced Stability with 4 Handles】The silicone baking mat is designed with four handles for excellent stability during dough transfer, ensuring perfect baking results. The silicone bread baking sling maintains your dough's shape throughout the process without spills or mess.

Reusable & Eco-Friendly: Made with a durable triple-layer silicone + fiber + silicone construction, this baking liner is built for repeated use—cut down on waste and save money.
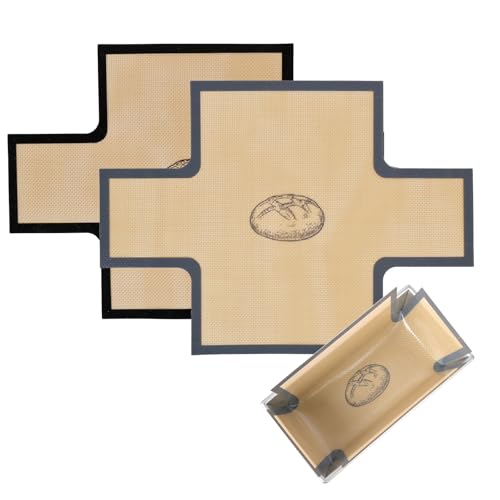
Reusable & Money-Saving:These silicone bread slings measure 0.7mm thick, offering greater durability than most standard 0.4mm bread pan liners. This makes them the ideal alternative to disposable parchment paper.
When Should You First Check the Meatloaf Temp?
You should start checking your meatloaf’s temperature about 10 to 15 minutes before the estimated cooking time ends. For example, if your recipe suggests a 50-minute cook time for a 2-pound loaf, begin checking at around 45 minutes. Rely on your recipe’s timeline as a cue, but avoid waiting until the very end to test. This early check allows you to gauge doneness without overcooking, especially if your oven runs hot or cold. Insert a reliable meat thermometer into the center of the loaf, avoiding contact with the pan’s bottom or edges. Confirm your oven is properly calibrated because inaccurate oven temperature can skew cooking times. If the meat’s internal temperature is below 160°F for beef or 165°F for poultry, return the loaf to the oven and check again every 5 minutes. Only remove the meatloaf once it reaches the safe internal temperature, ensuring both safety and perfect texture. To guarantee accurate readings, consider using a kitchen scale to portion your meatloaf ingredients precisely, as consistent weight ensures more predictable cooking times. For shaped loaves, you can instead bake the meat mixture in a standard muffin tin for quicker, individually portioned servings.

Instant Read Food Thermometer | Our instant read thermometer features a temperature probe and advanced, highly accurate technology with 1-2 seconds response time; Instructions, meat temperature chart, comes pre-calibrated for your convenience, and recalibrating feature if needed.

【Fast & Accurate】Our meat thermometer digital delivers accurate readings within ±1°F in just 1–2 seconds, with a wide temperature range of -58°F to 572°F (-50°C to 300°C). No more waiting over the heat - know your food's exact temperature instantly.
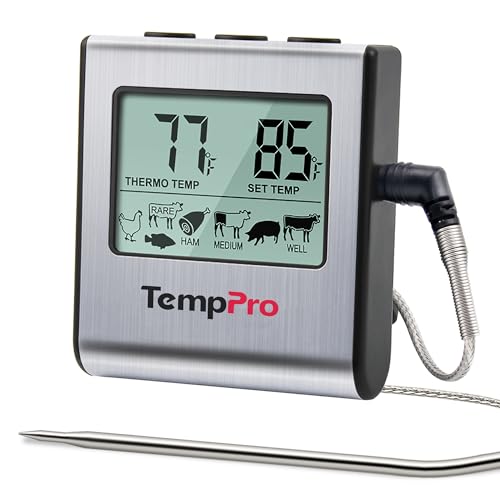
Cook mode with USDA preset temperature settings: TempPro cooking thermometer ideal for meat, oven, smoker or stove top; Programmable alert with preset temperatures for specific foods recommended by USDA; All of the preset temps can be reset to your desired tastes
Why Resting Your Meatloaf for 10–15 Minutes Is Required
Resting your meatloaf for 10–15 minutes after removing it from the oven is essential to ensure proper juiciness and structure. During this period, the juices inside the loaf redistribute evenly, preventing them from spilling out when you slice. This resting time also allows carryover cooking to finish the center gently, as the internal temperature rises by 3–7°F, ensuring the middle is cooked through without extra baking.
Taking this pause keeps the meatloaf from crumbling and helps it hold together neatly. It concentrates flavors by keeping juices inside rather than pooling on the plate or cutting board. Additionally, the loaf’s structure firms up during resting, making slices easier to serve cleanly without falling apart. To serve, you can either slice directly in the pan or transfer the loaf to a platter—both work well because the resting period stabilizes the structure.
To preserve warmth, lightly tent the meatloaf with foil. Skipping this step can result in a drier, less flavorful dish or messy slices. This low-effort practice greatly improves the overall texture, flavor, and presentation of your meatloaf, making every serving look and taste just right.
The Simple Meatloaf Planning Rule: 35–40 Minutes Per Pound
For a standard meatloaf in a loaf pan, plan on cooking it for 35 to 40 minutes per pound at 350°F. For example, a 1-pound meatloaf will take roughly 35 to 45 minutes, while a 2-pound loaf will require about 55 to 70 minutes. This timing ensures the meat reaches a safe internal temperature and develops the right flavor. To enhance flavor, sauté onions and garlic before mixing them into the meat. However, don’t rely solely on the clock. Start testing the internal temperature near the lower end of the range. For beef, aim for 160°F; for poultry, 165°F. Keep in mind that oven calibration varies—using an oven thermometer helps avoid under- or overcooking. Also, be aware that the thickness and material of your loaf pan can affect heat penetration, so adjust your timing accordingly. This rule provides a reliable starting point but isn’t a guaranteed cook time—always verify doneness with a thermometer.

QUALITY AND PRECISION: Taylor has delivered trusted kitchen measurement tools for over 150 years. This digital thermometer provides reliable temperature readings from -40°F to 450°F, ideal for cooking, grilling, and food prep.
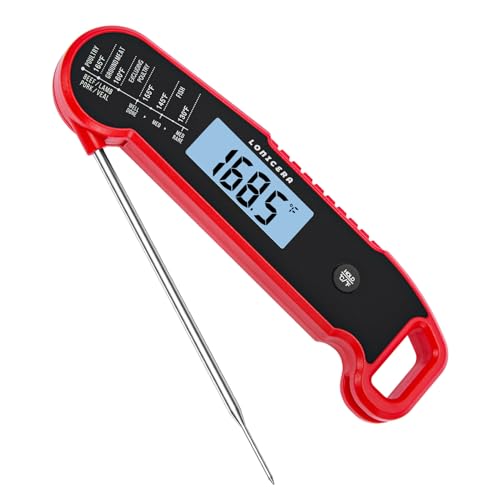
INSTANT READ: New thermocouple tech enables the meat thermometer responding time less than 1 second, prevent over cooking and allow you to cook juicy, flavorful food effortlessly.

PRECISION YOU CAN TRUST: Taylor has crafted accurate measurement tools since 1851; this digital thermometer delivers reliable temperature readings from -40 F to 396 F (-40 C to 200 C) so you always cook meat, poultry, and fish to the right doneness.