

If you’ve just bought a silicone cake pan and wonder how to get the best results, you’re in the right place. Using a silicone pan might seem different from traditional metal ones, but with a few simple tips, you can bake cakes that slip right out every time.
In this guide, you’ll learn the essential steps for prepping, baking, and unmolding your cake to ensure perfect, mess-free results.
Let’s get started!
Wash and Dry Your Silicone Pan Before First Use
To ensure your silicone cake pan is clean and safe to use, washing and drying it before first use is essential. Start by washing the pan with warm water and a mild, nonabrasive soap, using a soft sponge or cloth. Pay extra attention to corners and molded details, where debris or factory residues may settle. Rinse thoroughly to remove all soap residue. If any residue persists, soak the pan briefly in vinegar to help remove stubborn spots. To lift any additional baked-on film, soaking in hot water with a gentle detergent is also effective. Avoid abrasive cleaners or metal scrubbers, as they can scratch the silicone and compromise its flexibility. For those who also use metal roasting pans, a top roasting rack can similarly prevent scratches and improve airflow. For those making sourdough bread, choosing a best loaf pan with proper heat distribution is equally important for consistent results.
Once cleaned, dry your silicone pan using one of two effective methods: air-drying on a rack or towel-drying with a lint-free cloth. Air-drying allows all moisture to evaporate naturally, especially from folds and intricate details. Towel-drying can speed up the process, but ensure the pan is completely dry afterward. Never store the pan while it is still damp, as trapped moisture can lead to mold or odor buildup. Only put away your silicone pan once it is fully dry to maintain its cleanliness and flexibility.
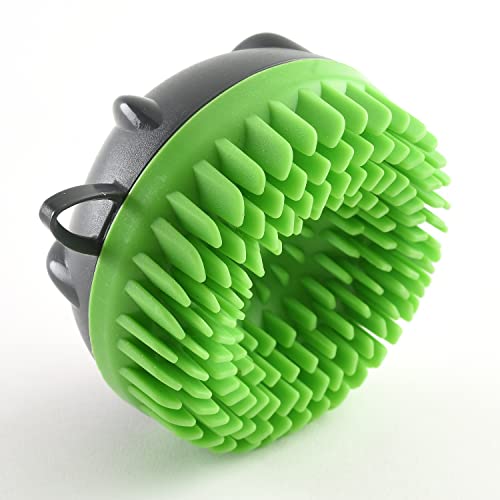
Silicone brush won't harbor bacteria and lasts longer than other brushes! Easy grip for efficient cleaning.

Wonderful Performing - Although this dish brush bristles made of silicone, it scrub clean grease and grime quite well.

Unique bristle design won’t retain odors or clump during cleaning
Grease Your Silicone Pan for Easy Release
Once your silicone pan is clean and completely dry, you can decide whether to grease it. Silicone is naturally nonstick, but a light coating provides extra assurance for sugar-heavy batters or detailed molds. Use a thin, even layer to prevent greasy spots or texture issues. To apply the greasing, employ a pastry brush, a paper towel, or your fingers to spread butter, shortening, or oil into every corner and crevice. Nonstick baking spray is an excellent choice because it spreads quickly and evenly. Be careful not to over-grease, as it can negatively affect your cake’s texture; aim for just a minimal film. Unlike traditional metal pans, silicone does not require parchment paper lining for release, but the same principle of using a light barrier against sticking applies. Other methods to prevent sticking include dusting the greased surface with flour or cocoa powder, especially for chocolate cakes. Tap out any excess powder to keep the coating thin. This approach works well for detailed or intricate pan designs or when you need a reliable release for presentation-quality cakes. For a neat, long-lasting result, consider the steady hand and consistent technique used in pour over coffee without a scale, similar to how a top-rated food scale provides precise measurement for baking ingredients.
Support Your Silicone Pan With a Baking Sheet
Support your silicone pan with a baking sheet to provide essential stability during baking. Because silicone pans are naturally flexible, placing them on a sturdy baking sheet prevents bending or wobbling when pouring batter or transporting. The rigid metal base of the baking sheet complements the silicone’s flexibility without replacing it, ensuring the pan remains steady. For best results, choose a heavy-duty baking sheet that resists warping, similar to the sturdy metal base found on high-quality stainless steel bowl mixers.
Using a baking sheet also makes handling safer since you can slide the filled pan onto the oven rack easily, reducing the risk of spills. Keep in mind that the baking sheet’s heat resistance does not alter the silicone pan’s temperature rating. It simply keeps the pan stable against shifting oven air and door jolts. To achieve balanced weight distribution and confident handling, always center your silicone pan on a flat, un-warped baking sheet before placing it in the oven. For a similar approach to stability, KitchenAid mixer attachments can also be supported by a sturdy base to prevent wobbling during use. Note that, unlike silicone bakeware, most metal mixing bowls are not microwave safe due to their conductive materials and risk of arcing.

Best German Silicone: We attach great importance to the health of our customers. Therefore, we use the best German WACKER silicone as the raw material in the industry. Food Grade, BPA Free, PFOA Free, Non-toxic. NOT made in Germany.

3-PIECE SET: NutriChef 3-piece nonstick cookware set includes the small, medium, and large size of cookie pans. These are a flexible, stylish, and non-stick carbon steel bakeware set with red silicone handles
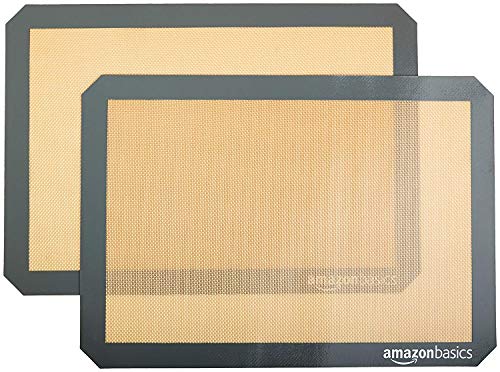
SHIPMENT CONTAINS: 2-pack of food-safe silicone baking mats for easy and convenient baking, roasting, or food prep
Fill the Pan ¾ Full and Place on Center Rack
Fill the pan three-quarters full and place it on the center rack. This ensures even heat distribution and helps your cake rise properly without overflowing. Use this fill level primarily for dense batters or recipes specifically tested to handle it. For lighter batters, sticking to two-thirds full is safer, leaving enough room for expansion and preventing spills. The batter’s thickness and leavening agents influence this choice: thicker, low-leavening batters can often be filled closer to the top, while airy, lighter mixes need more space. Additionally, the shape of the pan matters; Bundt pans usually require more room, whereas standard round pans can be filled slightly less.
Once filled, set the pan on the center rack of the oven. This position provides the most uniform heat, critical for even rising and baking. Since silicone pans often have insulating properties, placing your cake in the center helps avoid uneven baking, such as a burnt top or raw bottom. Proper placement and fill level work together to ensure your cake bakes evenly and develops a good rise. For best results, consider using a high-quality KitchenAid stand mixer to thoroughly incorporate your batter ingredients before filling the pan.

Expand Your Cooking Skills - Unleash the full potential of your air fryer and make all of your favorite recipes with ease! From a full meal to desserts and snacks, the possibilities are endless with the airfryer accessories.
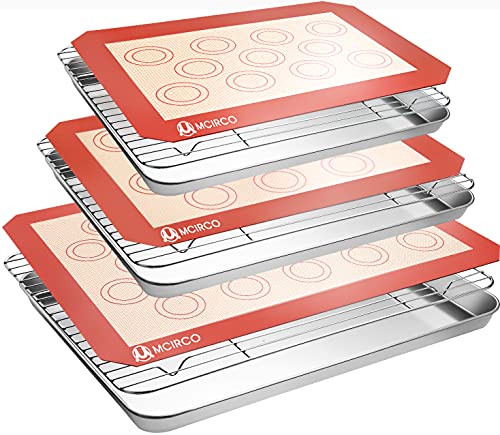
VERSATILE BAKING KIT: Pack of 9 in 3 different sizes 15.9 x 12 x 1 inch, 12.4 x 9.6 x 1 inch, and 10.4 x 8.1 x 1 inch- This oven cooking set includes 3 rimmed baking sheets, 3 cooling racks and 3 silicone baking mats, fits most regular toaster ovens

▶Perfect Fits All 3.6QT- 6.8QT Air Fryer◀ The size of our air fryer accessory is 8 inches, perfectly compatible with Gourmia, Ninja, Phillips, Nuwave, Gowise, Dash, Cozyna, Cosori, Ultrean, Vremi, power XL air fryer (3.6QT-6.8QT).This deep fryer accessories can also be used in oven,microwave.
Adjust Baking Times for Silicone Pans
Silicone pans generally require an additional 5 to 10 minutes of baking time compared to metal pans. This is because silicone heats more slowly and evenly, so baked goods need a bit more time to cook through fully. For small items like muffins, add only 1 to 2 minutes, while larger cakes or thicker batters may need up to 15 extra minutes.
Start checking your baked goods a few minutes before the estimated time. Use a toothpick or skewer; it should come out clean once the item is done. The top should also spring back lightly when touched. Keep your oven temperature the same when adjusting for silicone, or lower it by about 25°F for a slower, more even bake. Watch for visual cues: if the edges brown too quickly, reduce the heat. Pale centers indicate more baking time is needed, even if the top appears set and the edges look perfect.
Cool the Cake in the Pan Before Unmolding
Allow the cake to cool in the silicone pan for 10 to 15 minutes after baking. This brief rest lets the structure set and reduces the risk of tearing when you unmold it. During this time, the crumb stabilizes, resulting in cleaner edges when you release the cake. For those who enjoy making frozen desserts, a KitchenAid ice cream attachment can also benefit from proper cooling and resting times. Similarly, hot pad projects require careful timing to avoid warping or sticking during use.
The ideal cooling duration depends on the cake type. Dense or delicate cakes benefit from a longer cool, but avoid waiting too long—cooling excessively can cause sticking in some pans. Place the pan on a wire rack to ensure even airflow, which prevents condensation and helps the cake cool uniformly.
You’ll know it’s ready to unmold when the cake feels set and warm but not hot. If it resists, give it a few more minutes. Proper timing in cooling makes the difference between a smooth release and a tear. For most standard cakes, the recommended cool time is between 10 to 15 minutes in the pan before transferring to a wire rack.
Flex and Invert the Pan to Release the Cake
To release the cake from a silicone pan, gently flex and invert the pan. Silicone’s flexibility makes this process easier—you can press inward around the edges and wiggle the pan side to side to break the seal. Avoid aggressive folding; only bend enough to loosen the cake evenly and prevent tearing. Use light, even pressure around the perimeter to help release the cake smoothly. For consistent results, consider using dry measuring cups for your dry ingredients to ensure the batter has the correct ratio. Unlike rigid glass or metal bowls, silicone cookware will not shatter or crack from sudden temperature changes, but it is always wise to check the manufacturer’s stated heat limits to confirm safe use. Quality and performance are key factors when selecting kitchen tools like measuring sets and bakeware.
Place a cooling rack or plate over the top of the pan, then flip it in one swift, confident motion. Hold both the pan and the rack or plate firmly so the cake remains centered during the inversion. Lightly tap the underside of the pan to encourage release. If the cake doesn’t come out immediately, shake the pan gently for a few seconds.
Once the cake has been inverted onto the rack or plate, peel away the silicone carefully, starting from the edges. Maintain steady tension to avoid tearing or damaging the cake. If needed, run a dull knife around the perimeter or re-flex the sides lightly to loosen stubborn spots. Properly flexing and inverting ensures the cake releases cleanly and maintains its shape.
Clean and Store Your Silicone Pan for Longevity
To keep your silicone pan in good condition for years, wash it promptly after each use. Rinse it soon after it cools to prevent residue from hardening. If bits stick, soak the pan briefly in warm, soapy water. Use a mild dish soap and a soft sponge to clean—abrasive scrubbers can wear down the surface. For stubborn grease or stains, apply a baking soda paste. To eliminate lingering odors, soak the pan in white vinegar. These simple cleaning steps help maintain your pan’s cleanliness and extend its lifespan. For best results, consider using an non-stick baking sheet for similar easy cleanup. An 8 inch pan holds roughly 6 cups of batter, which is a standard volume for many cake recipes.
Before storing, dry the silicone pan thoroughly with a towel or by air drying to avoid musty odors. To preserve its shape, lay it flat or stack it upside-down in small piles. Avoid overstacking or placing heavy objects on top, which can distort the pan. Never store food directly inside the silicone pan, as this can cause staining or odors to linger. Periodic deep cleaning with lemon or vinegar can also help keep your pan fresh and extend its longevity.