

Ever wondered how to make bread or pizza dough without the tedious kneading by hand? A dough hook is the tool that can do that for you, attaching to your stand mixer to knead dough automatically.
Knowing the right shape, size, and speed can make all the difference, so let’s explore what options work best for your baking needs.
What the Heck Is a Dough Hook (And Do You Really Need One)?
A dough hook is a mixer attachment shaped like a C or spiral, designed to knead dough automatically. It works by stretching, folding, and pulling the dough against the bowl wall, which develops gluten—the protein responsible for dough’s structure and elasticity. This process happens much faster than manual kneading, making it ideal for tough or dense doughs. Usually made of durable stainless steel, it handles heavy mixing without bending or breaking. For KitchenAid owners, top attachments include dough hooks as a versatile option for frequent bakers. However, even though the hook is durable, it is not recommended to place it in the dishwasher, as high heat and detergents can damage the finish over time.
You don’t necessarily need a dough hook to make bread or other yeasted baked goods, especially if you enjoy hand-kneading. However, it saves a significant amount of time and reduces physical effort. If you bake frequently with thick or sticky doughs, a dough hook can make the process more efficient and less tiring. After kneading, proper cooling racks help prevent baked goods from becoming soggy. You can keep it attached to your mixer between uses, so it’s always ready for next time. Ultimately, it’s a convenient tool, but not a mandatory one for every home baker.
Why You Need This Attachment for Bread, Pizza, and Pasta
A dough hook efficiently replaces hand-kneading for bread, pizza, and pasta doughs. For bread, it mimics the traditional method to develop gluten, giving your loaf structure and chew. It also ensures proper yeast activation, encouraging fermentation and a better rise. Typically, you knead on speed 2 for about 6 to 8 minutes until the dough is smooth and elastic.
For pizza dough, the hook develops gluten quickly and evenly, taking about 5 to 7 minutes. This results in a smooth, springy dough that can hold gases well during baking, making it easier to handle and shape.
Pasta dough is stiff and tough to knead by hand. The hook can mix flour, eggs, and salt in roughly 4 to 5 minutes, creating a cohesive dough ball. It saves your hands from strain and consistently produces a well-kneaded, uniform dough every time.

Note: Compatible with almost all KitchenAid 4.5-quart and 5-quart tilt-head stand mixers. You can find your model on the bottom of the mixer. Compatible models include: K45, K45SS, KN15,KDM90, KA15, BEA30, RRK150, KSM45, KSM75, KSM85, KSM88, KSM90, KSM95, KSM96, KSM100, KSM103, KSM106, KSM110, KSM111, KSM120, KSM125, KSM150, KSM151, KSM152, KSM153, KSM154, KSM155, KSM156, KSM160, KSM170, KSM175, KSM177, KSM180,KSM195, KSM200

FOOD-GRADE STAINLESS STEEL – SAFE & HEALTHY- Upgrade your KitchenAid with a stainless steel dough hook kitchen aid you can trust. Never worry about coating chips or rust again! Precision-forged from solid 304 stainless steel, this one-piece design is completely coating-free, rust-resistant, and built to deliver a safer, healthier baking experience for your family.
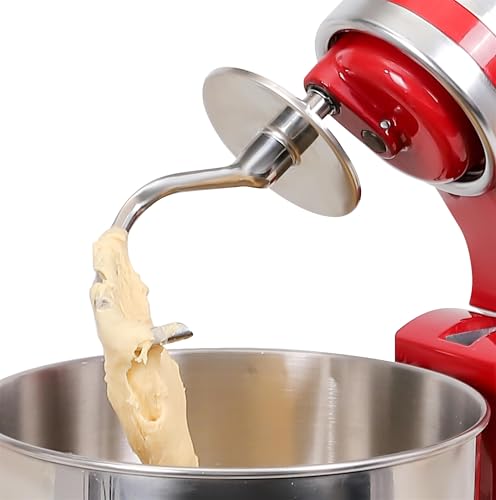
[Perfect Fit for 4.5 & 5 Qt Mixers] Specifically designed for KitchenAid tilt-head stand mixers. Compatible with a wide range of models: K45, K45SS, KSM45, KSM75, KSM85, KSM88, KSM90, KSM95, KSM96, KSM100, KSM103, KSM106, KSM110, KSM111, KSM120, KSM125, KSM150, KSM151, KSM152, KSM153, KSM154, KSM155 . (Excludes 6Qt Bowl-Lift models).
C-Shaped vs. Spiral: Which One Wins for Your Kitchen?
A spiral dough hook generally outperforms a C-shaped hook for dense bread doughs. Its aggressive corkscrew motion pushes dough downward, promoting faster and more consistent gluten development. This is especially beneficial for stiff, heavy doughs where proper gluten formation is essential for fermentation and rising. The spiral hook also offers improved efficiency, reducing the need for manual kneading or finishing. For those working with large batches, using a foil-lined baking sheet can help with even heat distribution and easier cleanup, though the hook itself remains the primary tool for dough development. To keep your tools in top condition, routine cleaning of your Silpat mat prevents residue buildup and extends its lifespan.
In contrast, a C-shaped hook is better suited for softer, everyday doughs. It works by pushing dough against the bowl sides, handling gentle gluten formation effectively. However, it can leave unmixed pockets in stiffer mixes, which may require extra manual attention. It is commonly used with tilt-head mixers and is ideal for smaller, enriched dough batches or lighter cookie doughs.
The choice depends directly on your mixer type and baking needs: tilt-head models mostly use C-shaped hooks, while bowl-lift models can accommodate spiral hooks. For large batches of lean, heavy doughs, the spiral hook is the better option. For smaller, more delicate doughs, the C-shaped hook remains a simple, reliable choice.
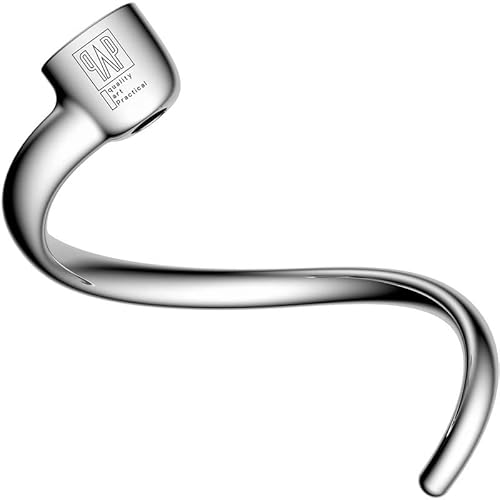
Premium Stainless Steel Dough Hook for KitchenAid Bowl-Lift Mixers: Not a KitchenAid Original

Why Choose a Spiral Dough Hook?Unlike C-shaped kitchen aid dough hook that just rotate and pull, this spiral dough hook actively pushes dough down while kneading.The spiral design creates continuous downward pressure that ensures even kneading of heavy doughs.

Anti-Rise Disc Baffle: Unlike ordinary hooks, this dough hook attachment for KitchenAid features a metal Disc Baffle that stops dough from spreading up onto the mixer’s hub and body while kneading. This clever upgrade protects your Kitchen Aid mixer accessories and keeps your machine clean during heavy mixing
Batch-Size Guidelines: How Much Flour Can Your Hook Handle?
Your mixer’s batch-size limits depend on the size of its bowl, but generally, for a 4.5 to 5-liter bowl, you should use at least 300 grams of flour—roughly 3 cups—for the hook to engage properly. If you use too little, the dough won’t knead effectively because it spins freely, wasting energy. The practical range for home mixers is between 500 grams and 1 kilogram of flour, which typically yields enough for 1 to 2 loaves. For best results, ensure your baking sheet and wire rack setup is sturdy enough to support heavy dough batches for cooling or proofing. For those considering an upgrade, models with a bowl lift design offer greater stability for larger batches. Similarly, when working with delicate doughs that require gentle handling, it helps to understand perfect timing for removing them from their pans to avoid structural issues.
Never exceed your mixer’s maximum rated capacity; for example, a 4.8-liter bowl should not handle more than about 1 kilogram of flour. Keep in mind that dough hydration affects capacity—stiffer doughs with less water reduce the amount you can safely knead at once. Always operate your mixer at a lower speed, usually first speed, to prevent motor strain.
For larger bowls, such as 6.7 liters, you can handle up to 2 kilograms of flour, but always check your manufacturer’s guidelines first to avoid overloads.
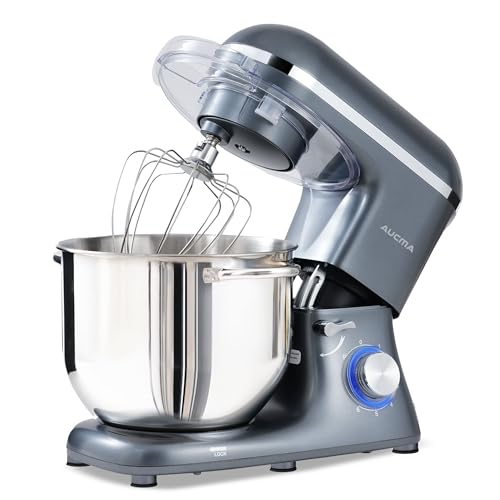
Powerful Motor - 900W high performance pure copper motor and sturdy ABS housing; 6 optimized speeds with pulse function, access to multipurpose and a variety of recipes. More powerful motor but lower operation noise ≤76dB.

🍐【Compatible】K45, K45SS, KN15E1X, KSM75, KSM85PS, KSM88PSQ, KSM90, KSM95, KSM96, KSM97, KSM100, KSM103, KSM105, KSM110, KSM120, KSM150, KSM150A, KSM151PS, KSM152, KSM153, KSM154, KSM155, KSM156HB, KSM158, KSM160A, KSM175,KSM180, KSM180LEBK, KSM180RPMB

BAKE WITH EASE: Effortlessly mix thick batters and doughs for bread, cookies and more. With a powerful 300 watt motor, this Hamilton Beach stand mixer will easily handle the ingredients for all your homemade baked goods from cupcakes and cookies to bread.
Match Your Hook’s Size to Your Mixer Bowl
Matching your dough hook’s size to your mixer bowl is essential for optimal performance. Typically, a 4.5 to 5-quart bowl requires a standard C-shaped hook designed for tilt-head models. For larger bowls, around 6.7 to 7 quarts, a bowl-lift or spiral hook is better suited. Using an oversized hook in a small bowl can cause scraping and strain your motor, while an undersized hook in a large bowl won’t gather the dough properly, affecting hydration and fermentation times. Always verify your mixer’s model number and consult the manufacturer’s fit list to ensure compatibility. Remember, tilt-head and bowl-lift hooks are not interchangeable; match the hook’s design to your bowl’s depth and width for proper clearance and efficient mixing. If you want a different mixing attachment, consider a flat beater that is designed specifically for your KitchenAid model. For those who also bake cakes, consider cake pans with lids for quality and value. For reference, a top baking sheet with a rack can also be a useful addition to your kitchen for even baking results.

Dough hook attachment 100% stainless steel material, there is no paint loss or rusting, dishwasher safe
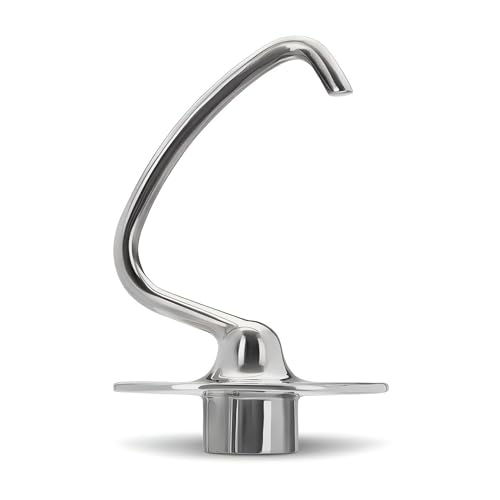
COMPATIBILITY DESIGN: Specifically engineered for KitchenAid 4.5 and 5 quart classic, classic plus, artisan and artisan plus series tilt-head stand mixers, this dough hook is a precise replacement for model numbers starting with K45, K45SS, KSM75, KSM90, KSM95, KSM150, KSM152, and KSM50, ensuring a secure and stable fit for your daily baking needs.

[PERFECT COMPATIBILITY] Precision-engineered for almost all KitchenAid 4.5-5 Qt Tilt-Head stand mixers. Compatible with models K45SS, KSM75, KSM90, KSM97, KSM100, KSM150, KSM155, KSM160, KSM170, KSM180 and more, please refer to our compatibility list of this dough hook.
Best Practices for Kneading With Your Dough Hook
Begin kneading with your dough hook on speed 1 to gently combine ingredients without splashing. Then, increase to speed 2 for typical yeast doughs, which helps develop gluten structure without overworking the dough. Focus on the dough’s texture rather than the clock: stop when it pulls cleanly from the sides of the bowl and feels smooth and elastic. Use the windowpane test—stretch a small piece of dough until thin; if it tears easily, knead longer. Midway through, pause to scrape down the bowl, ensuring even mixing. Avoid over-kneading, which can toughen the dough or cause the mixer to overheat. For heavier doughs like whole wheat, keep speeds at or below 2. Finish once the dough is tacky but not sticky, and it pulls away cleanly from the bowl. For sourdough, a quality loaf pan helps achieve an even rise and well-shaped final loaf. Using a precise food scale ensures your flour and water ratios are accurate for consistent results. For even baking of enriched doughs, consider transferring the dough to a half sheet pan lined with parchment for proofing.
Common Mistakes to Avoid When Using a Dough Hook
To avoid common mistakes when using a dough hook, ensure your bowl is filled appropriately—neither too full nor too empty. A small batch can cause the hook to spin without effectively kneading, while overfilling can result in the dough wrapping around the hook instead of being worked properly. Check that the dough contacts the sides of the bowl to promote even gluten development.
Use the correct mixing speed as well. High speeds tend to fling dough upward, causing it to climb the shaft. Stick to low or medium speeds for controlled mixing that protects both your machine and the dough’s consistency. Additionally, pay attention to hydration levels. High-hydration doughs tend to stick excessively, making them hard to handle, while very stiff doughs put strain on the mixer. Adjust moisture carefully so the dough can be kneaded smoothly without overtaxing your equipment.
Finally, monitor your mixing time closely. Over-kneading can lead to tough bread. When the dough passes the windowpane test—being elastic enough to stretch without tearing—you’re done. If the dough climbs, wraps around the hook, or sticks to the bowl, stop and make adjustments. Pause, scrape down the sides, and inspect the dough frequently. Proper setup involves ensuring the hook just clears the bottom of the bowl; this helps prevent most common issues and keeps your dough mixing efficiently.
Choosing the Right Dough Hook: Material, Power, and Budget
Choosing the right dough hook depends on three main factors: material, power, and budget. For durability, stainless steel is the top choice. It resists rust, is dishwasher-safe, and won’t peel over time like coated hooks. This makes cleaning easier, especially if you bake dense breads regularly. Coated hooks tend to be cheaper initially but wear down faster, exposing metal that can cause sticking or damage. A stainless steel spiral design like the GVODE hook uses a disc stopper to prevent dough from climbing during kneading, enhancing mixing efficiency. Choosing a well-constructed hook is similar to selecting a reliable loaf pan for consistent baking results. For those without a nozzle, cutting a piping bag at an angle can serve as a quick alternative for icing or filling tasks. When selecting a hook, it is also important to consider the size and material of the pan you might pair it with, as similar principles apply to ensuring even heating and proper dough development.
In terms of power, a motor with at least 450W is recommended for heavy doughs like sourdough or rye. For frequent baking or larger batches, look for mixers with 600W to 1,000W motors; however, the motor’s overall quality also influences performance. A high wattage motor on a lower-quality machine might not deliver the same results as a more robust, well-built motor.
Budget considerations steer you toward mid-range stainless steel hooks, which often balance cost and durability well. Cheaper options may have weaker motors or flimsy coatings that degrade quickly. Investing in stainless steel is a good idea if you want longevity, even when working within a limited budget.

Enhanced Durability: The dough hook features a sturdy solid stainless steel construction, serving as a durability and rust resistance alternative to standard aluminum dough hooks. It eliminates concerns regarding coating peeling, breakage, and aging, ensuring a more efficient and healthier mixing process.

【600W Powerful Motor for Effortless Mixing】 Tackle any baking project with ease! Our hand mixer electric handheld is equipped with a robust 600-watt motor that delivers consistent power to mix thick cookie dough, whip cream, or beat eggs to perfect peaks in no time. Say goodbye to straining your arms and hello to smooth, lump-free results every time

Made from high quality 100% stainless steel, this Dough Hook is designed for long-lasting quality and durability for everyday use