

Ever wondered how to make your own oven mitts that actually fit and keep your hands safe? It’s easier than you might think—just pick the right heat-resistant fabrics, measure your hand for a perfect fit, and sew a few simple layers together.
In the next sections, I’ll guide you through each step to craft oven mitts tailored to you and ready to use.
Choose Cotton Fabric and Insulated Batting for Heat Safety
Cotton fabric and insulated batting are essential for heat safety because they resist melting and provide effective insulation. Use thick cotton canvas for the outer shell; it’s more resistant to burning than lightweight quilting cotton, increasing the durability of your mitts. Pair this with a smooth cotton lining to create a second non-melting barrier and help the mitt slide on smoothly.
For the insulating layer, avoid regular polyester batting, as it melts at high temperatures. Instead, select insulation options like Insul-Bright, but never use it alone. Instead, sandwich it between two layers of cotton batting to build a stronger, multi-layer quilted barrier. This configuration traps air and slows heat transfer, protecting your hands from hot surfaces. Remember to respect the insulation’s rated temperature limit of around 400°F to 425°F. To further ensure safety, check the material and heat limits of any fabric or insulation you use, just as you would verify whether a mixing bowl is rated for microwave use.

17-inch extended protection: Oversized mitts cover most of your forearm, offering extra protection from heat, oven doors, and grills, perfect for any cooking or grilling task

Burn Protection: We've all been burned before whether from the stove, oven, or barbecue, and want to avoid having that painful experience again. These huge oven mitts will shield your hands and arms from heat for a comfortable and pain-free cooking or grilling experience

COMPLETE DIY APRON & MITT KIT - Create your own coordinated kitchen set with this sewing project kit. Includes a 43" x 43" premium cotton canvas fabric panel and step-by-step assembly instructions to sew a finished apron and matching oven mitts.
Set Up and Print a Reliable Oven Mitt Pattern at 100% Scale
Once you verify that the test square checks out at 100% scale, you are ready to print the full pattern. Print all pages at the same 100% scale to ensure accuracy. If your pattern is tiled across multiple pages, cut along the crop marks and tape the pages together, aligning the seam lines carefully. Always double-check the scale before you start tracing—precise pattern sizing is essential to avoid fabric waste. A high-quality food scale can help you accurately weigh pattern pieces for consistent project results. Keep the test square page nearby as a reference for future reprints or adjustments, ensuring your pattern remains consistent over time. For example, just as baked-on residue requires special care to remove from a Silpat mat, a poorly scaled pattern requires careful correction to avoid wasting fabric. Understanding the exact volume of an 8-inch pan helps bakers select the correct recipe capacity for consistent results.
Trace Your Hand With a 1-Inch Safety Margin for a Custom Fit
Tracing your hand with a 1-inch safety margin creates a custom fit that allows for seam allowances, batting bulk, and free movement. Start by printing your 100 percent scale pattern, then place your hand flat on paper with fingers naturally together. Trace a loose outline around your hand, keeping the line relaxed and generous. Add a full 1-inch safety margin around the entire traced shape; this extra space prevents tightness and ensures comfort. Slightly angle the thumb outward to promote a natural grip, and keep the palm area wide enough to support fabric durability during heavy use without strain. Focus solely on creating a generous outline without worrying about color blending at this stage. Remember, stitching pulls the fabric inward, so your final pattern should be larger than your actual hand. Once the outline is complete, smooth the line into a clean, balanced guide ready for fabric layers. For similar precision in the kitchen, consider how hand mixer attachments ensure consistent results across different baking tasks. To avoid a common mistake of improper tracing that results in a glove-like fit, ensure your 1-inch safety margin is consistently applied around the entire hand shape. Choosing a roasting pan with rack can also improve heat circulation for even cooking, much like a well-fitted mitt protects from heat. Applying a paste of baking soda can lift baked-on residue from cookie sheets just as effectively as a generous pattern prevents tightness in oven mitts.
Cut the Outer, Lining, and Batting Layers From Your Pattern
Start by aligning each fabric layer separately with your main mitt pattern piece, beginning with the outer fabric. Cut two outer pieces from heat-tolerant cotton, making each a mirror image of the other for added durability. To accommodate potential quilting later, cut these pieces at least 1 inch larger on all sides. For the lining, cut two matching cotton pieces, either exactly to the template or slightly larger to ensure a proper fit. Finally, cut two batting pieces for insulation safety, about a quarter inch larger than the template to allow for quilting or trimming. Keep the fabric grains aligned and pin layers together before cutting. This layered approach minimizes mismatch and reduces fabric waste while ensuring your pieces fit together properly. For durable construction, consider using stainless steel bowls for mixing any necessary adhesives or stiffeners. If you plan to sew multiple mitts, using a KitchenAid mixer with a fabric paddle can speed up the blending of heat-resistant coatings or stiffeners. A mixing bowl set with tight-fitting lids helps keep leftover adhesive blends fresh between sewing sessions.

【Perfect for Kitchen DIY Insulation Projects】This heat resistant batting is ideal for making oven mitts, potholders, hot pads, bowl cozies, and more. For best insulation, use with cotton fabric layers. Not for Microwave Use.

Insulated Batting – Insul-Bright is engineered with a reflective metallized polyester film that reflects heat or cold, helping keep hot items hot and cold items cold.

Cotton Batting for Quilts: you will receive 3 pieces of batting for quilting in the package, rich and abundant, sufficient for you to applied in sewing and quilting, to meet your various sewing requirements; Not suitable for direct contact with open flames or high heat sources
Quilt Your Oven Mitt Sandwich to Keep Layers From Shifting
Start by creating a flat quilt sandwich on a large surface to prevent layers from shifting. Place your lining fabric down, then the heat-resistant batting, and finally your outer fabric with the right side up. Use pins or basting spray to hold everything smooth and eliminate puckers. Top heat-resistant gloves often use multiple layers of insulation to ensure safe handling of hot objects.
Quilt through all layers to lock the insulation in place. Your stitches offer fiber reinforcement, which keeps the layers from separating during use. Opt for simple quilting patterns, like straight lines or diagonal parallel lines, to maintain stability. Use a walking foot and set your stitch length to 2.5–3 for better control. Sew slowly to ensure accuracy and prevent shifting. For maximum heat protection, consider using a wire rack during baking to allow air circulation. A reliable grain mill attachment can grind fresh flour for baking mitts.
Repeat this process for the second mitt half. Match the quilting pattern but reverse the layout so both halves will mirror each other later. Quilting both layers now helps prevent shifting during final assembly, ensuring your oven mitt remains sturdy and effective.
Sew the Two Oven Mitt Halves Right Sides Together and Turn
Sew around the mitt perimeter with a consistent ¼- to ½-inch seam allowance. Leave the wrist opening unsewn for turning. Backstitch at both ends to secure the seam. When sewing around tight curves, move slowly to keep the seam smooth and even. To reduce bulk and make turning easier, clip into the inner curve near the thumb, snipping small notches without cutting through the stitches. While working with heat-resistant fabrics, it is also useful to note that Pyrex measuring cups are not typically recommended for dishwasher use due to potential thermal shock and gradual clouding of the glass. Choosing a high-quality cookie sheet ensures even heat distribution and prevents burning when baking alongside your mitt-making projects. After sewing, turn the mitt right side out through the opening. Use a blunt tool, like a pencil or chopstick, to gently push out the thumb and corners for a neat shape. Press the finished mitt flat with an iron to smooth the seams and prepare it for finishing touch-ups. When selecting fabrics for your mitts, consider KitchenAid Mini vs. Artisan performance if you plan to pair them with a stand mixer, as the smaller mini is better suited for lighter baking tasks. Now it’s ready for the final step of closing the opening securely.
Trim Seams and Add a Binding Around the Opening Edge
To finish the curved opening edge, trim the seam allowances close to the stitching line, gradually reducing bulk in tight curves. Clip or notch the curves where needed to help the fabric turn smoothly, but be careful not to cut through the stitches. These trimming techniques ensure a flat, professional finish.
Next, cut a bias strip approximately 2 inches wide and long enough to wrap fully around the opening. Bias-cut strips are best for curves because they stretch and conform more easily. Fold the strip lengthwise and press to create a clean, narrow edge. Align the binding right sides together with the raw edge of the opening, starting at a side seam. Use a 1/4-inch seam allowance to sew the binding onto the opening, clipping around curves to maintain a smooth fit. Take care to match the curves properly and avoid puckering.
Once attached, fold the binding over the raw edge to the inside of the mitt, fully encasing it. Topstitch from the front side, catching the folded edge evenly on the back, to secure the binding in place. Finally, press the finished edge to give it a crisp, durable appearance. For a more durable finish, consider using a double layer of batting in the pot holder’s center to improve heat resistance.
Add a Hanging Loop for Easy Oven Mitt Storage
Adding a hanging loop to your oven mitt makes storage quick and convenient. Use a fabric strip measuring 2 inches by 5 inches, chosen to match the durability and construction of your mitt. Fold the strip lengthwise with wrong sides together and press. Then, open the fold and fold both raw edges toward the center. Fold it again along the center line, press, and edgestitch both long edges to create a sturdy loop. For additional strength, sew the hanging loop into layers with a consistent ½ inch seam allowance. For best results, the sturdy construction of this loop should mirror the high build quality found in premium kitchen tools.
Position the loop near the seam below the thumb or at the top opening edge of the mitt. Ensure the raw loop ends align with the mitt’s raw edges. Baste the loop in place facing upward, then sew it into the seam allowance to enclose the raw ends. This secure attachment allows you to hang the mitt easily on hooks or pegs, keeping it accessible and preventing clutter in your kitchen.

Cotton cooking gloves:they are widely used for cooking, barbecue, microwave oven, soup cooking, bringing your family better protection,Anti-Scald Mitts
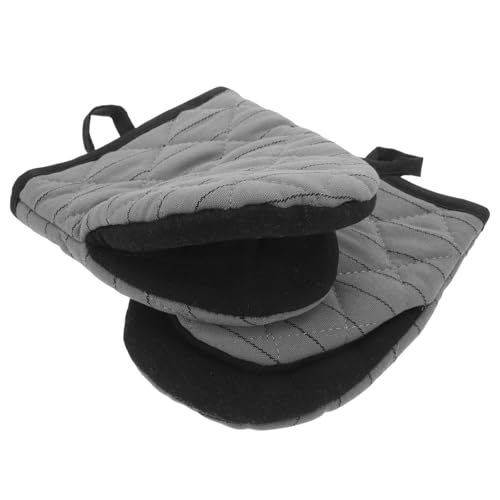
Oven mitts for kitchen--perfect for home kitchen or backyard, it can be used in any culinary occasion such as baking, cooking and grilling to protect your hands,kitchen baking gloves

High-Temperature Protection: These oven mitts feature a surface made of heat-resistant silicone strips and pure cotton fabric, with insulated cotton padding inside. They provide protection against heat up to 500°F / 260℃, keeping your hands safe from burns
Test Your Finished Mitt for Comfort and Heat Protection
After completing your mitt, testing for comfort and heat protection is essential before use. First, slide the mitt on and off to ensure it’s easy to put on and remove without strain. Then, bend your fingers and grip a hot skillet handle to check for tight spots that could cause pressure points or discomfort. For heat protection, heat a cast-iron pan to 400°F and lift it, noting how long it takes until you feel warmth or discomfort. This assesses the mitt’s thermal insulation; if warmth is felt quickly, the lining may need reinforcement. After use, inspect the mitt for scorching or fraying, which indicates poor material durability. Wear the mitt for a few minutes to detect any sweat buildup or stiffness, and ensure the cuff doesn’t chafe or restrict movement. Consider that high-performance baking sheets often use similar materials and construction principles for even heat distribution and durability. Using accurate measuring tools ensures consistent material ratios, which directly impacts the mitt’s insulation performance. If it passes these tests, your mitt is ready for kitchen duties.