

Looking to swap attachments on your KitchenAid mixer? You’ll want to start by finding your model number, usually on a sticker under the unit.
Once you have it, selecting the right attachments and installing them safely will make your kitchen tasks a whole lot easier.
Keep reading to learn the simple steps to set up and care for each attachment.
How to Check Which KitchenAid Attachments Fit Your Model
To determine which KitchenAid attachments fit your model, start by locating the sticker on the underside of your mixer’s base. Your model number usually begins with a “K” or “KSM,” which is essential for compatibility checks. Once you have this, distinguish between hub attachments and bowl accessories; all front power hub attachments are compatible with every KitchenAid stand mixer, whether it has a tilt-head or bowl-lift design. This makes it straightforward to identify pasta makers or grinders as they are universally compatible. Compatibility challenges mainly arise with bowls and beaters. For those, you need to match your mixer’s head style and bowl size precisely. Tilt-head and bowl-lift models have different attachment dimensions, so verify your specific model number against the manufacturer’s attachment guide. When shopping online, check product pages for any listed exclusions or restrictions. Always read the packaging carefully to verify the exact model numbers compatible with the attachment, and note whether it’s suitable for all stand mixers or only specific models. Using your model number, mixer type, and bowl size together will ensure you find the most reliable fit. For accurate liquid measurements in your mixing bowl, consider using a clear measuring cup with a spout for easy pouring. For attachments that become stuck, a release trick involves pressing the hub release lever while gently wiggling the attachment free. A high-precision food scale can also help ensure ingredient weights are exact for consistent baking results.

【Perfect Fit】: JEASOM 5 Quart stainless steel mixer bowl fit for KitchenAid all 4.5QT and 5QT Tilt-Head Stand Mixers, including K45, K45SS, KN15E1X, KSM75, KSM85PS, KSM88PSQ, KSM90, KSM95, KSM96, KSM97, KSM100, KSM103, KSM105, KSM110 ,KSM120, KSM150, KSM150A, KSM151PS, KSM152, KSM153, KSM154, KSM155, KSM158, KSM160A, KSM175, KSM180, KSM180RPMB, KSM180LEBK
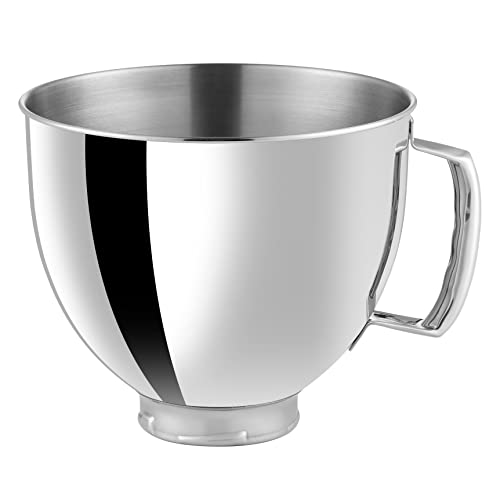
5qt Stainless-Steel Bowl - Compatible with all 4.5 and 5 Quart KitchenAid Tilt Head Stand Mixers - Compatible with Artisan KSM150, RRK150, KSM100, K45SS, KSM75, KSM90, KSM95, K45, KSM103, KSM110, 5KSM125, 5KSM150, 5KSM175, 5KSM7580 and more models for simple attachment and easy use. Please Note - Ulticor is not affiliated with the Kitchenaid brand
The 3 Essential KitchenAid Mixing Tools You Need First
When you unbox a KitchenAid stand mixer, you get three essential tools right away: the flat beater, dough hook, and wire whip. These attachments cover the most common mixing tasks, so you’re set without needing to buy extras immediately.
The flat beater is your go-to for creaming butter and sugar, mixing cake batters, and blending cookie dough. It’s effective at both slow and fast speeds, handling everything from gentle folding to thorough mixing. For best results when making cookies, using a silicone baking mat ensures even baking and easy release. The dough hook is designed to work at low speeds only—speed 1 or 2—and is perfect for kneading heavy yeast doughs like bread or pizza crusts. The wire whip introduces air into ingredients, making it ideal for whipping egg whites, cream, and light batters into fluffy meringues or airy cakes.
Each tool has its own purpose: the flat beater handles batters and doughs, the dough hook focuses on bread and pizza doughs, and the wire whip creates volume by incorporating air. Together, they can manage most baking needs from cakes and cookies to bread, frosting, and whipped toppings. For most home bakers starting out, these three attachments are enough to cover a wide range of recipes without additional purchases. If you choose to bake in metal pans, aluminum pans are safe for oven use and conduct heat evenly for consistent results. For a completely different craft project, you can also learn how to crochet hot pads using easy steps and helpful tips.

Designed, engineered, and tested by KitchenAid
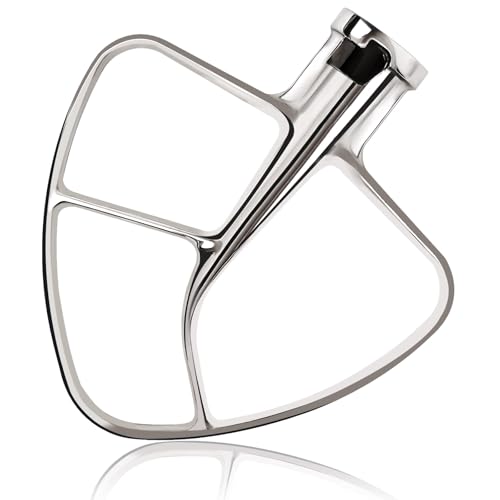
COMPATIBILITY: Stainless steel Paddle attachments Fits all 4.5 and 5 Quart KitchenAid Tilt-Head Stand Mixers perfectly.

Reduces mixing time when used on your KitchenAid 4. 5 and 5 quart tilt-head stand mixer
KitchenAid Pasta Attachments for Making Fresh Noodles
Once you’ve mastered the basic mixing tools, KitchenAid’s pasta attachments allow you to roll and cut fresh noodles at home with ease. Start by preparing your favorite pasta dough recipes and feed the dough through the roller attachment. As you turn the roller’s thickness adjustment, it creates smooth, even sheets suitable for lasagna or ravioli. For different pasta shapes, swap to the cutter attachment, which can produce spaghetti or fettuccine. Understanding the proper pan size ensures your baking results match your equipment’s capacity, just as selecting the right attachment does for pasta. The best models reviewed in this guide highlight quality and performance differences between the roller set and the press attachment.
When choosing your setup, consider whether you want sheet or extruded pasta. The roller and cutter set excel at making sheet pasta, providing consistent thickness and clean cuts. Conversely, the pasta press attachment is ideal for extruded shapes like macaroni or rigatoni, pushing dough through shaped molds. For faster workflow, a 3-in-1 attachment combines rolling and cutting functions, reducing prep time.
Proper care prevents damage and ensures longevity. Never immerse attachments in water. Instead, air-dry them for about an hour and then brush off any dried dough. Store them in a dry place at room temperature. Always match your attachment to your specific KitchenAid model before purchasing and use pasta dough only, as these attachments are not designed for general mixing. For similar reasons, piping bags require careful cleaning to remain reusable for multiple uses without cross-contamination, as outlined by bakers.

Genuine KitchenAid Stand Mixer Attachment - Designed and engineered by the manufacturers of the KitchenAid Stand Mixer, sold separately
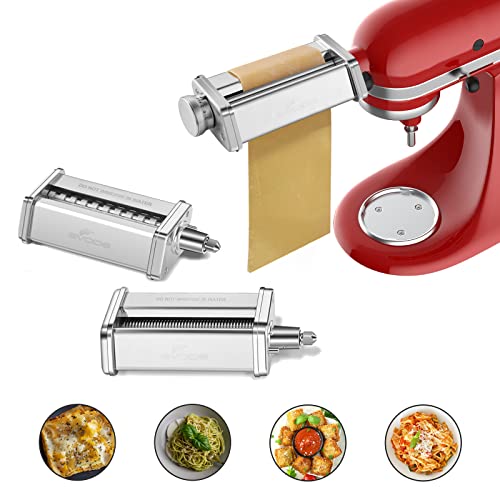
[Fits All KitchenAid Stand Mixers] Great pasta attachment for KitchenAid stand mixer, simply attach and operate. A smooth pasta press roller gives pasta a consistent texture every time, delivering a chewy consistency. No more squeezing and tearing dough as the automatic pasta machine; enjoy delicious gourmet pasta meals at home like never before. Please note: This attachment is compatible with KitchenAid stand mixers but is not manufactured or sold by KitchenAid.

Connect to any household KitchenAid Stand Mixer power hub and use the power of the motor to make fresh homemade pasta in your kitchen. sold separately.
KitchenAid Prep Attachments That Slice, Shred, and Process
KitchenAid prep attachments are designed to slice, shred, and process ingredients quickly and efficiently. The Fresh Prep Slicer/Shredder connects to your mixer’s power hub and features three interchangeable blades: a 3 mm slicer for thin slices, a 4 mm medium shredder for standard shredding, and a 6 mm coarse shredder for chunkier textures. You can easily switch between blades using the lever, making it simple to prepare a variety of ingredients like vegetables, cheese, and potatoes in minutes. For those who also use a hand mixer, best hand mixer attachments like the KitchenAid Fresh Prep offer similar slicing and shredding convenience for small-batch tasks. Unlike standard round pans, the tall, fluted angel food cake pan uses a central tube to support the batter’s rise. The attachment is one of the top attachments for Kitchenaid Mixers because of its versatility for everyday prep tasks.
The attachment includes a 2-in-1 feed tube that accommodates both large and small items; however, feeding one piece at a time yields the best results. For more versatility, the dedicated food processor attachment offers additional discs for slicing, shredding, and julienning. It’s essential to check your mixer model’s compatibility before purchasing any attachment. When cleaning, place blades on the dishwasher’s top rack for safe and straightforward maintenance. A bowl positioned underneath collects the processed ingredients, keeping your workspace neat and tidy.

Genuine KitchenAid Stand Mixer Attachment - Designed and engineered by the manufacturers of the KitchenAid Stand Mixer, sold separately
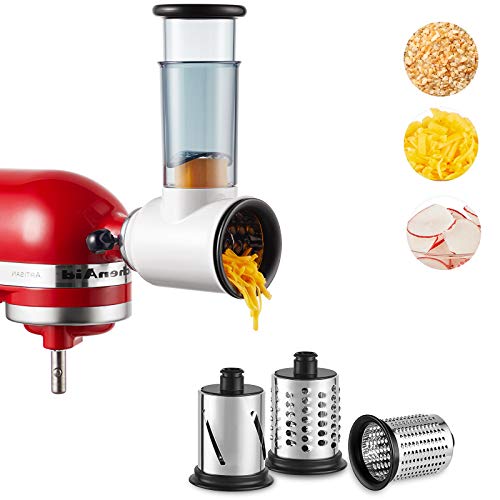
Effort-Saving Slicer-Shredder: The specialized slicer shredder attachment for KitchenAid stand mixers, which is an essential among KitchenAid attachments and Kitchen Aid attachments, transforms your stand mixer into a versatile kitchen appliance. It helps you tackle more culinary tasks, cuts food prep effort, and serves as a practical addition to your kitchen tools

Versatility: HOZODO's slicer shredder for KitchenAid mixer attachments comes with 4 stainless steel blades, each designed for specific tasks. The 5mm slicing blade provides thin, even cuts, while the 6mm coarse shredding blade handles larger chunks. The 3mm grinding blade works well for spices and nuts. The 2.5mm fine shredding blade offers precision for delicate ingredients
Specialty KitchenAid Attachments for Ice Cream and Juicing
The KitchenAid Ice Cream Maker attachment can churn up to two quarts of frozen dessert per batch. This capacity allows you to make enough ice cream for a small gathering or family dessert without multiple rounds. The double-wall freeze bowl keeps ingredients cold as the dasher evenly spreads and scrapes the mixture, resulting in smooth, creamy texture every time. It’s compatible with full-sized tilt-head and bowl-lift mixers, but always verify fit for your specific model before purchasing. The attachment is rated highly, with an average customer review score of 4.6 out of 5 stars. When choosing a loaf pan for baking, similar care is needed to match the pan size to your recipe for even results.
The Juicer and Sauce Attachment processes produce slowly while slicing and handling a variety of produce, including leafy greens, soft fruits, and hard vegetables. It includes three pulp screens, letting you control the amount of pulp in your juice—from low to high—or create thicker sauces and jams. The extra-wide feed tube minimizes prep work by accommodating larger pieces of produce. Connects directly to your mixer’s power hub, but check your model’s compatibility first to ensure a proper fit.

A Dream Come True for Ice Cream Enthusiasts: Designed exclusively for KitchenAid's 4.5/5 Quart, 6 Quart, and larger mixers, this ice cream maker attachment is a match made in heaven. It offers unparalleled compatibility, making it a must - have for every ice cream aficionado. Get ready to embark on a delightful journey of creating velvety - smooth and absolutely scrumptious ice cream with the greatest of ease. It's like having an ice cream parlor right in your own kitchen!

WIDELY COMPATIBLE: For kitchenaid ice cream maker attachment is designed with lugs, whether it's a tilt head or a Bowl-Lift, The lug design ensures that the bowl stays securely in place on the mixer, and the pattern on the bottom of the bowl is perfect for 4.5QT or larger mixers to make your ice cream making the process go smoother. NOTE: Does not work with 3.5QT mixers

2 QT ICE CREAM BOWL FOR KITCHENAID MIXER: Make up to 2 quarts of homemade ice cream, gelato, sorbet, or frozen yogurt. This ice cream bowl for KitchenAid mixer kit includes a freezer bowl, dasher, and drive assembly for KitchenAid stand mixer ice cream making.
How to Install KitchenAid Mixer Attachments the Right Way
To install KitchenAid mixer attachments properly, start by turning off the mixer completely. Set the speed control to zero, unplug the appliance, and keep the head locked if your model has a lock lever. Clear your work area to ensure unobstructed access. Before attaching, verify that the attachment is compatible with your specific mixer model to avoid issues during use. Many attachments, including the foil-lined baking sheet whisk, are crafted from sturdy materials designed for high durability and even heat distribution. For mixing heavier doughs, consider choosing a paddle attachment designed for creaming and blending tasks. Understanding the key differences between mixer attachments helps you choose the right tool for each recipe.
Next, flip up the hinged hub cover or remove a detachable one by turning the attachment knob counterclockwise. Set the cover aside and inspect the hub for the square socket and rim notch. Insert the attachment shaft housing, aligning the power shaft with the square socket. Gently rotate the attachment until the housing pin aligns with the rim notch; resist the urge to force it, as a smooth, snug fit is essential for safety. Avoid overtightening to prevent damage when securing the hub knob.
Finally, tighten the hub knob clockwise until the attachment sits flush against the mixer with no wobbling. If necessary, place a bowl beneath the attachment for stability, especially when mixing larger quantities. Follow the recommended speed settings provided in your user guide to ensure proper operation. Always double-check compatibility before beginning to mix to prevent mishaps or damage.
How to Clean and Store KitchenAid Attachments to Prevent Damage
To prevent damage, clean your KitchenAid attachments immediately after use using warm water and mild dish soap. A soft brush or microfiber cloth works well for removing residue. Avoid heavy scrubbing to prevent scratching coatings. Hand-wash burnished aluminum and wire whips to prevent oxidation, while coated beaters are often dishwasher-safe—check your model’s guidelines. After washing, dry all parts thoroughly with a soft cloth to prevent rust. For storage, keep attachments in a dry, protected space such as a cupboard or box. Wrapping pieces in cloth pouches helps prevent scratches, and storing them separately avoids bending wires or chipping coatings. If you have specialty attachments, store them in their original boxes, label all small parts, and keep everything organized. Never store damp tools together or toss them loosely, as this can cause damage over time. For a budget-friendly alternative, consider building your own rolling pin holder using simple materials like wood scraps and dowels. For silicone-based accessories like baking mats, soaking them in warm soapy water lifts baked-on residue without abrasive scrubbing. For precise measuring tasks, using 3/4 cup measuring cups ensures accurate ingredients without risking oxidation or chipping from improper tools.